For many people, using a word processor is the fastest, easiest, and most familiar way to write and publish an e-book. But firing up your word processor and typing away isn't enough—you need to follow a format.
That's where a template comes in. A template ensures that your book has a consistent look and feel. Luckily, creating a template is quick and easy, and the time and effort you spend on it will give you a better-looking book.
In this article, I'll walk you through how to create a simple template for writing individual chapters of an e-book using LibreOffice Writer. You can use this template for both PDF and EPUB books and modify it to suit your needs.
My approach
Why am I focusing on creating a template for a chapter rather than one for an entire book? Because it's easier to write and manage individual chapters than it is to work on a single monolithic document.
By focusing on individual chapters, you can focus on what you need to write. You can easily move those chapters around, and it's less cumbersome to send a reviewer a single chapter rather than your full manuscript. When you've finished writing a chapter, you can simply stitch your chapters together to publish the book (I'll discuss how to do that below). But don't feel that you're stuck with this approach—if you prefer to write in single file, simply adapt the steps described in this article to doing so.
Let's get started.
Setting up the page
This is important only if you plan to publish your e-book as a PDF. Setting up the page means your book won't comprise a mass of eye-straining text running across the screen.
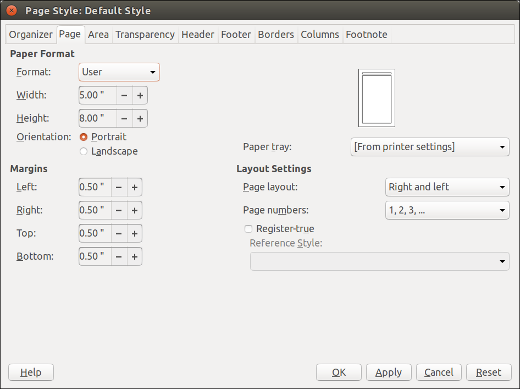
Select Format > Page to open the Page Style window. My PDF e-books are usually 5x8 inches tall (about 13x20cm, for those of us in the metric world). I also set the margins to half an inch (around 1.25 cm). These are my preferred dimensions; use whatever size suits you.

The Page Style window in LibreOffice Writer lets you set margins and format the page.
Next, add a footer to display a page number. Keep the Page Style window open and click the Footer tab. Select Footer on and click OK.
On the page, click in the footer, then select Insert > Field > Page Number. Don't worry about the position and appearance of the page number; we'll take care of that next.
Setting up your styles
Like the template itself, styles provide a consistent look and feel for your documents. If you want to change the font or the size of a heading, for example, you need do it in only one place rather than manually applying formatting to each heading.
The standard LibreOffice template comes with a number of styles that you can fiddle with to suit your needs. To do that, press F11 to open the Styles and Formatting window.

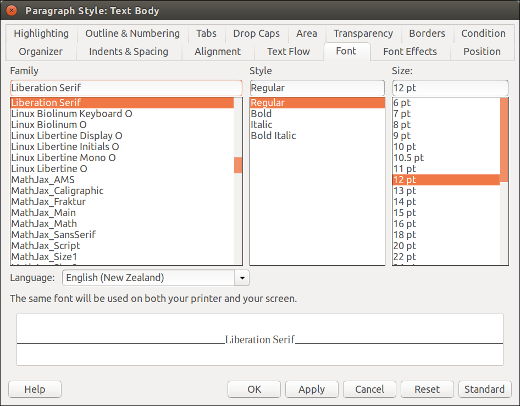
Change fonts and other details using the Styles and Formatting window.
Right-click on a style and select Modify to edit it. Here are the main styles that I use in every book I write:
| Style | Font | Spacing/Alignment |
|---|---|---|
| Heading 1 | Liberation Sans, 36 pt | 36 pt above, 48 pt below, aligned left |
| Heading 2 | Liberation Sans, 18 pt | 12 pt above, 12 pt below, aligned left |
| Heading 3 | Liberation Sans, 14 pt | 12 pt above, 12 pt below, aligned left |
| Text Body | Liberation Sans, 12 pt | 12 pt above, 12 pt below, aligned left |
| Footer | Liberation Sans, 10 pt | Aligned center |

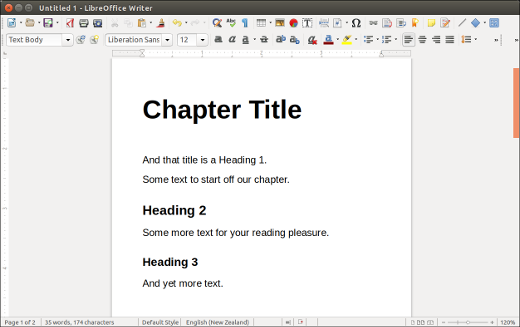
Here's what a selected style looks like when applied to ebook content.
That's usually the bare minimum you need for most books. Feel free to change the fonts and spacing to suit your needs.
Depending on the type of book you're writing, you might also want to create or modify styles for bullet and number lists, quotes, code samples, figures, etc. Just remember to use fonts and their sizes consistently.
Saving your template
Select File > Save As. In the Save dialog box, select ODF Text Document Template (.ott) from the formats list. This saves the document as a template, which you'll be able to quickly call up later.
The best place to save it is in your LibreOffice templates folder. In Linux, for example, that's in your /home directory, under .config/libreoffice/4/user/template.
Writing your book
Before you start writing, create a folder on your computer that will hold all the files—chapters, images, notes, etc.—for your book.
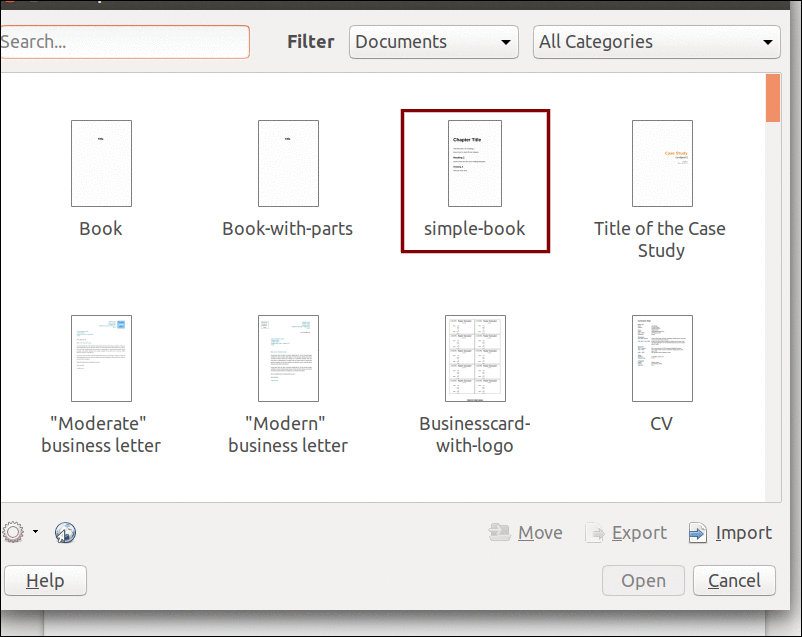
When you're ready to write, fire up LibreOffice Writer and select File > New > Templates. Then select your template from the list and click Open.

Select your template from the list you set up in LibreOffice Writer and begin writing.
Then save the document with a descriptive name.
Avoid using conventions like Chapter 1 and Chapter 2—at some point, you might decide to shuffle your chapters around, and it can get confusing when you're trying to manage those chapters. You could, however, put chapter numbers, like Chapter 1 or Ch1, in the file name. It's easier to rename a file like that if you do wind up rearranging the chapters of your book.
With that out of the way, start writing. Remember to use the styles in the template to format the text—that's why you created the template, right?
Publishing your e-book
Once you've finished writing a bunch of chapters and are ready to publish them, create a master document. Think of a master document as a container for the chapters you've written. Using a master document, you can quickly assemble your book and rearrange your chapters at will. The LibreOffice help offers detailed instructions for working with master documents.
Assuming you want to generate a PDF, don't just click the Export Directly to PDF button. That will create a decent PDF, but you might want to optimize it. To do that, select File > Export as PDF and tweak the settings in the PDF options window. You can learn more about that in the LibreOffice Writer documentation.
If you want to create an EPUB instead of, or in addition to, a PDF, install the Writer2EPUB extension. Opensource.com's Bryan Behrenshausen shares some useful instructions for the extension.
Final thoughts
The template we've created here is bare-bones, but you can use it for a simple book, or as the starting point for building a more complex template. Either way, this template will quickly get you started writing and publishing your e-book.


1 Comment