Another weekend rolls around, and I can spend some time working on my passion projects, including working with single-board computers, playing with emulators, and general tinkering with a soldering iron. Earlier this year, I wrote about resurrecting the Commodore Amiga on the Raspberry Pi. A colleague referred to our shared obsession with old technology as a "passion for preserving our digital culture."
In my travels in the world of "digital archeology," I heard about a new way to emulate old systems by using field-programmable gate arrays (FPGAs). I was intrigued by the concept, so I dedicated a weekend to learn more. Specifically, I wanted to know if I could use an FPGA to emulate a Commodore Amiga.
What is an FPGA?
When you build a circuit board, everything is literally etched in silicon. You can change the software that runs on it, but the physical circuit is immutable. So if you want to add a new component to it or modify it later, you are limited by the physical nature of the hardware. With an FPGA, you can program the hardware to simulate new components or change existing ones. This is achieved through programmable logic gates (hence the name). This provides a lot of flexibility for Internet-of-Things (IoT) devices, as they can be changed later to meet new requirements.

FPGAs are used in many devices today, including smartphones, medical devices, motor vehicles, and aircraft. Because FPGAs can be easily modified and generally have low power requirements, these devices are everywhere! They are also inexpensive to manufacture and can be configured for multiple uses.
The Commodore Amiga was designed with chips that had specific uses and fun names. For example, "Gary" was a gate array that later became "Fat Gary" when "he" was upgraded on the A3000 and A4000. "Bridgette" was an integrated bus buffer, and the delightful "Amber" was a "flicker fixer" on the A3000. The ability to simulate these chips with programmable gates makes an ideal platform for Amiga emulation.
When you use an emulator, you are tricking an application into using software to find the architecture it expects. The primary limitations are the accuracy of the emulation and the sequential nature of how the commands are processed through the CPU. With an FPGA, you can teach the hardware what chips are in play, and software can talk to each chip as if it was native and in parallel. It also means applications can thread as if they were running on the original hardware. This makes FGPAs especially good for emulating old systems.
Introducing the MiSTer project
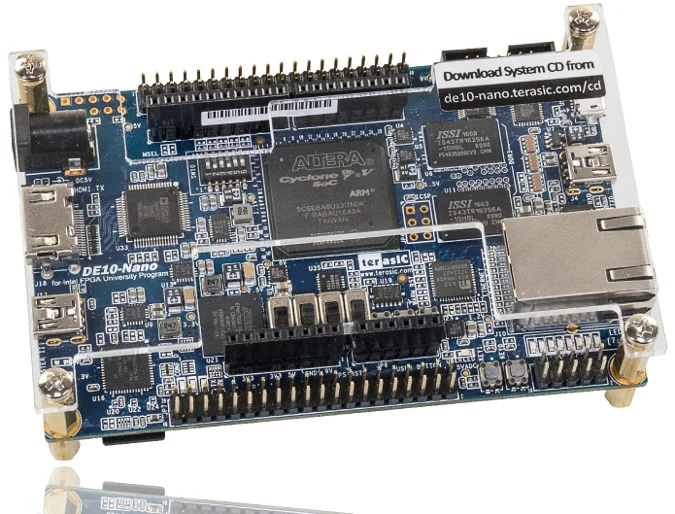
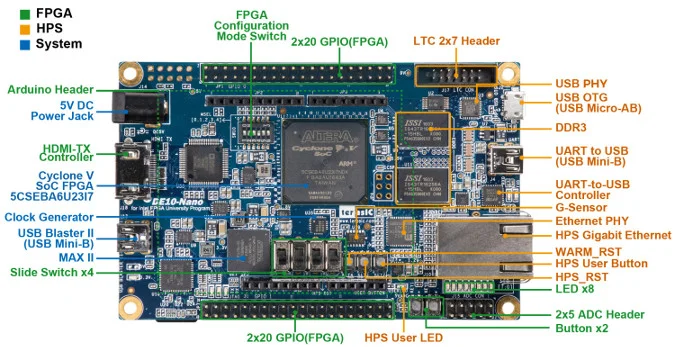
The board I have been working with is Terasic's DE10-Nano. Out of the box, this device is excellent for learning how FPGAs work and gives you access to tools to get you started.

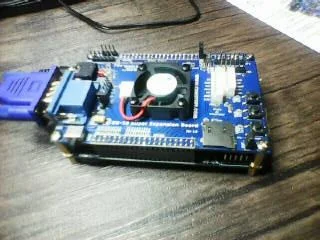
The MiSTer project is built on top of this board and employs daughter boards to provide memory expansion, SDRAM, and improved I/O, all built on a Linux-based distribution. To use it as a platform for emulation, it's expanded through the use of "cores" that define the architecture the board will emulate.
Once you have flashed the device with the MiSTer distro, you can load a "core," which is a combination of a definition for the chips you want to use and the associated menus to manage the emulated system.

Compared to a Raspberry Pi running emulation software, these cores provide a more native experience for emulation, and often apps that don't run perfectly on software-based emulators will run fine on a MiSTer.
How to get started
There are excellent resources online to help get you started. The first stop is the documentation on MiSTer's GitHub page, which has step-by-step instructions on putting everything together. If you prefer a visual walkthrough of the board, check out this video from the Retro Man Cave YouTube channel. For more information on configuring the Minimig (short for mini Amiga) core to load disks or using Amiga's classic Workbench and WHDLoad, check out this great tutorial from Phil's Computer Lab on YouTube.
Cores
MiSTer has cores available for a multitude of systems; my main interest is in Amiga emulation, which is provided by the Minimig core. I'm also interested in the Commodore 64 and PET and the BBC microcomputer, which I used at college. I also have a soft spot for playing Space Invaders on the Commodore PET, which I will admit (many years later!) was the real reason I booked time in the college computer lab at the end of the week.
Once a core is loaded, you can interact with it through a connected keyboard and by pressing F12 to access the "core" menu. To access a shell, you can log in by using the F9 key, which presents you with a login prompt. You will need a kickstart ROM (the equivalent of a PC's BIOS), to get your Amiga running. You can obtain these from Cloanto, which sells the Amiga Forever kickstart that contains the ROMs required to boot a system as well as games, demos, and hard drive files that can be used on your MiSTer. Store the kickstart ROM in the root of your SD card and name it "KICK.ROM."
On my MiSTer board, I can run Amiga demos that don't run on my Raspberry Pi, even though my Pi has much more memory available. The emulation is more accurate and runs more efficiently. Through the expansion board, I can even use old hardware, such as an original Commodore monitor and Amiga joysticks.
Source code
All code for the MiSTer project is available in its GitHub repo. You have access to the cores as well as the main MiSTer setup, associated scripts, and menu files. These are actively updated, and there is a solid community actively developing, bug fixing, and improving all contributions, so check back regularly for updates. The repo has a wealth of information available to help get you up and running.
Security considerations
With the flexibility of customization comes the potential for security vulnerabilities. All MiSTer installs come with a preset password on the root account, so one of the first things you want to do is to change the password. If you are using the device to build a cabinet for a game and you have given the device access to your network, it can be exploited using the default login credentials, and that can lead to giving a third party access to your network.
For non-MiSTer projects, FPGAs expose the ability for one process to be able to listen in on another process, so limiting access to the device should be one of the first things you do. When you build your application, you should isolate processes to prevent unwanted access. This is especially important if you intend to deploy your board where access is open to other users or with shared applications.
Find more information
There is a lot of information about this type of project online. Here are some of the resources you may find helpful.
Community
- MiSTer wiki
- Setup guide
- Internet connections on supporting cores
- Discussion forums
- MiSTer add-ons (public Facebook group)
Daughter boards
Videos and walkthroughs
- Exploring the MiSTer and DE-10 Nano FPGA: Is this the future of retro?
- FPGA emulation MiSTer project on the Terasic DE10-Nano
- Amiga OS 3.1 on FPGA—DE10-Nano running MisTer
Where to buy the hardware
MiSTer project
- DE10-Nano (Amazon)
- Ultimate Mister
- MiSTer Add-ons
Other FPGAs
- TinyFPGA BX—ICE40 FPGA development board with USB (Adafruit)
- Terasic, makers of the DE10-Nano and other high-performance FPGAs


Comments are closed.