The Rdiffweb app offers a simplified web interface for easy management of rdiff-backup, software that offers robust automatic backups from one Linux computer (client) to another Linux computer (server) using secure shell (SSH), thus maximizing your disk space. The free, open source online tool helps save time when accessing rdiff-backup archives, recovering data, and managing administrators. Recently, rdiff-backup received a major update with a host of new features when it was migrated to Python 3.
In this article, I'll show you a basic way to set up rdiff-backup with Rdiffweb. Before getting started, you should know enough network basics to identify a Linux computer's IP address and set up an SSH connection.
Install rdiff-backup and Rdiffweb on a server
First, you must install rdiff-backup and Rdiffweb on the server. Because there is no .deb or .rpm package, you must install Rdiffweb using pip, so install pip, if it is not already on your server. Then start the installation.
On Fedora, RHEL, or CentOS:
$ sudo yum install epel-release
$ sudo yum install python3-devel openldap-devel rdiff-backup gcc python3-pip openssh-server
$ pip3 install -U rdiffweb
On Debian, Ubuntu, or similar:
sudo apt update
sudo apt install python3-dev libldap2-dev libsasl2-dev rdiff-backup build-essential curl python3-pip openssh-server-server
pip3 install -U rdiffweb
Complete the setup and restart
By default, Rdiffweb looks for a configuration in /etc/rdiffweb/rdw.conf, and it will not start if this file does not exist. Therefore, create a default configuration file:
$ sudo mkdir -p /etc/rdiffweb
$ sudo curl -L https://gitlab.com/ikus-soft/rdiffweb/-/raw/master/rdw.conf -o/etc/rdiffweb/rdw.conf
You can also create a service unit to manage Rdiffweb as a service and automatically start it whenever you restart your computer:
$ sudo curl -L https://gitlab.com/ikus-soft/rdiffweb/-/raw/master/extras/systemd/rdiffweb.service -o /etc/systemd/system/rdiffweb.service
    $ sudo systemctl daemon-reload
    $ sudo service rdiffweb start
Now, connect to the web interface. At this point, you should be able to access Rdiffweb from a browser at https://localhost:8080.
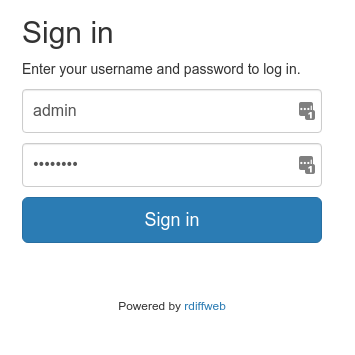
You should see the default login page, which can be customized using /etc/rdiffweb/rdw.conf. The default username and password are admin and admin123 change them immediately to maintain your system's security.

(Patrik Dufresne, CC BY-SA 4.0)
Install rdiff-backup on a client machine
By using SSH, you can manage a different computer's rdiff-backup using Rdiffweb. You must have SSH access to the other computer. By default, Rdiffweb does not manage the configuration of the OpenSSH server that rdiff-backup uses. However, the default installation is usually suitable for basic usage.
The other computer must also have rdiff-backup itself installed. To install rdiff-backup on another Linux computer:
On Fedora, RHEL, or CentOS:
$ sudo yum install epel-release
$ sudo yum install rdiff-backup
On Debian, Ubuntu, or similar:
$ sudo apt update
$ sudo apt install rdiff-backup
Test your SSH connection
To execute a backup with rdiff-backup, the SSH server must be able to establish an SSH connection that rdiff-backup can use as a secure link for transfering data. Test it to ensure it's working properly.
Retrieve your server's IP address:
$ hostname  -I
192.168.0.45
Retrieve the username:
$ whoami
ikus
Test the SSH connection:
ssh ikus@192.168.0.45
password: ******
ikus@192.168.0.45:~$
If you receive a login error, you will need to troubleshoot and fix the problem.
Set up an SSH connection
To facilitate rdiff-backup's execution, set up passwordless authentication (passwordless SSH).
To generate a unique authentication key to identify your client computer:
ssh-keygen -f ~/.ssh/id_rsa -N ""
ssh-copy-id ikus@192.168.0.45
Test the SSH connection again to make sure no password is required. If you are having trouble with this step, verify that SSH is configured correctly on your system.
ssh ikus@192.168.0.45
ikus-192.168.0.45: $168:~$
Start a backup
From your client computer, launch a backup of your files to the server using the general structure:
rdiff-backup <source> <dest>Where:
<source>identifies the location of local files to be backed up<dest>identifies the storage location on the server
For example: rdiff-backup /home/ ikus@192.168.0.45:/backups/home
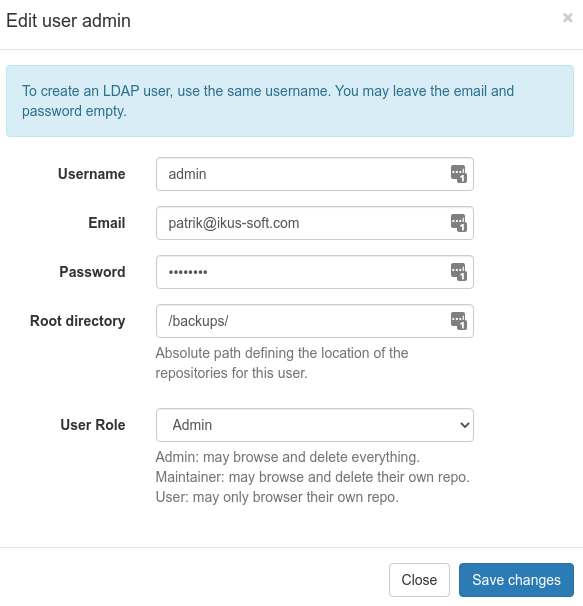
By default, your Rdiffweb user will be created with a root directory, identified as /backups, that corresponds to the location where your rdiff-backup files are stored.
If you choose a different location for your files, be sure to change your user's root directory in Rdiffweb's web interface; otherwise your documents won't be visible.
To define this location:
- Go to the administration area.
- Browse the user list.
- Click the Edit button on the right.
- You should see a dialog box to change the user's information.
- Replace the default
/backupswith the path where your rdiff-backup files are stored:- If you have a single repository, provide the path to that repository.
- If you have multiple repositories, provide a parent folder that contains them.
- Then click Save to confirm the change.
Pay close attention to any error message that may indicate an invalid value.

(Patrik Dufresne, CC BY-SA 4.0)
Browse the results in Rdiffweb
At this point, you should have a functional and accessible Rdiffweb installation at https://192.168.0.45/ with 192.168.0.45 showing as your server address. You are now ready to browse your backup data and test the restore function.
Go to https://192.168.0.45 in your favorite browser and confirm your identity.
To view your data, simply click on the backup folder to see the contents. Download the latest version of a file by clicking directly on it.
If your data is not visible, be sure to refresh your backups from your user profile.
Other installation options
This is one way to deploy Rdiff-backup and Rdiffweb; there are many other options with higher or lower levels of complexity to meet specific needs, such as installation on multiple servers, installation with Docker, more secure management of SSH connections, and further improvements to the robustness and security of your system. You may take a look into rdiffweb documentation to learn more about how to configure rdiffweb or subscribe to rdiffweb Google Group to receive news about it.


Comments are closed.