Cockpit is a service for Linux that provides a web-based interface for managing and monitoring hosts. It can be deployed in any size organization, even a small office, and it's a great way for home users to maintain the family IT infrastructure. I use it to manage and monitor all of the computers in my house—including Raspberry Pi.
Cockpit is a free and open source software project released under the LGPL v2.1+. It is sponsored by Red Hat and included in Red Hat Enterprise Linux as the RHEL Web Console.
Using Cockpit
Cockpit allows you to manage Linux devices on your network remotely. You can add or remove users, connect Network File System (NFS) shares, and start and stop services. One of my favorite simple Cockpit tasks is doing updates. I no longer have to walk around the office or house to collect each device to log in, update, reboot, and wait. Enterprise administrators don't need to badge into a data center; instead, they can manage devices from the comfort of their office.
This isn't all, though. Cockpit's advanced capabilities include managing an LDAP server, virtual machines, and storage. You can also use it to install Docker or Podman containers.
In terms of monitoring, Cockpit provides visibility into the expected CPU, memory, and disk space metrics. But it also exposes information like the manufacturer, BIOS, and CPU branding and gives a detailed look at hardware elements such as the northbridge and southbridge chips and various controllers. It lists the graphics, storage, and network communications devices and the memory controller and memory type. Cockpit can also be used to review logs.
Install Cockpit
Cockpit is included in most major distributions. The website provides documentation for installing on Red Hat, Fedora, Ubuntu, Debian, Arch, and several others. You can install it with the standard package management commands on your Linux distribution. You can also usually find it in your graphical utility, such as GNOME Software Center, for a one-click process.
- Fedora:
dnf install cockpit - Ubuntu:
apt install cockpit
Access and login
The default listen port is 9090. To access the Cockpit interface on a server, just point your browser to hostname:9090. You can use localhost:9090 for the local server where you are logged on. Log in with a common account, as it will be advantageous to have root privileges on this account.
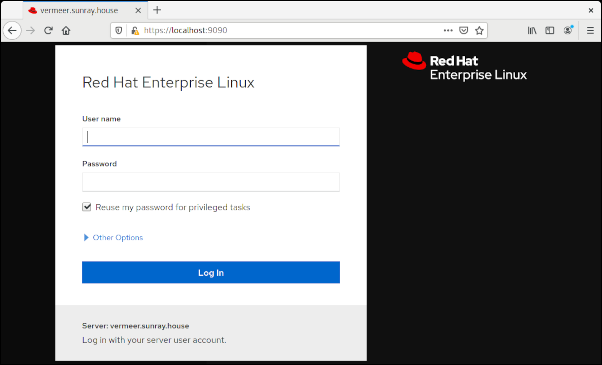
(Alan Formy Duval, CC BY-SA 4.0)
To access other servers remotely, you would use their hostname, e.g., https://hostname:9090. However, you could designate one host as a management server and add all your servers to the Dashboard for a unified view.
Once you log in, the first screen you see is the Dashboard; the other option is Host view.
Dashboard view
The Dashboard view is clean and uncluttered. The image below shows a performance monitor for all of a system's connected servers. It graphs CPU, memory, network, and disk I/O. If this is your first run and you haven't yet connected any servers, you will see graphs for the local system only.

(Alan Formy Duval, CC BY-SA 4.0)
Add a server by clicking the blue plus (+) button.
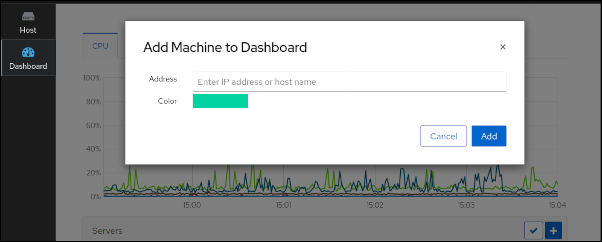
(Alan Formy Duval, CC BY-SA 4.0)
After you add servers, scroll down to see the full list. I have a few systems set up already.
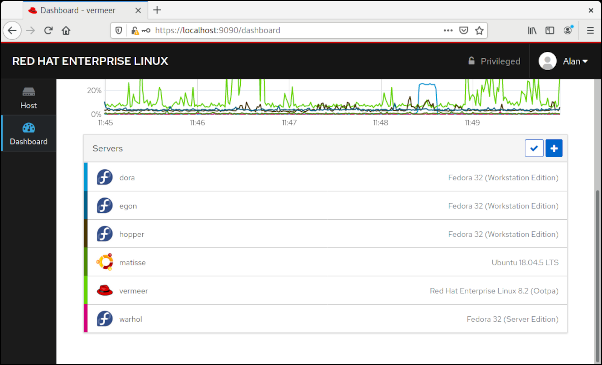
(Alan Formy Duval, CC BY-SA 4.0)
Host view
Host view is where all the fun begins. This section shows and gives access to each server added to the Dashboard. The main area of interest here is the column toward the left that includes Overview, Logs, Storage, Networking, and a few other items, with Terminal at the bottom. Clicking on each item enables you to manage these parts of the system. The items in this section can vary depending on other features that may be installed.
Overview
When you select a server, the Host screen opens to the Overview section with controls for the specific host system. The Overview screen is divided into quadrants for Health, Usage, Configuration, and System information.
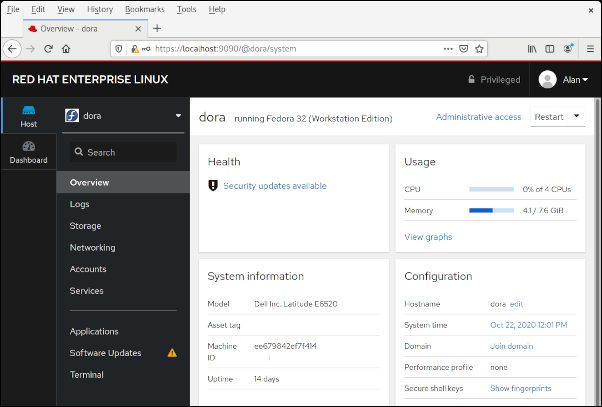
(Alan Formy Duval, CC BY-SA 4.0)
Usage links to a detailed performance graph view, and System information links to hardware details. Some management controls are directly available on this screen. For example, you can change the system hostname or join the server to an enterprise domain.
Storage
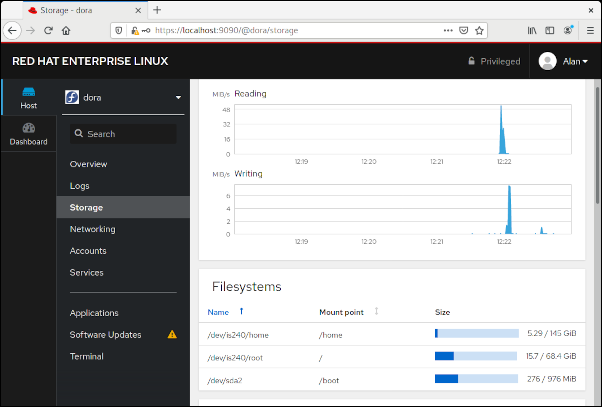
In this image of the Storage section, the top part has a graph of read/write activity, and below that is a list of local filesystems. Further down, you can add NFS mounts or view logs. You can even create RAID devices and volume groups.
(Alan Formy Duval, CC BY-SA 4.0)
Networking
The Networking section allows you to manage firewall and network interfaces. You can edit firewall rules and zones and manipulate networking with bonding, teaming, bridges, and VLANs.

(Alan Formy Duval, CC BY-SA 4.0)
Software updates
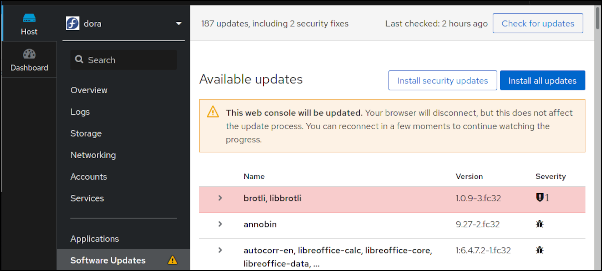
Being able to apply updates on servers remotely is super-convenient. Even a family may have five or 10 computers. But an enterprise with hundreds or thousands of headless servers racked in a dry, dark data center miles away definitely needs this capability. The Software updates section lists the updates available to you.
(Alan Formy Duval, CC BY-SA 4.0)
You can select whether to install all updates or just those related to security, and Cockpit displays a progress bar while updates are installed. Once the process is complete, you can restart the system.
Terminal
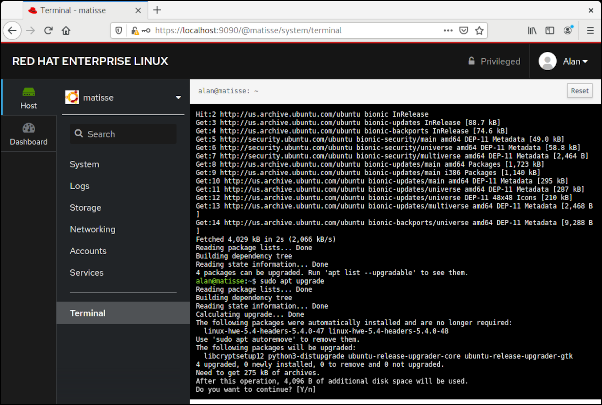
The last item in Host view is a Terminal, where you can do all the normal command-line options. One way I've used the Terminal is to overcome inconsistencies in Cockpit feature sets, most likely due to Linux version differences. I discovered this on my Media Center PC running Ubuntu Linux 18.04. In this version of Ubuntu, the Overview section is labeled System. It indicates available bug-fix updates but does not have a button for applying updates. This is not the case with the newer Ubuntu 20.04 LTS, which has the expected Overview section and update facility. Either way, there is no need to fret because I can leverage the terminal to run the normal Apt update commands.
(Alan Formy Duval, CC BY-SA 4.0)
Applications
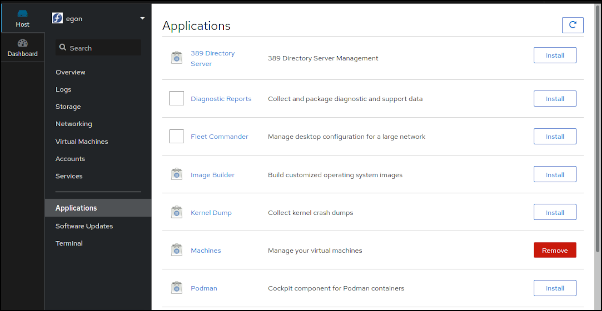
You may have noticed that I skipped the Applications section in Host view. This section deserves your attention because it can manipulate the view and functionality of your Cockpit service. From here, you can install additional functionality or applications, such as 389 LDAP Server or tools for collecting diagnostic reports and kernel dumps or building server images. The Machines section enables virtual machine management, and Podman provides container management capabilities. Once you have Cockpit up and running, it's a good idea to explore the Applications section.
(Alan Formy Duval, CC BY-SA 4.0)
Final thoughts
Cockpit uses a secure shell (SSH) client to access remote servers, so there may be some resource impact on a system where you create the unified view that I described above since each managed server will have an associated SSH connection.
$ ps fax |grep cockpit
2064515 ?        Ssl    0:50 /usr/libexec/cockpit-tls
2064521 ?        Ssl    0:41 /usr/libexec/cockpit-ws --for-tls-proxy --port=0
2064527 ?        S      0:00  \_ /usr/libexec/cockpit-session localhost
2064537 ?        Sl     0:38      \_ cockpit-bridge
2064636 ?        S      1:37          \_ /usr/libexec/cockpit-ssh webserver
2064639 ?        S      1:37          \_ /usr/libexec/cockpit-ssh smtpserver
2064640 ?        S      1:37          \_ /usr/libexec/cockpit-ssh ftpserver
2064670 ?        Sl     0:02          \_ /usr/bin/cockpit-bridge --privileged
2076607 ?        S      0:21          \_ /usr/libexec/cockpit-ssh ldapserver
2078182 ?        S      0:10          \_ /usr/libexec/cockpit-ssh teaserver
I've used many operations tools like this, both closed and open source, for management, monitoring, provisioning, deployment, and security tasks. Cockpit is a great tool that fits organizations of all sizes.



Comments are closed.