When I first heard about WebAssembly and the possibility of creating web user interfaces with Qt, just like I would in ordinary C++, I decided to take a deeper look at the technology.
My open source project Pythonic is completely Python-based (PyQt), and I use C++ at work; therefore, this minimal, straightforward WebAssembly tutorial uses Python on the backend and C++ Qt WebAssembly for the frontend. It is aimed at programmers who, like me, are not familiar with web development.

TL;DR
git clone https://github.com/hANSIc99/wasm_qt_example

cd wasm_qt_example

python mysite.py
Then visit https://127.0.0.1:7000 with your favorite browser.
What is WebAssembly?
WebAssembly (often shortened to Wasm) is designed primarily to execute portable binary code in web applications to achieve high-execution performance. It is intended to coexist with JavaScript, and both frameworks are executed in the same sandbox. Recent performance benchmarks showed that WebAssembly executes roughly 10–40% faster, depending on the browser, and given its novelty, we can still expect improvements. The downside of this great execution performance is its widespread adoption as the preferred malware language. Crypto miners especially benefit from its performance and harder detection of evidence due to its binary format.
Toolchain
There is a getting started guide on the Qt wiki. I recommend sticking exactly to the steps and versions mentioned in this guide. You may need to select your Qt version carefully, as different versions have different features (such as multi-threading), with improvements happening with each release.
To get executable WebAssembly code, simply pass your Qt C++ application through Emscripten. Emscripten provides the complete toolchain, and the build script couldn't be simpler:
#!/bin/sh
source ~/emsdk/emsdk_env.sh
~/Qt/5.13.1/wasm_32/bin/qmake
make
Building takes roughly 10 times longer than with a standard C++ compiler like Clang or g++. The build script will output the following files:
- WASM_Client.js
- WASM_Client.wasm
- qtlogo.svg
- qtloader.js
- WASM_Client.html
- Makefile (intermediate)
The versions on my (Fedora 30) build system are:
- emsdk: 1.38.27
- Qt: 5.13.1
Frontend
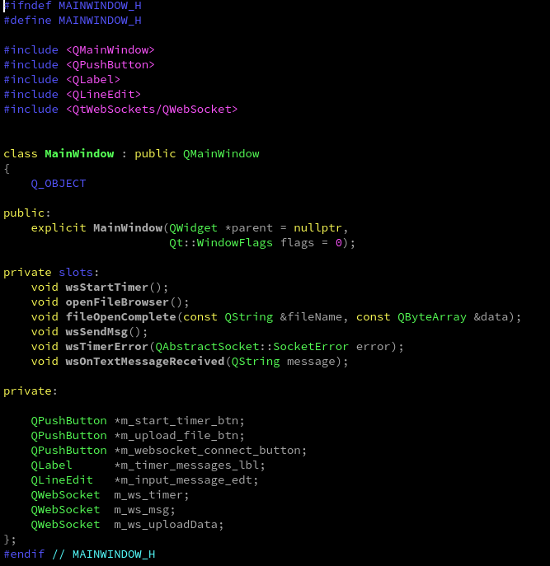
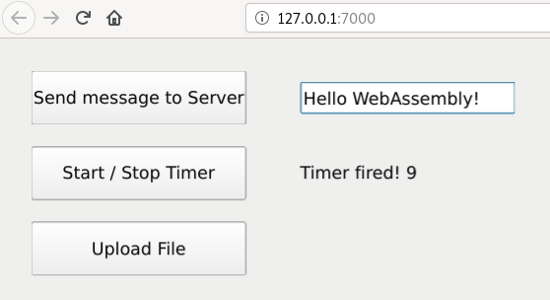
The frontend provides some functionalities based on WebSocket.

- Send message to server: Send a simple string message to the server with a WebSocket. You could have done this also with a simple HTTP POST request.
- Start/stop timer: Create a WebSocket and start a timer on the server to send messages to the client at a regular interval.
- Upload file: Upload a file to the server, where the file is saved to the home directory (~/) of the user who runs the server.
If you adapt the code and face a compiling error like this:
error: static_assert failed due to
 requirement ‘bool(-1 == 1)’ “Required feature http for file
 ../../Qt/5.13.1/wasm_32/include/QtNetwork/qhttpmultipart.h not available.”
QT_REQUIRE_CONFIG(http);
it means that the requested feature is not available for Qt Wasm.
Backend
The server work is done by Eventlet. I chose Eventlet because it is lightweight and easy to use. Eventlet provides WebSocket functionality and supports threading.

Inside the repository under mysite/template, there is a symbolic link to WASM_Client.html in the root path. The static content under mysite/static is also linked to the root path of the repository. If you adapt the code and do a recompile, you just have to restart Eventlet to update the content to the client.
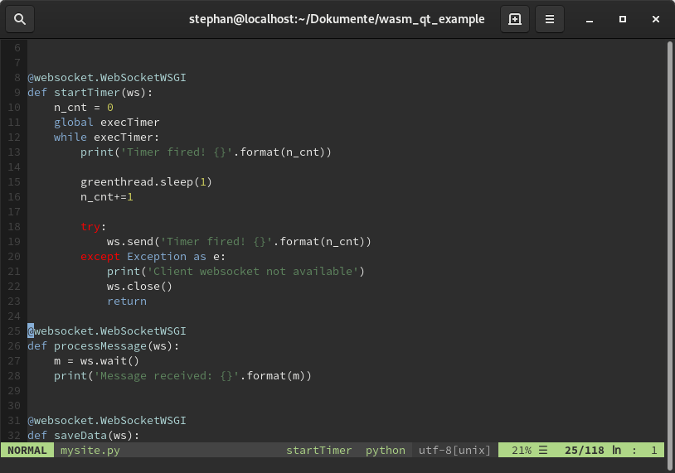
Eventlet uses the Web Server Gateway Interface for Python (WSGI). The functions that provide the specific functionality are extended with decorators.
Please note that this is an absolute minimum server implementation. It doesn't implement any multi-user capabilities — every client is able to start/stop the timer, even for other clients.
Conclusion
Take this example code as a starting point to get familiar with WebAssembly without wasting time on minor issues. I don't make any claims for completeness nor best-practice integration. I walked through a long learning curve until I got it running to my satisfaction, and I hope this gives you a brief look into this promising technology.


3 Comments