"All the documentation, the tooling, the community is great—you have all the tools to succeed in writing Rust code."
Antonio Verardi, Infrastructure Engineer of Yelp
So, why hesitate to learn a new programming language when all this is provided to you? It's now your turn to join the great community of Rust. If you are interested, you can read more about the advantages of Rust over other languages here.
This tutorial will guide you through setting up Rust and getting started.
Why use Rust and what to build with it
Performance
Rust is a really fast and memory-efficient language, as it has no run time or garbage collector. This is because the run-time does not have to wait for the Garbage Collector, which functions at its own pace that removes out-of-scope variables immediately. So it can perform well with critical services, within embedded devices, and easily be integrated with other languages.
Safety
Memory safety and thread safety in Rust allows for eliminating errors in code at compilation time. A rich type system and ownership model guarantees this for you. This is a great relief to any new programmer, as it reduces the burden while compiling.
Productivity
Any newcomer likely prefers using a programming language with features like rich documentation, a trouble-free compiler with useful error messages, and a resourceful toolbox. Rust has all of them. Furthermore, within the toolbox, you can access an integrated package manager, auto-completion of code with smart multi-support, auto-formatting support, type inspecting, and much more.
What to make with Rust
You can use Rust with many different projects. Rust's great command-line tool can help you to build your app easily and quickly. It can be used for web assembly applications with javascript, networking services, and my personal favorite—embedded systems.
Getting started
Start by downloading Rust. After downloading the relevant file, follow the instructions on the installation page to continue the installation.
I recommend using the tool "rustup." Once you are done, configure the path variable. All this is detailed on the download link above.
Cargo is the package manager for Rust. To see a list of packages that are installed, follow these steps:
Step 1: Open a terminal or shell.
Step 2: Then, type "cargo" and press Enter. You can see Cargo options and Cargo commands:
cargoCargo packages and commands are listed for you.
Step 3:Type "rustc --version" to view your Rust version:
rustc –version

rustc x.y.z (73528e339 20xx-12-21)
Step 4: Enable Rust's nightly version to use its newer features sooner. If you don't, you'll have to wait for its six-week release process. Type "rustup default nightly" in your shell to allow the installation to continue:
rustup default nightlyStep 5: Check your version and confirm that you've installed the nightly version.
rustc –version

rustc x.z.y-nightly (41f41b235 20xx-01-23)
Creating your first application
I use Visual Studio Code (VS Code) as my IDE because it's simple to use and provides a lot of support for Rust.
VS Code is a cross-platform editor and supports Linux, Windows, and macOS. Given the flexibility and convenience it offers, many large organizations like Google and Facebook have made it their default IDE. Be aware, however, that it does include telemetry code to track usage. If you're opposed to being tracked with a clear avenue for opting out, you should instead download and use VSCodium, a version of the application built with most tracking functions removed.
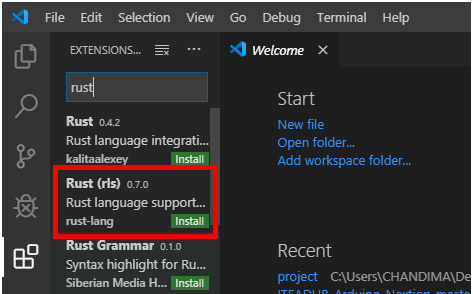
Open VS Code and go to Extensions and type "rust." Look for the extension ("Rust (rls)") and install it.

Now, follow these steps:
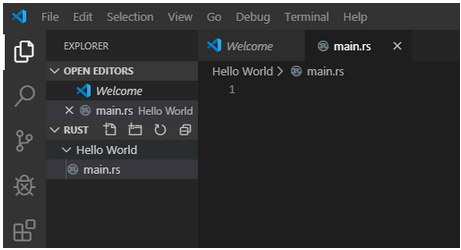
Step 1: Create a folder for your first project. I have named mine "Hello World."
Step 2: Right-click on your folder name (Hello World) and create a new file with the name "main.rs" extension:

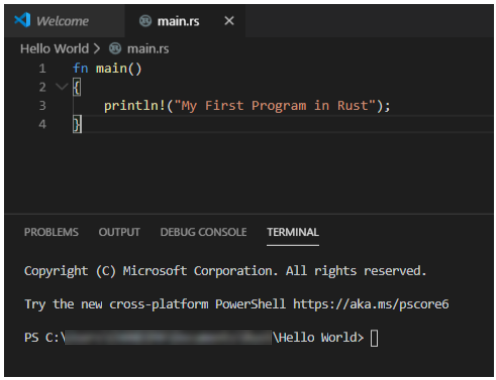
Step 3: Type in the following text in the newly created main.rs file. Here, fn is used to declare a function in Rust. Also, every statement in Rust must end with a semicolon.
fn main()

{

println!("My First Program in Rust");

}
Step 4: Right-click on main.rs and click "Open in Terminal." The terminal will open below your code.

To compile your application, type "rustc main.rs" and compile your first code. Then, to run it, type main and hit enter. Results ("My first Program in Rust") will display below your commands in the terminal.
Creating a Rust project with Cargo
Now that you have created and run a simple application, look at a more robust way to create an app. This offers more features in the long run and is typical of most Rust programmers.
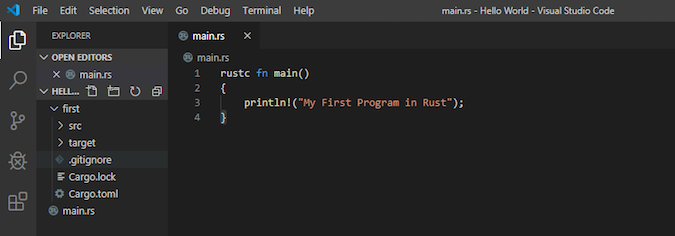
Step 1: To create a project in Cargo, open a terminal (or use the one in VS Code) and type "cargo new first."
cargo new firstA project called "first" will be created.
Created binary (application> ‘first’ packageSo you can see that every Rust project has a ("src") source folder and a cargo.toml file, which contains its dependencies.

Step 2: Change directory into the first project directory:
cd firstStep 3: To compile your program, type "cargo run build." This command runs the project and displays the results below the code.
cargo run buildStep 4: Type "cargo run" and execute it in cargo.toml. You don't need to build your project repeatedly; just type "cargo run" to get the updated output.
cargo runRust uses immutable variables, so once you have defined the value, you won't be able to change it.
Try declaring an integer variable "a," a floating-point variable "b," a string "My name is Rust," and a Boolean variable with the value true. You can display them on the terminal using the println! command. So for the value of a, it displays the result as "The value of a is 1."
fn main()

{

**let a=1;**

**let b=2.0;**

**let name = “My Name is Rust”;**

**let boolean = true;**


println!(“The value of a is:”, a);

}
Arithmetic operations in Rust follow standard mathematical order, similar to other languages. For instance, this returns a total of 14:
let arithmetic_value= 8-2 +8;

println!(arithmetic_value);
Arrays
Arrays are declared with square brackets. Array values can be accessed by calling the array name with the value index inside square brackets.
**let array1[1,2,4,5,8];**

println!(“The value of a is:”,array1[1]);
This displays "The value of a is 2" in the terminal.
Tuples
Tuples can be declared as below:
**let tuple1=(5,6.0,”My_Name”);**
Functions are declared with the "fn" keyword. This sample code declares three functions—main, hello, and add:
**fn main()**

{

hello(“Rust”);

add(2,3);

}


**fn hello(name :&str)**

{

println!(“hello {}”, name);

}


**fn add(a=i8 ,b=i8)**

{

println!(“{}”,x+y);

}
main is the core function for every program.
You can always call another function declared outside the main function by name. You can assign function parameter values in the main function, but the parameter type and the limit must be declared in the sub-functions.
In the above code, "&str" defines that it is a string function, and its limit is defined dynamically.
"I7" declares the parameter as an integer, and its limit is declared by 8.
Braces { } define where the function output should be returned.
In this example, "hello Rust" is displayed first, followed by 5.
Comments
Single-line comments are defined by two leading slashes. Slashes have to be added on each line for block comments.
fn main() {

let number = 13; // I’m feeling great today


// This function is defined to

// explain the use of comments.

}
Conclusion
"From startups to large corporations, from embedded devices to scalable web services, Rust is a great fit."
This is motivation from the Rust Organization, and it explains how extensively Rust can be used in your applications.
I hope that this short tutorial gave you a thirst to learn more about Rust and its advantages that can take your applications a long way.


Comments are closed.