There are many ways to install software, but you get an option not available elsewhere with open source: You can compile the code yourself. The classic three-step process to compile source code:
$ ./configure
$ make
$ sudo make install
Thanks to these commands, you might be surprised to find that you don't need to know how to write or even read code to compile it.
Install commands to build software
As this is your first time compiling, there's a one-time preparatory step to install the commands for building software. Specifically, you need a compiler. A compiler, such as GCC or LLVM, turns source code that looks like this:
#include <iostream>

using namespace std;

int main() {
  cout << "hello world";
}
Into machine language, the instructions that a CPU uses to process information. You can look at machine code, but it wouldn't make any sense to you (unless you're a CPU.)
You can get the GNU C compiler (GCC) and the LLVM compiler, along with other essential commands for compiling on Fedora, CentOS, Mageia, and similar distributions, using your package manager:
$ sudo dnf install @development clangOn Debian, Elementary, Mint, and similar distributions:
$ sudo apt install build-essential clangWith your system set up, there are a few tasks that you'll repeat each time you want to compile your software:
- Download the source code
- Unarchive the source code
- Compile
You have all the commands you need, so now you need some software to compile.
1. Download source code
Obtaining source code for an application is much like getting any downloadable software. You go to a website or a code management site like GitLab, SourceForge, or GitHub. Typically, open source software is available in both a work-in-progress ("current" or "nightly") form as well as a packaged "stable" release version. Use the stable version when possible unless you have reason to believe otherwise or are good enough with code to fix things when they break. The term stable suggests the code got tested and that the programmers of the application feel confident enough in the code to package it into a .zip or .tar archive, give it an official number and sometimes a release name, and offer it for download to the general non-programmer public.
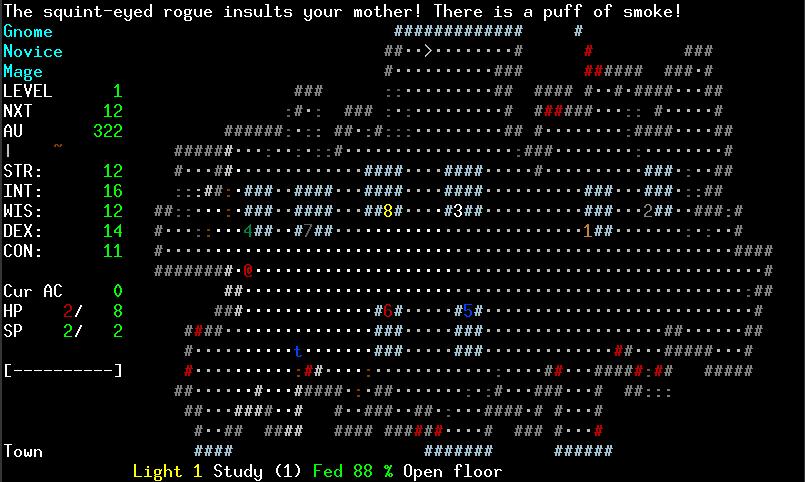
For this exercise, I'm using Angband, an open source (GPLv2) ASCII dungeon crawler. It's a simple application with just enough complications to demonstrate what you need to consider when compiling software for yourself.
Download the source code from the website.
2. Unarchive the source code
Source code is often delivered as an archive because source code usually consists of multiple files. You have to extract it before interacting with it, whether it's a tarball, a zip file, a 7z file, or something else entirely.
$ tar --extract --file Angband-x.y.z.tar.gzOnce you've unarchived it, change the directory into the extracted directory and have a look around. There's usually a README file at the top level of the directory. This file, ideally, contains guidance on what you need to do to compile the code. The README often contains information on these important aspects of the code:
- Language: What language the code is in (for instance, C, C++, Rust, Python).
- Dependencies: What other software you need to have installed on your system for this application to build and run.
- Instructions: The literal steps you need to take to build the software. Occasionally, they include this information within a dedicated file intuitively entitled
INSTALL.
If the README file doesn't contain that information, consider filing a bug report with the developer. You're not the only one who needs an introduction to source code. Regardless of how experienced they are, everyone is new to source code they've never seen before, and documentation is important!
Angband's maintainers link to online instructions to describe how to compile the code. This document also describes what other software you need to have installed, although it doesn't exactly spell it out. The site says, "There are several different front ends that you can optionally build (GCU, SDL, SDL2, and X11) using arguments to configure such as --enable-sdl, --disable-x11, etc." This may mean something to you or look like a foreign language, but this is the kind of stuff you get used to after compiling code frequently. Whether or not you understand what X11 or SDL2 is, they're both requirements that you see pretty often after regularly compiling code over a few months. You get comfortable with the idea that most software needs other software libraries because they build upon other technologies. In this case, though, Angband is very flexible and compiles with or without these optional dependencies, so for now, you can pretend that there are no additional dependencies.
3. Compile the code
The canonical steps to build code are:
$ ./configure
$ make
$ sudo make install
Those are the steps for projects built with Autotools, which is a framework created to standardize how source code is delivered. Other frameworks (such as Cmake) exist, however, and they require different steps. When projects stray from Autotools or Cmake, they tend to warn you in the README file.
Configure
Angband uses Autotools, so it's time to compile code!
In the Angband directory, first, run the configuration script included with the source:
$ ./configureThis step scans your system to find the dependencies that Angband requires to build correctly. Some dependencies are so basic that your computer wouldn't be running without them, while others are specialized. At the end of the process, the script gives you a report on what it has found:
[...]
configure: creating ./config.status
config.status: creating mk/buildsys.mk
config.status: creating mk/extra.mk
config.status: creating src/autoconf.h

Configuration:

  Install path:    /usr/local
  binary path:     /usr/local/games
  config path:     /usr/local/etc/angband/
  lib path:        /usr/local/share/angband/
  doc path:        /usr/local/share/doc/angband/
  var path:        (not used)
  (save and score files in ~/.angband/Angband/)

-- Frontends --
- Curses            Yes
- X11               Yes
- SDL2              Disabled
- SDL               Disabled
- Windows           Disabled
- Test              No
- Stats             No
- Spoilers          Yes

- SDL2 sound        Disabled
- SDL sound         Disabled
Some of that output may make sense to you, some of it may not. Either way, you probably notice that SDL2 and SDL are marked as Disabled, and both Test and Stats are marked with No. Although negative, this isn't necessarily a bad thing. This, essentially, is the difference between a Warning and an Error. Had the configure script encountered something that would prevent it from building the code, it would have alerted you with an error.
If you want to optimize your build a little, you can choose to resolve these negative messages. By searching through the Angband documentation, you might decide that Test and Stats aren't actually of interest to you (they're developer options, specific to Angband). However, with a little online research, you might discover that SDL2 would be a nice feature to have.
To resolve a dependency when compiling code, you need to install the missing component and the development libraries for that missing component. In other words, Angband needs SDL2 to play sound, but it needs SDL2-devel (called libsdl2-dev, on Debian systems) to build. Install both with your package manager:
$ sudo dnf install sdl2 sdl2-develTry the configuration script again:
$ ./configure --enable-sdl2
[...]
Configuration:
[...]
- Curses                                  Yes
- X11                                     Yes
- SDL2                                    Yes
- SDL                                     Disabled
- Windows                                 Disabled
- Test                                    No
- Stats                                   No
- Spoilers                                Yes

- SDL sound                               Disabled
- SDL2 sound                              Yes
Make
Once everything's configured, run the make command:
$ makeThis usually takes a while, but it provides lots of visual feedback, so you'll know code is getting compiled.
Install
The final step is to install the code you've just compiled. There's nothing magical about installing code. All that happens is that lots of files get copied to very specific directories. That's true whether you're compiling from source code or running a fancy graphical install wizard. Because the code is getting copied to system-level directories, you must have root (administrative) privileges, which get granted by the sudo command.
$ sudo make installRun the application
Once the application gets installed, you can run it. According to the Angband documentation, the command to start the game is angband, so try it out:
$ angband

(Seth Kenlon, CC BY-SA 4.0)

(Seth Kenlon, CC BY-SA 4.0)
Compiling code
I compile most of my own applications, whether on my Slackware desktop computer or my CentOS laptop using NetBSD's pkgsrc system. I find that by compiling software myself, I can be as particular as I want to be about the features included in the application, how it's configured, which library version it uses, and so on. It's rewarding, and it helps me keep up to date with new releases and, because I sometimes find bugs in the process, it helps me get involved with lots of different open source projects.
It's rare that you have no other option but to compile software. Most open source projects provide both the source code (that's why it's called "open source") and installable packages. Compiling from source code is a choice you get to make for yourself, maybe because you want new features not yet available in the latest release or just because you prefer to compile code yourself.
Homework
Angband can use either Autotools or Cmake, so if you want to experience another way of building code, try this:
$ mkdir build
$ cd build
$ cmake ..
$ make
$ sudo make install
You can also try compiling with the LLVM compiler instead of the GNU C compiler. For now, I'll leave that as an exercise for you to investigate on your own (hint: try setting the CC environment variable.)
Once you finish exploring the source code of Angband and at least a few of its dungeons (you've earned some downtime), have a look at some other codebases. Many will use Autotools or Cmake, while others may use something different. See what you can build!


2 Comments