Digital painting is an art form all its own. It obviously emulates the discipline it's named for, but painting in the physical world and a digital environment is unique. Krita is a digital paint application that's seen use at major film production houses, book publishers, and art studios. It specializes in materials emulation, allowing the artist to adjust and fine-tune their tools through a brush engine so that they can achieve exactly the look and drawing feel they need. Krita won't make you a great painter, but if you love to paint, Krita can help you make sure your artwork looks its best.
Install Krita on Linux
Krita is available for Linux, Windows, and macOS.
On Fedora, Mageia, and similar distributions, you can install it with your package manager:
$ sudo dnf install kritaOn Elementary, Mint, and other Debian-based distributions:
$ sudo apt install kritaI use Krita as a Flatpak.
If you want to support the continued development of Krita, you can also buy Krita for Linux and Windows on Steam.
Brushes
A fairly standard interface for graphic creation greets you when it first launches. There's a toolbar on the left, and properties panels across the top and right. In the middle is your workspace. To create a new file, click the New File link in the workspace, or select it from the File menu. Choose the size and resolution of your canvas and click Create.
Once you've got a canvas, it's time to explore the tools of the trade. Brushes are located in the top toolbar, just to the right of the color swatch chooser.
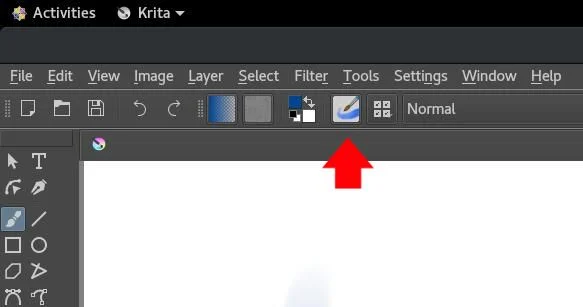
(Seth Kenlon, CC BY-SA 4.0)
You can find the same brushes in the right properties panel, provided that the brush panel is enabled. Property panels are called Dockers in Krita, and you can show or hide them from the Settings menu in the Dockers submenu.
The brush menu in the top toolbar is very graphical, with lots of brushes to choose from, plus you have control over many attributes of each brush, so you can also design your own. Each brush gets defined as a brush preset. All presets are located on the left side of the brush menu, although they may be hidden at first.
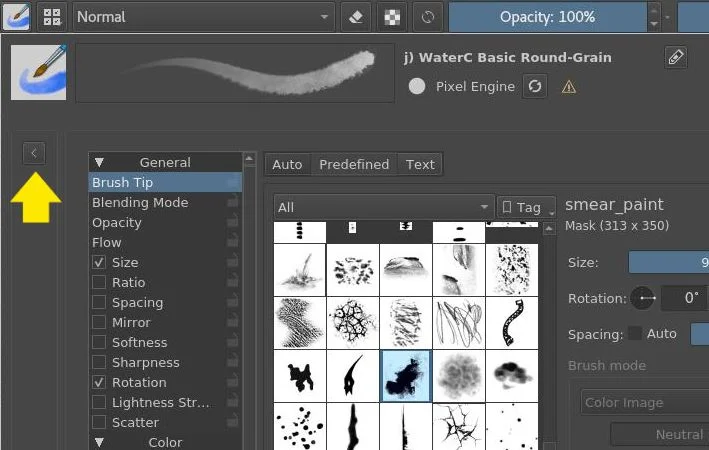
(Seth Kenlon, CC BY-SA 4.0)
A brush preset defines attributes that simulate the material you're using to make a drawing: watercolor, oil, acrylic, ink, charcoal, and so on. Each one has a default brush tip, too, but you can choose from any number of brush tips by clicking the Predefined tab in the brush menu.
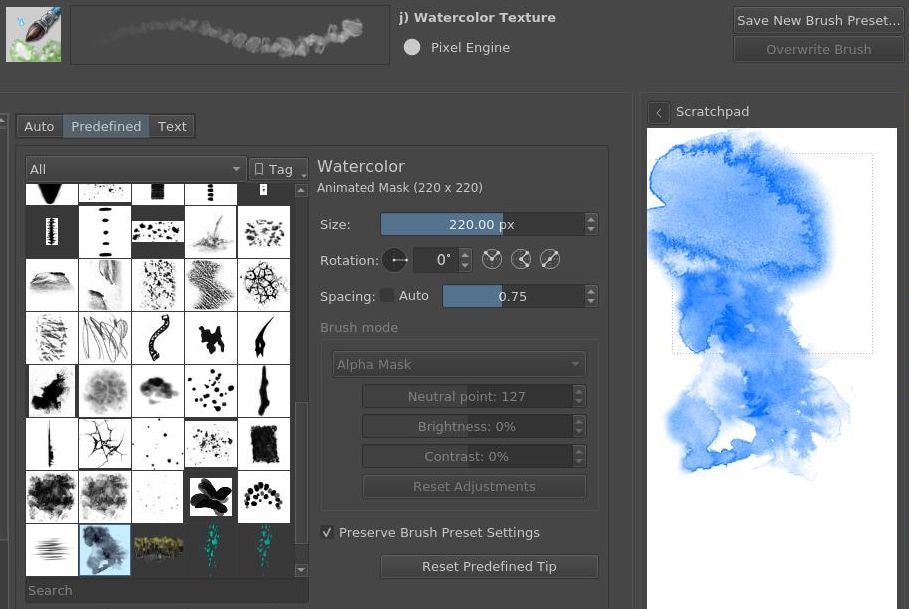
(Seth Kenlon, CC BY-SA 4.0)
You can adjust the size and spacing of brushes in the brush menu, as well, and there's a scratchpad area, so you test your settings.
It can be a little overwhelming at first. Just remember this hierarchy:
- Brush presets are the media you're using (paint, ink, charcoal, and so on)
- Brush tips are the brushes, pens, and spray cans
Painting with Krita
I find that it helps to focus on just the brush presets at first. The brush tips are indispensable, but the brush presets speak for themselves when you're just getting used to the tools.
Select a brush preset that looks interesting to you, select a color from the color selector in the top toolbar or the right properties panel of the window, and click and drag on the canvas to paint. Because Krita seeks to emulate real-world brush behavior, try a few different techniques. Dab some paint onto the canvas, and then try some longer brush strokes. The initial paint is strong, but as the virtual paint on your virtual brush gets "used," the paint starts to thin, just like in real life. Paint can also build up or thin out the more you paint over places there's already paint.
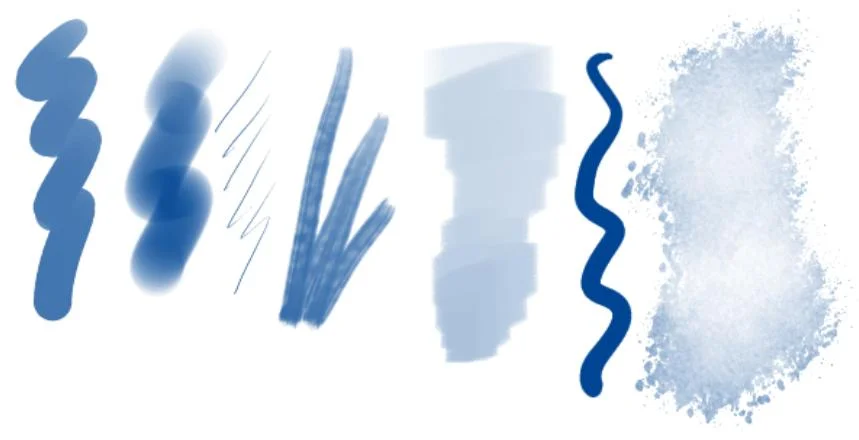
(Seth Kenlon, CC BY-SA 4.0)
Get more brushes
Because brushes are your primary form of expression in Krita (aside from what you actually do with them, I mean), getting more brushes is a significant way to bolster your toolkit. Artists release brushes every now and again, and one of my favorite sets is the brushes released by David Revoy.
Brush presets come in the form of a .bundle file, which you can import into Krita.
To import a brush file in Krita:
- Download the zip file and extract it. This produces a
.bundlefile. - In Krita, go to Settings and select Manage Resources.
- Click the Import Bundles button (Import Resources in Krita 5), and select the
.bundlefile on your drive. - Click OK.
- Restart Krita to allow it to load in the new presets.
You can also create your own brush tips or import existing brush tips from GIMP, Adobe, and SVG files.
To import a brush tip:
- Download a collection of brushes.
- Open the brush menu and click on the Predefined tab.
- Click the +Import button at the bottom of the brush tip table.
- Select the brush collection you want to import.
I used this function to import my handy arrow brush tip, which I use to paint arrows on screenshots. It's surprisingly useful in both GIMP and Krita.

(Seth Kenlon, CC BY-SA 4.0)
A serious painting app for serious painters
Krita is an application that takes its purpose very seriously. It's a digital painting app that aims to be the best. Thanks to its flexibility, its skilled developer team, and its strong community, it's my opinion that it is. When I commission art for projects I'm involved with, I generally work with artists who use open source tools, and Krita is often the tool of choice.
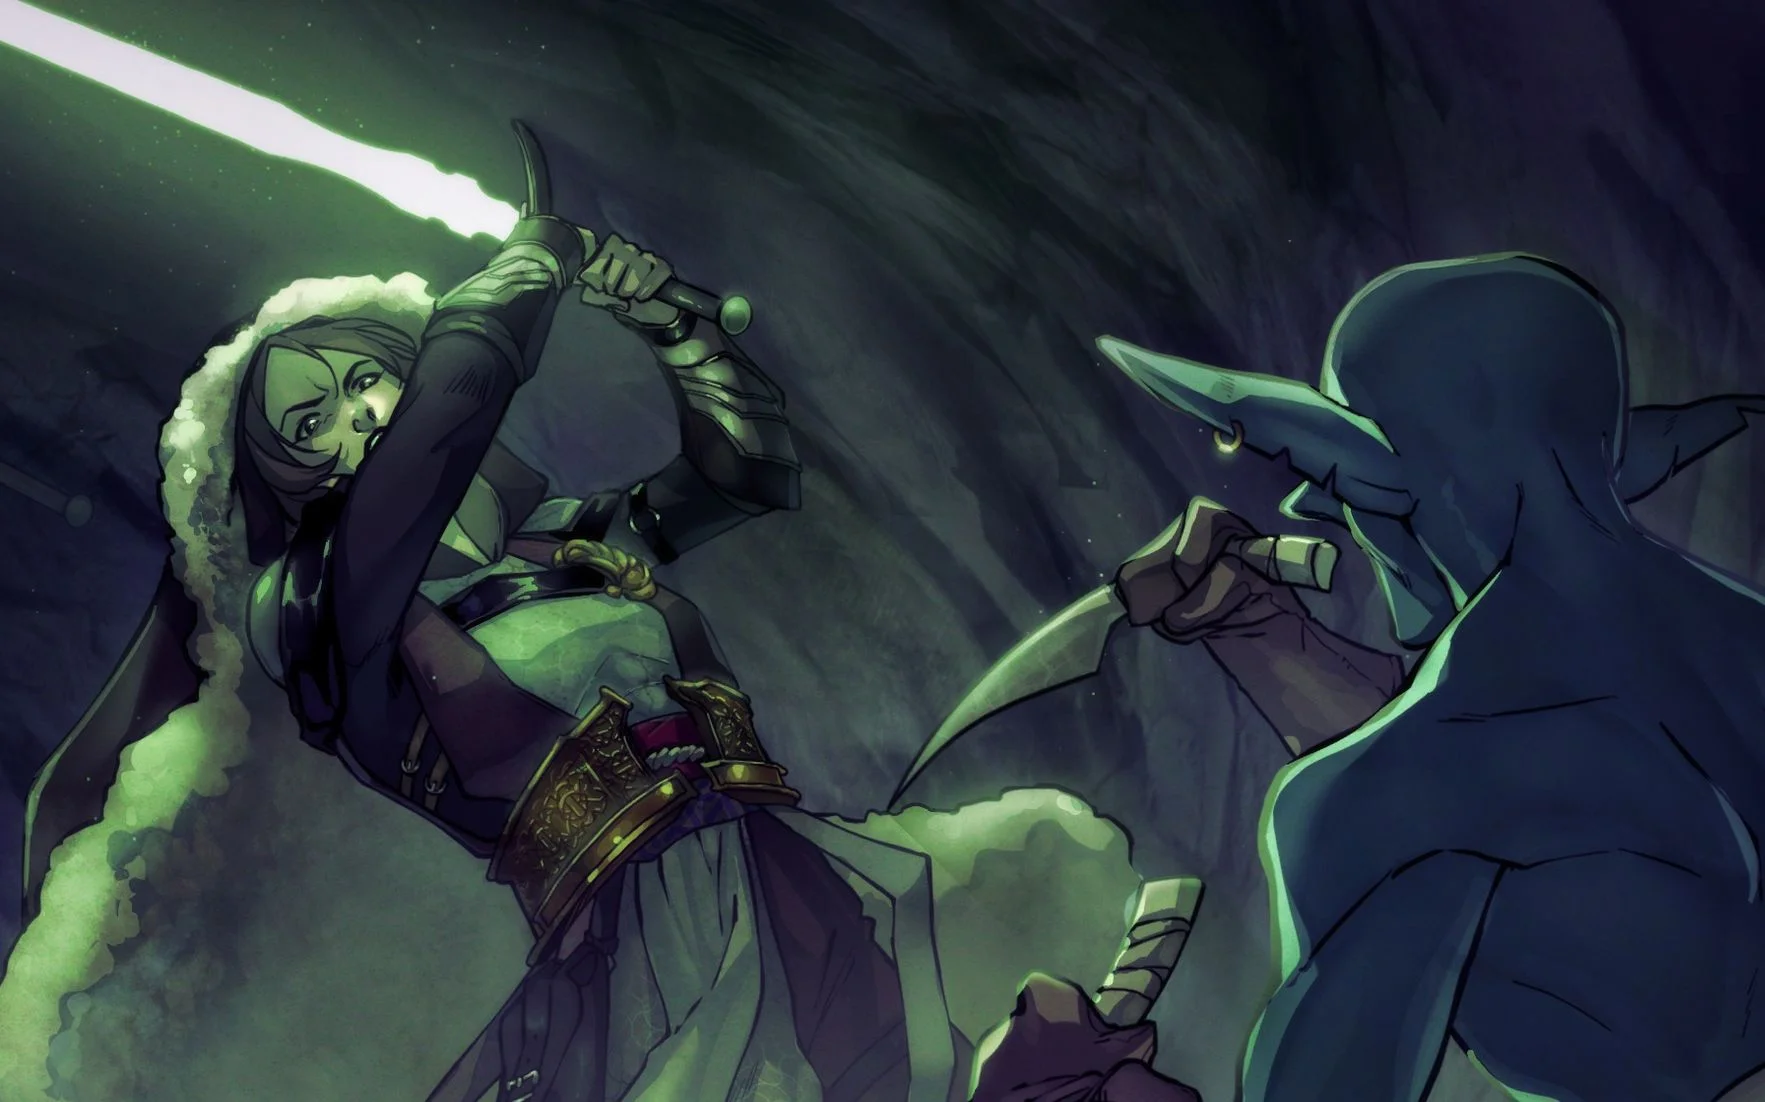
(Victoria Popova, CC BY-SA 4.0)
Whether you're an experienced artist like Victoria Popova or just a beginner like me, Krita is a fun and powerful application. Give it a try, and see what art you can make with just a few amazing tools.




Comments are closed.