Inkscape is an illustration application, and it works in vectors to ensure limitless resolution for your drawings. Vector illustration is different from freehand illustration. If you're used to drawing freehand, vectors may at first feel restrictive, but once you get used to how vectors get created and how you can use them to construct an image, it's a powerful way to build visuals of all sorts. And if you're not much of an illustrator at all, you might just find that the hands-off approach of vectors means you can draw in Inkscape even though you can't draw with pen and paper.
Install Inkscape on Linux
Inkscape is available for Linux, Windows, and macOS.
On Fedora, Mageia, and similar distributions, you can install it with your package manager:
$ sudo dnf install inkscapeOn Elementary, Mint, and other Debian-based distributions:
$ sudo apt install inkscapePersonally, I use Inkscape as a Flatpak.
Drawing in Inkscape
The best way to learn is to do, and there's nothing quite as festive as a sugar skull, so you may as well celebrate your soon-to-be-discovered new talent by drawing one.
Whether or not you consider yourself an illustrator, open Inkscape and find the Circle tool. You can find all the drawing tools along the left side of the Inkscape window.
Once you've selected the circle tool, click and drag on the canvas to draw an ellipse. It doesn't have to be a perfect circle, but if you want it to be, you can hold down Ctrl as you draw.
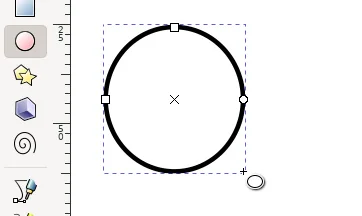
(Seth Kenlon, CC BY-SA 4.0)
You've just drawn a shape. It may or may not look exactly like the one I've drawn, and that's OK. There are at least two standard properties to any shape you draw in Inkscape: the fill and the stroke. The stroke is the outline of a shape, and the fill is the part within the outline. You can customize both with the Fill and Stroke panel.
You can access the property panels (Inkscape calls them "Dialogs") with the icons on the right side of the Inkscape window. The Fill and Stroke dialog has three tabs: Fill, Stroke Paint, and Stroke Style. In the Fill and Stroke dialog, select the Fill tab and set the fill type to Flat color. Use the color wheel to give the fill of your shape a color. Then select the Stroke paint tab, set the stroke type to Flat color, and set a stroke color.
Unifying objects
Next, use the rectangle tool to draw a jaw for the skull.
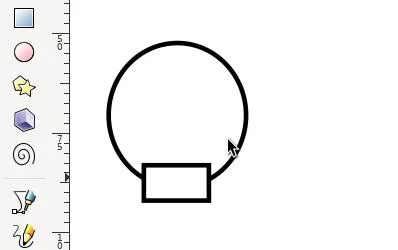
(Seth Kenlon, CC BY-SA 4.0)
If you squint a little, this resembles the basic outline of a skull shape. That's a good start, but to smooth out some of the internal lines that aren't needed, you can unify the two separate shapes you've drawn, so it looks like you've just drawn one thing. This is a little like what real illustrators do when drawing with a pencil on paper: They erase a lot because there are many sketch lines that people should never see.
To make your two shapes into one, click on the Select and transform tool (the cursor icon at the top of the left toolbar). Click the circle, and then Shift+click the rectangle. Alternately, you can click and drag anywhere on your canvas to select all shapes you "lasso." Once both shapes are selected, go to the Path menu and select Union.
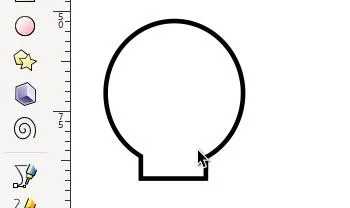
(Seth Kenlon, CC BY-SA 4.0)
Duplicating objects
Now that you're an old pro at drawing circles in Inkscape draw one circle (yes, just one) to serve as the eye sockets of your skull illustration. Once you have one eye drawn, draw an ellipse that cuts off the lower third of the eye socket and select both.
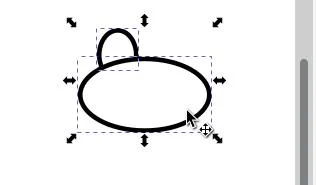
(Seth Kenlon, CC BY-SA 4.0)
With both selected, go to the Path menu and select Difference. This removes the topmost shape, plus everything it's covering, from the bottom shape. In this case, that leaves you with an eye socket with a pleasant suggestion of a "cheek" or, more precisely, cheek bone.
Now that you have the shape of the eye socket, you need a second eye socket. Instead of trying to replicate your work exactly, you can have Inkscape just duplicate the shape for you. Click on the eye socket, go to the Edit menu, and select Duplicate. The shape gets duplicated in place. It probably doesn't look like anything happened, but it's there, just on top of the other.
With one eye socket still selected, go to the Object menu and select Flip Horizontal. You can see the other eye socket now because one's got flipped. So Ctrl+drag one eye socket to the left or the right until you're happy with the spacing. The Ctrl key ensures that you're dragging in a straight line.
Adjust the fill and stroke to your preference.
Hand-drawn shapes
You're not limited to just circles and rectangles in Inkscape. There's a polygonal shape tool that lets you adjust the number of sides you want a shape to have, or you can draw a shape freehand. For the nose shape of the skull, use the Draw bezier curves tool (the first pen tool in the left toolbar).
Although this tool looks like a pen, it's easiest at first to treat it more like a connect-the-dots tool. Don't click and drag the pen. Just click-and-release to create a node, and then move it and click-and-release again. Inkscape draws a line between each point you create. For this drawing, just make three points and double-click to end the shape at the third point.
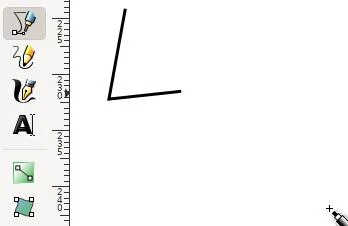
(Seth Kenlon, CC BY-SA 4.0)
Even though the shape appears open, it still has a fill property. If your fill is white on white, it might be hard to see that, so open the Fill and stroke dialog on the right side of the Inkscape window, select the Fill tab, and give the shape a fill color.
There's no need for the shape to be open, except that I wanted to demonstrate that even open objects have the fill property, so you can either connect the two open nodes or leave it open.
The triangle you've drawn can serve as the "nose" of your skill illustration. To make it less like a jack-o-lantern and more human, though, you can give it a little roundness by editing the lines you've drawn. This is something you can do because your lines are paths, which indicates that it's an individual line calculated and drawn by Inkscape based on where you clicked to create nodes.
To edit a path, activate the Edit paths by nodes tool (the second tool from the top of the left toolbar). Use this tool to grab one of the lines you've drawn and drag and drop it to give it a nice organic curve.
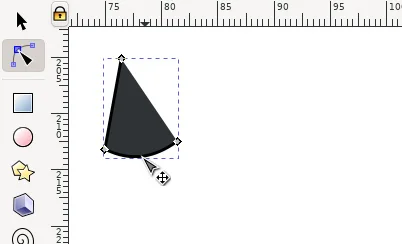
(Seth Kenlon, CC BY-SA 4.0)
Stroke properties
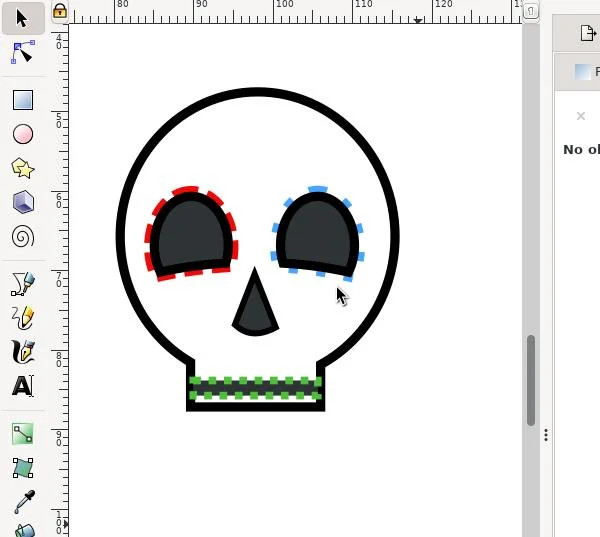
To decorate your sugar skull, click an eye socket and duplicate it (the shortcut for this is Ctrl+D). In the Fill and stroke dialog, remove the fill from the duplicate, and then click the Stroke style tab.
In the Stroke style tab, you can adjust the thickness of the stroke and how the stroke gets drawn. By default, strokes are solid lines, but in this case, make it a dotted line instead.
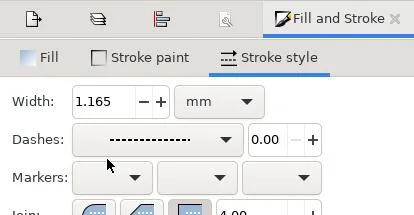
(Seth Kenlon, CC BY-SA 4.0)
Give the stroke a festive color in the Stroke paint tab.
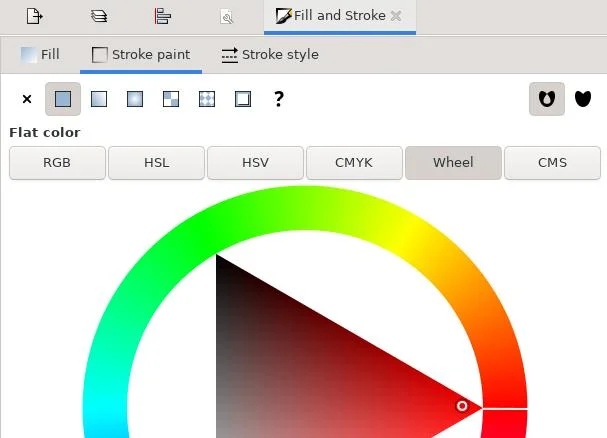
(Seth Kenlon, CC BY-SA 4.0)
Holding down both the Shift and Ctrl keys, click and drag the resize handle of the eye socket's bounding box. The Shift key forces the shape to expand from its center point, and the Ctrl key preserves its height and width aspect ratio.
Expand the duplicate shape until it serves as an outline for the eye socket. Repeat this for the other eye socket and the nose.
You have all the knowledge you need to make your sugar skull more elaborate, so spend a little time discovering other functions of Inkscape.
(Seth Kenlon, CC BY-SA 4.0)
Anybody can draw
Inkscape makes it possible for anyone to draw. As long as you can create circles and squares, and you're willing to learn the Inkscape tricks to transform, cut, combine, and edit objects, you can essentially draw with shapes instead of freehand lines. It's liberating for us who haven't spent the requisite 10,000 hours learning to draw well, and all the more powerful to those who have! Take some time to learn Inkscape.







Comments are closed.