RudderStack is an open source, warehouse-first customer data pipeline. It collects and routes event stream (or clickstream) data and automatically builds your customer data lake on your data warehouse.
RudderStack is commonly known as the open source alternative to the customer data platform (CDP), Segment. It provides a more secure, flexible, and cost-effective solution in comparison. You get all the CDP functionality with added security and full ownership of your customer data.
Warehouse-first tools like RudderStack are architected to build functional data lakes in the user's data warehouse. The benefits are improved data control, increased flexibility in tool use, and (frequently) lower costs. Since it's open source, you can see how complicated processes—like building your identity graph—are done without relying on a vendor's black box.
Getting the RudderStack workspace token
Before you get started, you will need the RudderStack workspace token from your RudderStack dashboard. To get it:
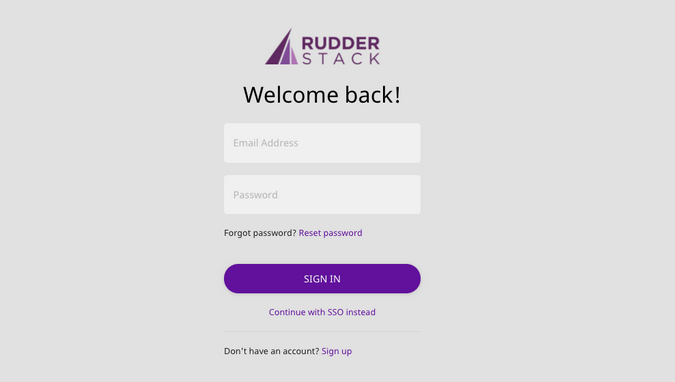
- Go to the RudderStack dashboard.
- Log in using your credentials (or sign up for an account, if you don't already have one).
(RudderStack, CC BY-SA 4.0)
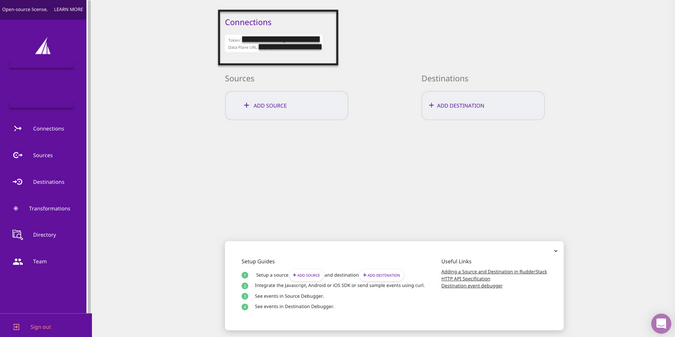
- Once you've logged in, you should see the workspace token on your RudderStack dashboard.
(RudderStack, CC BY-SA 4.0)
Installing RudderStack
Setting up a RudderStack open source instance is straightforward. You have two installation options:
- On your Kubernetes cluster, using RudderStack's Helm charts
- On your Docker container, using the
docker-composecommand
This tutorial explains how to use both options but assumes that you already have Git installed on your system.
Deploying with Kubernetes
You can deploy RudderStack on your Kubernetes cluster using the Helm package manager.
If you plan to use RudderStack in production, we strongly recommend using this method. This is because the Docker images are updated with bug fixes more frequently than the GitHub repository (which follows a monthly release cycle).
Before you can deploy RudderStack on Kubernetes, make sure you have the following prerequisites in place:
- Install and connect kubectl to your Kubernetes cluster.
- Install Helm on your system, either through the Helm installer scripts or its package manager.
- Finally, get the workspace token from the RudderStack dashboard by following the steps in the Getting the RudderStack workspace token section.
Once you've completed all the prerequisites, deploy RudderStack on your default Kubernetes cluster:
- Find the Helm chart required to deploy RudderStack in this repo.
- Install the Helm chart with a release name of your choice (
my-release, in this example) from the root directory of the repo in the previous step:
$ helm install \
my-release ./ --set \
rudderWorkspaceToken="<your workspace token from RudderStack dashboard>"
This deploys RudderStack on your default Kubernetes cluster configured with kubectl using the workspace token you obtained from the RudderStack dashboard.
For more details on the configurable parameters in the RudderStack Helm chart or updating the versions of the images used, consult the documentation.
Deploying with Docker
Docker is the easiest and fastest way to set up your open source RudderStack instance.
First, get the workspace token from the RudderStack dashboard by following the steps above.
Once you have the RudderStack workspace token:
- Download the rudder-docker.yml docker-compose file required for the installation.
- Replace
<your_workspace_token>in this file with your RudderStack workspace token. - Set up RudderStack on your Docker container by running:
docker-compose -f rudder-docker.yml up
Now RudderStack should be up and running on your Docker instance.
Verifying the installation
You can verify your RudderStack installation by sending test events using the bundled shell script:
- Clone the GitHub repository:
git clone https://github.com/rudderlabs/rudder-server.git - In this tutorial, you will verify RudderStack by sending test events to Google Analytics. Make sure you have a Google Analytics account and keep the tracking ID handy. Also, note that the Google Analytics account needs to have a
Webproperty. - In the RudderStack hosted control plane:
- Add a source on the RudderStack dashboard by following the Adding a source and destination in RudderStack guide. You can use either of RudderStack's event stream software development kits (SDKs) for sending events from your app. This example sets up the JavaScript SDK as a source on the dashboard. Note: You aren't actually installing the RudderStack JavaScript SDK on your site in this step; you are just creating the source in RudderStack.
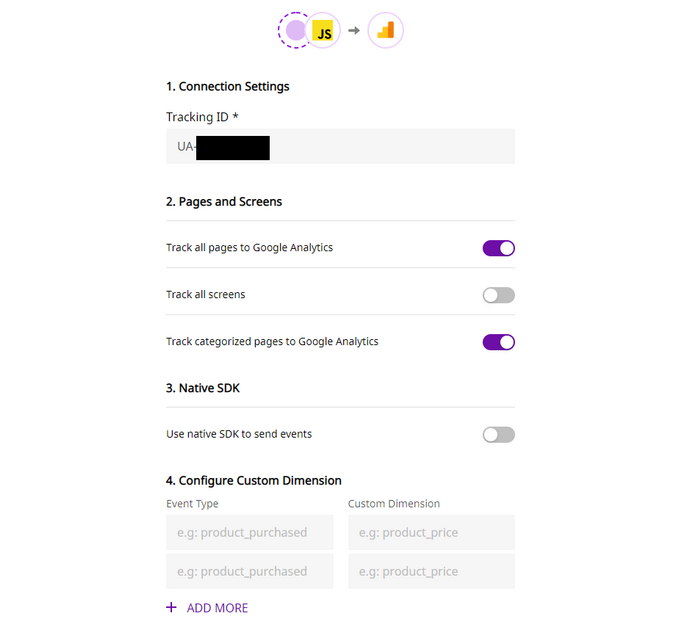
- Configure a Google Analytics destination on the RudderStack dashboard using the instructions in the guide mentioned previously. Use the Google Analytics tracking ID you kept from step 2 of this section:
(RudderStack, CC BY-SA 4.0)
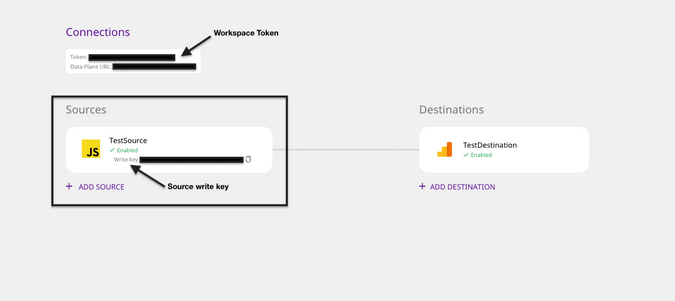
- As mentioned before, RudderStack bundles a shell script that generates test events. Get the Source write key from the RudderStack dashboard:
(RudderStack, CC BY-SA 4.0)
- Next, run:
./scripts/generate-event <YOUR_WRITE_KEY> https://hosted.rudderlabs.com/v1/batch - Finally, log into your Google Analytics account and verify that the events were delivered. In your Google Analytics account, navigate to RealTime -> Events. The RealTime view is important because some dashboards can take one to two days to refresh.
Optional: Setting up the open source control plane
RudderStack's core architecture contains two major components: the data plane and the control plane. The data plane, rudder-server, delivers your event data, and the RudderStack hosted control plane manages the configuration of your sources and destinations.
However, if you want to manage the source and destination configurations locally, you can set an open source control plane in your environment using the RudderStack Config Generator. (You must have Node.js installed on your system to use it.)
Here are the steps to set up the control plane:
- Install and set up RudderStack on the platform of your choice by following the instructions above.
- Run the following commands in this order:
cd utils/config-gennpm installnpm start
You should now be able to access the open source control plane at https://localhost:3000 by default. If your setup is successful, you will see the user interface.
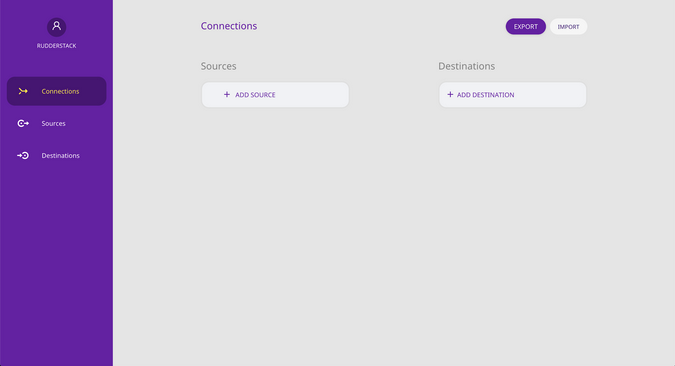
(RudderStack, CC BY-SA 4.0)
To export the existing workspace configuration from the RudderStack-hosted control plane and have RudderStack use it, consult the docs.
RudderStack and open source
The core of RudderStack is in the rudder-server repository. It is open source, licensed under AGPL-3.0. A majority of the destination integrations live in the rudder-transformer repository. They are open source as well, licensed under the MIT License. The SDKs and instrumentation repositories, several tool and utility repositories, and even some dbt model repositories for use-cases like customer journey analysis and sessionization for the data residing in your data warehouse are open source, licensed under the MIT License, and available in the GitHub repository.
You can use RudderStack's open source offering, rudder-server, on your platform of choice. There are setup guides for Docker, Kubernetes, native installation, and developer machines.
RudderStack open source offers:
- RudderStack event stream
- 15+ SDKs and source integrations to ingest event data
- 80+ destination and warehouse integrations
- Slack community support
RudderStack Cloud
RudderStack also offers a managed option, RudderStack Cloud. It is fast, reliable, and highly scalable with a multi-node architecture and sophisticated error-handling mechanism. You can hit peak event volume without worrying about downtime, loss of events, or latency.
Explore our open source repos on GitHub, subscribe to our blog, and follow us on social media: Twitter, LinkedIn, dev.to, Medium, and YouTube!




Comments are closed.