As users migrate away from Twitter, many wonder what the equivalent of the famous blue checkmark is on Mastodon. Ignoring debates about how anyone can be sure of anyone's true identity online, it's easy to verify yourself on Mastodon when you have a WordPress site.
1. Get your verification code
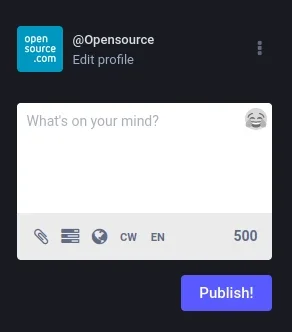
Sign in to your Mastodon account and click the edit profile link under your Mastodon handle.
(Seth Kenlon, CC BY-SA 4.0)
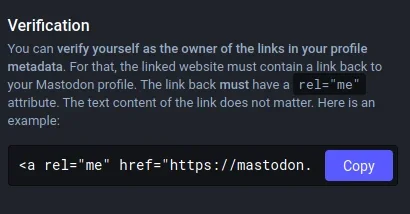
In the Edit Profile screen that appears, scroll down to the Verification section. This section contains a special verification code. Click the Copy button to copy your verification code to your clipboard.
(Seth Kenlon, CC BY-SA 4.0)
2. Paste your code on your WordPress site
To assure people that the same person running your Mastodon account also runs your website, you must paste your verification code into your WordPress site. You can create a post to serve especially for this purpose, or you can put it into your site's footer, or you can make it a social link.
The easiest method is to create a special post to serve as your verification page. In your WordPress dashboard, click the Posts link in the left panel, and then select Add New.
In the post editor, give your post a title, and then type the word "Mastodon" into the body. You can type more than just the word "Mastodon," of course. You might want to type a nice post about your new social network, inviting people to join you there and follow you. Or you might keep it simple. It's up to you.
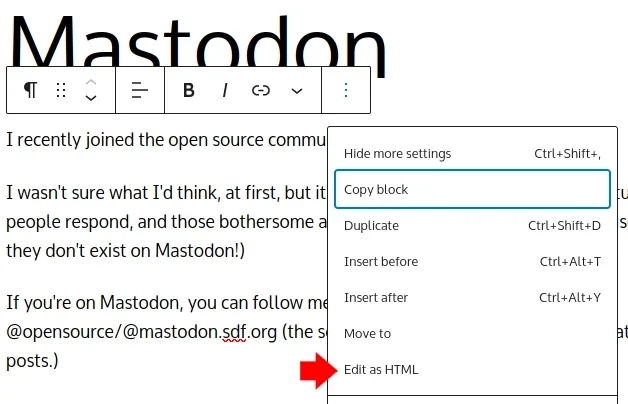
Once you've got some text, hover your mouse over the text block in WordPress until a pop-up toolbar appears. Click the three-dot icon ("Options") and select Edit as HTML.
(Seth Kenlon, CC BY-SA 4.0)
This exposes the HTML code inside the text block. Don't worry, you don't need to know how to code for this to work. Select the word "Mastodon" in the text block, and then paste your Mastodon verification code in its place.
Click the Update or Publish button in the top right corner of the WordPress editor interface. Your post must be published for Mastodon to detect your link.
3. Add your post URL to Mastodon
Once your verification post is published, visit the page and copy the web address from your web browser's URL bar. For example, the sample post I wrote is located at https://myexamplewebsite.tk/wp/uncategorized/i-joined-mastodon.
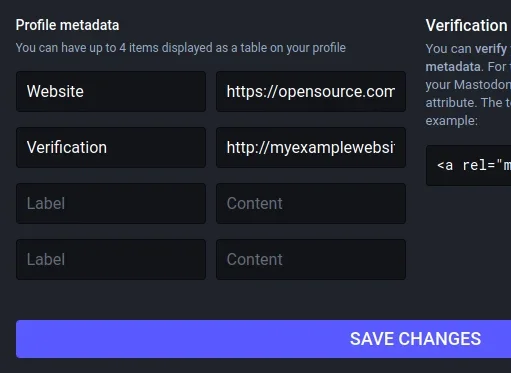
In your browser, return to the Edit Profile screen of Mastodon. Locate the Profile Metadata section, and type Website into the Label field and then paste the URL of your verification post in the Content field.
(Seth Kenlon, CC BY-SA 4.0)
Click the Save Changes button and return to your profile page to see your newly verified status.
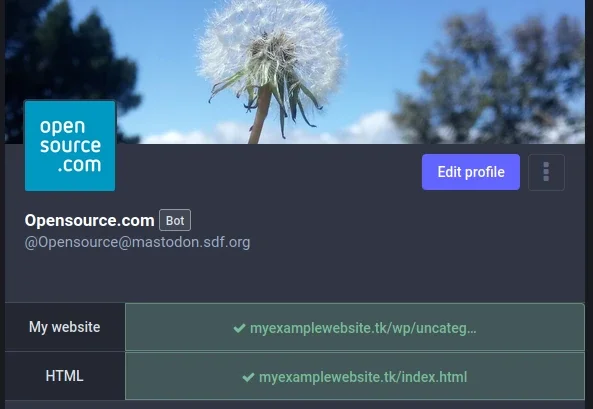
(Seth Kenlon, CC BY-SA 4.0)
On some Mastodon servers, it seems that verification may take an hour or so to resolve, but on two of the three I've tested, the green checkmark appeared immediately after saving.
Verifiably cool
Strictly speaking, the word "Mastodon" in the verification code is arbitrary. In this article, I've encouraged using that because it's the default and most obvious word to link back to your Mastodon profile. However, if you're interested in the technical aspect, then what really matters is that a link to your profile page, with the rel="me" attribute, appears on a page of a website you control. The contents of the link don't actually matter.
A green checkmark on Mastodon indicates proof that the same person controlling your Mastodon account also controls your website. Ultimately, that's as good as "identification" gets on the Internet. Blue checkmarks might look and feel official, but identification services online can't ever guarantee that a person at a computer is the same person from one day to the next. Mastodon acknowledges this and offers verification options for every user. With a no-cost WordPress blog and a no-cost Mastodon account, you can demonstrate to your friends that the same person (you) posting on the blog is the same person active on social media.


Comments are closed.