Markdown is one of most popular document formats among developers and non-developers alike. It is easy to write and understand, but organizing Markdown docs is difficult. In this post I will introduce you to Doctor, a documentation server, that lets you manage your project's documentation with minimum effort.
Think of Doctor as a content management system (CMS), but instead of a traditional database backend, it uses your Markdown documents as the backend. Simply add the path to your documents in the Doctor dashboard, and Doctor then serves these documents on the web. You can also use Doctor to aggregate multiple Markdown files from multiple repositories into a single documentation site. So, Doctor essentially decouples document context from document serving—irrespective of where your documents reside, on Google Drive, GitHub, Dropbox, ownCloud, or somewhere else, you can easily serve them via a website.
Licensed under the Apache v2.0 license, Doctor was created by the team behind Minio, an object storage server. Minio uses Doctor to host their documentation. Check out this live Doctor demo.
Installation
You can either install Doctor the traditional way, i.e. install the framework and database and then run Doctor, or you can use Docker to quickly launch a Doctor instance and see it in action. I will discuss both the steps here, starting with the traditional method.
To install Doctor on your system, you need to have these installed:
- Ruby 2.2.2 and Rails 4.2.4
- PostgreSQL
Once you have these installed, run these commands to install and run Doctor:
$ git clone https://github.com/minio/doctor.git
$ cd doctor
$ bundle install
$ rake db:drop
$ rake db:setup
$ rails s
If you'd rather have a Docker container running your Doctor instance, run the following commands. Note that you'll need to have Docker installed on your system before doing this:
$ git clone https://github.com/minio/doctor.git
$ cd doctor
$ docker-compose up
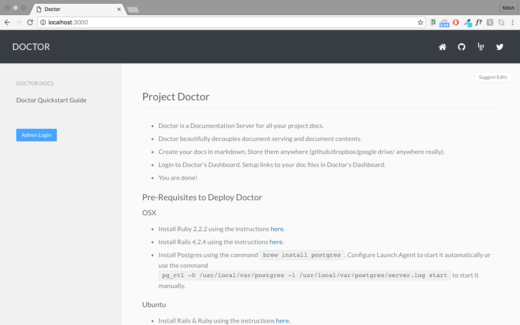
After successfully installing Doctor, you can visit the homepage via your browser. Just type https://localhost:3000 in the address bar. You should see something like this:
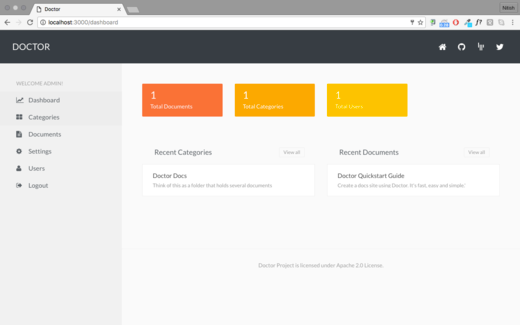
Use email sysadmin@doctor.io and password Doctor!23 to login to the dashboard. The dashboard looks like this on the first login:
Basics
The Doctor dashboard lets you categorize, add, group, remove and publish documents. To start with, you need a category where you can add new documents. This gives a logical grouping to the documents.
To add a category, click on the Categories link. Then click New Category button on the right top corner. You can then add the title and description of the new category:
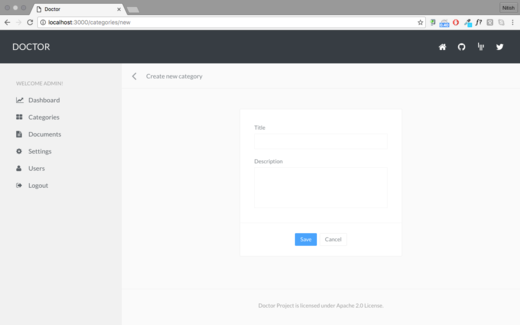
Once a category is added, it automatically appears when you add a new document.
The next step is to add a new document. Click on the Documents link and then the New Document button on the top right corner. You can then fill the form that appears. This will add a new document and a corresponding web page:
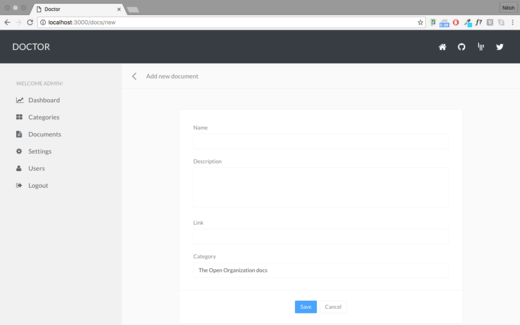
Note that you should enter the link to your raw Markdown file, or the page will not be rendered properly.
For demo purposes I added the link to The Open Organization Field Guide from the Opensource.com GitHub profile. Here is how it looks:
You can see how the pages are neatly arranged under corresponding categories on the left.
Customization
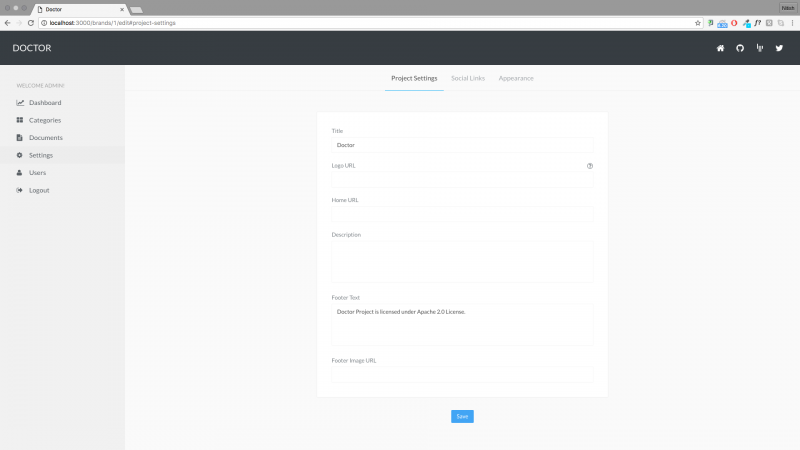
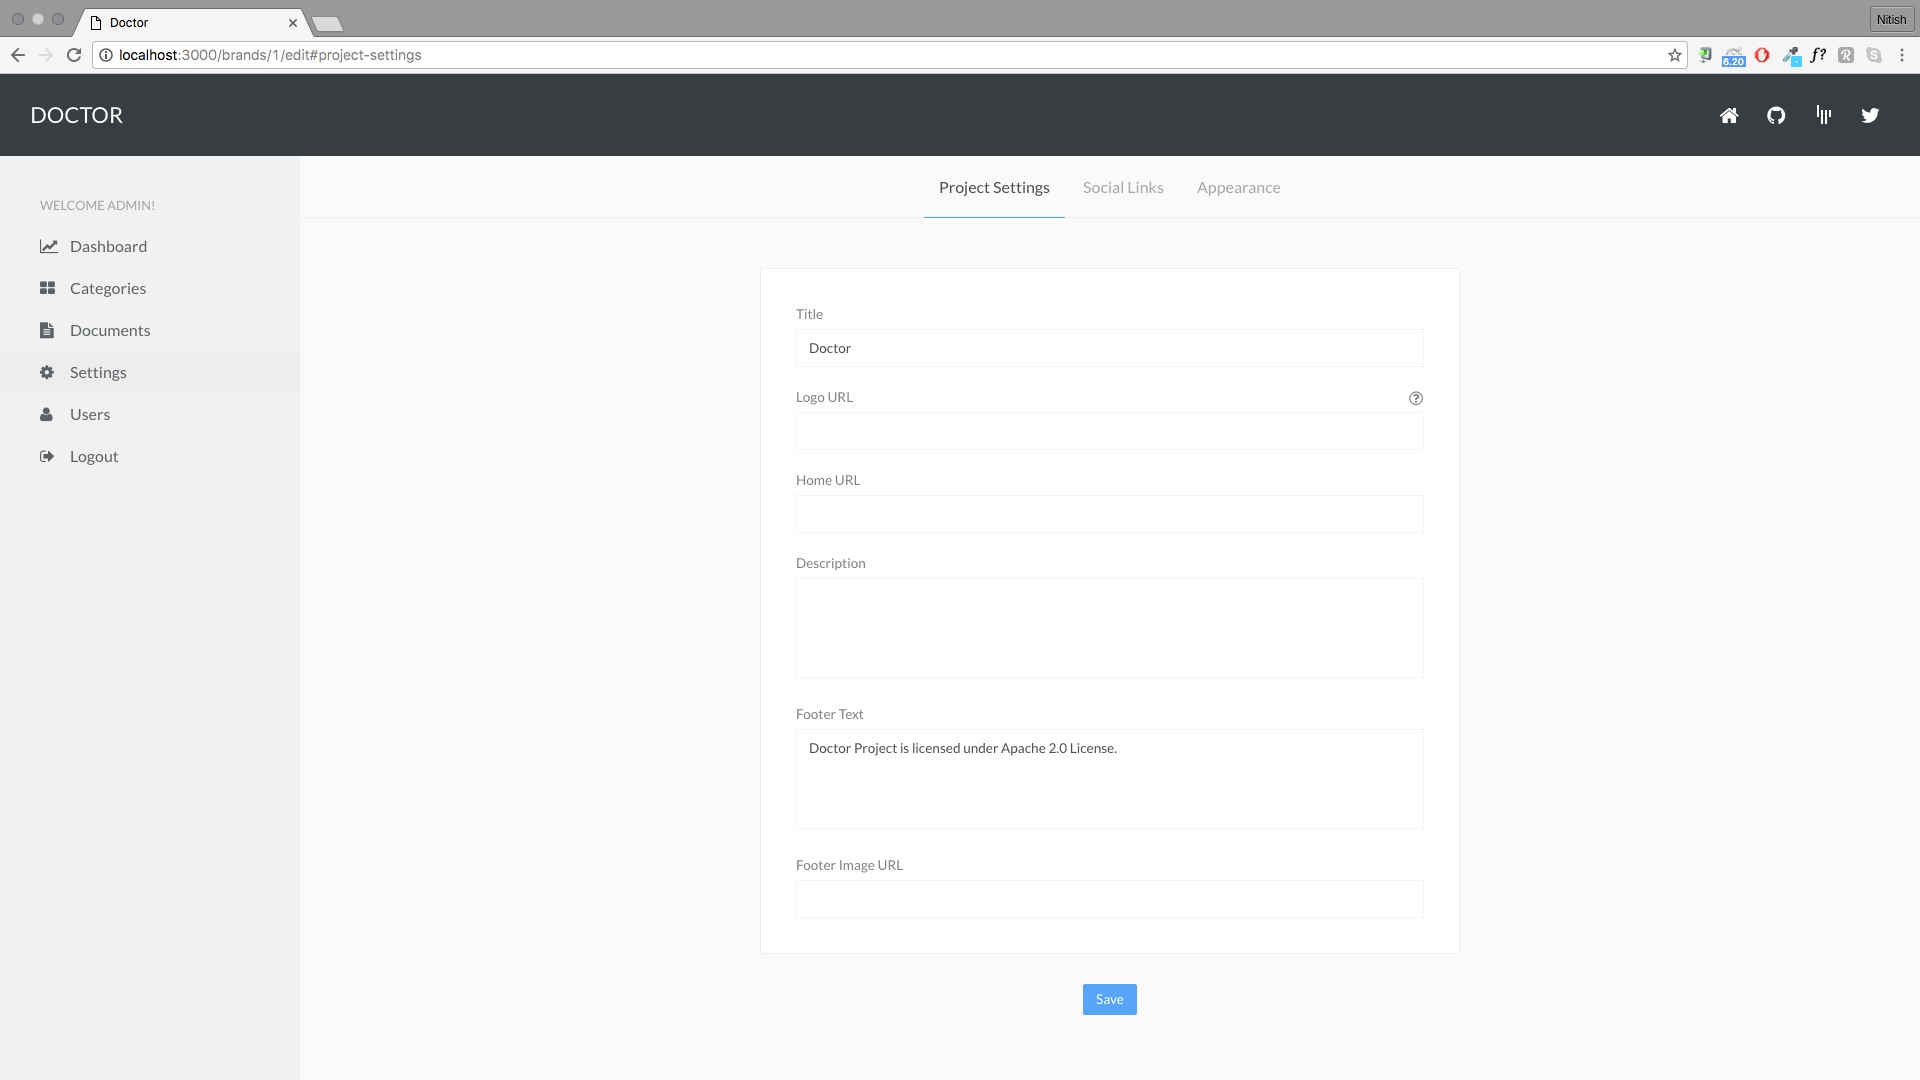
To customize Doctor pages, click on the Settings link. Here you can see the options to manage Project Settings, Social Links, and Appearance. Project settings section lets you edit the title, logo, home URL, and description. You can add the social media links of your project via Social Links section. The Appearance tab lets you customize the color scheme, font family, and font size.
Doctor also provides user management via dashboard. Click Users to add or remove users who can have access to the dashboard.
Conclusion
If you need to manage documents written in Markdown format, it is very easy to get started with Doctor. With Doctor you can manage and publish your Markdown documents on the Internet with minimal effort.


2 Comments