"Hello world" is the beginning of everything when it comes to computing and programming. It's the first thing you learn in a new programming language, and it's the way you test something out or check to see if something's working because it's usually the simplest way of testing simple functionality.
Warriors of programming language wars often cite their own language's "hello world" against that of another, saying theirs is shorter or more concise or more explicit or something. Having a nice simple readable "hello world" program makes for a good intro for beginners learning your language, library, framework, or tool.
I thought it would be cool to create a list of as many different "hello world" programs as possible that can be run on the Raspberry Pi using its Raspbian operating system, but without installing any additional software than what comes bundled when you download it from the Raspberry Pi website. I've created a GitHub repository of these programs, and I've explained 10 of them for you here.
1. Scratch
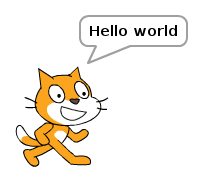
Scratch is a graphical block-based programming environment designed for kids to learn programming skills without having to type or learn the synax of a programming language. The "hello world" for Scratch is simple—and very visual!
1. Open Scratch 2 from the main menu.
2. Click Looks.
3. Drag a say Hello! block into the workspace on the right.
4. Change the text to Hello world.
5. Click on the block to run the code.
2. Python
Python is a powerful and professional language that's also great for beginners— and it's lots of fun to learn. Because one of Python's main objectives was to be readable and stick to simple English, its "hello world" program is as simple as possible.
- Open Thonny Python IDE from the main menu.
- Enter the following code:
print("Hello world") - Save the file as
hello3.py. - Click the Run button.

opensource.com
3. Ruby/Sonic Pi
Ruby is another powerful language that's friendly for beginners. Sonic Pi, the live coding music synth, is built on top of Ruby, so what users actually type is a form of Ruby.
- Open Sonic Pi from the main menu.
- Enter the following code:
puts "Hello world" - Press Run.
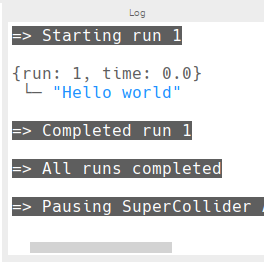
Unfortunately, "hello world" does not do Sonic Pi justice in the slightest, but after you've finished this article you should check out its creator Sam Aaron live coding, and see the tutorials on the Sonic Pi website.
Alternatively, to using the Sonic Pi application for this example, you can write Ruby code in a text editor and run it in the terminal:
- Open Text Editor from the main menu.
- Enter the following code:
puts "Hello world" - Save the file as
hello.rbin the home directory. - Open Terminal from the main menu.
- Run the following command:
ruby hello.rb

4. JavaScript
This is a bit of a cheat as I just make use of client-side JavaScript within the web browser using the Web Inspector console, but it still counts!
- Open Chromium Web Browser from the main menu.
- Right-click the empty web page and select Inspect from the context menu.
- Click the Console tab.
- Enter the following code:
console.log("Hello world") - Press Enter to run.

You can also install NodeJS on the Raspberry Pi, and write server-side JavaScript, but that's not available in the standard Raspbian image.
5. Bash
Bash (Bourne Again Shell) is the default Unix shell command language in most Linux distributions, including Raspbian. You can enter Bash commands directly into a terminal window, or script them into a file and execute the file like a programming script.
- Open Text Editor from the main menu.
- Enter the following code:
echo "Hello world" - Save the file as
hello.shin the home directory. - Open Terminal from the main menu.
- Run the following command:
bash hello.sh

Note you'd usually see a "hashbang" at the top of the script (#!/bin/bash), but because I'm calling this script directly using the bash command, it's not necessary (and I'm trying to keep all these examples as short as possible).
You'd also usually make the file executable with chmod +x, but again, this is not necessary as I'm executing with bash.
6. Java
Java is a popular language in industry, and is commonly taught to undergraduates studying computer science. I learned it at university and have tried to avoid touching it since then. Apparently, now I do (very small amounts of) it for fun...
- Open Text Editor from the main menu.
- Enter the following code:
public class Hello { public static void main(String[] args) { System.out.println("Hello world"); } } - Save the file as
Hello.javain the home directory. - Open Terminal from the main menu.
- Run the following commands:
javac Hello.java
java Hello

I could almost remember the "hello world" for Java off the top of my head, but not quite. I always forget where the String[] args bit goes, but it's obvious when you think about it...
7. C
C is a fundamental low-level programming language. It's what many programming languages are written in. It's what operating systems are written in. See for yourself&mdash:take a look at the source for Python and the Linux kernel. If that looks a bit hazy, get started with "hello world":
- Open Text Editor from the main menu.
- Enter the following code:
#include <stdio.h> int main() { printf("Hello world\n"); } - Save the file as
hello.cin the home directory. - Open Terminal from the main menu.
- Run the following commands:
gcc -o hello hello.c
./hello

Note that in the previous examples, only one command was required to run the code (e.g., python3 hello.py or ruby hello.rb) because these languages are interpreted rather than compiled. (Actually Python is compiled at runtime but that's a minor detail.) C code is compiled into byte code and the byte code is executed.
If you're interested in learning C, the Raspberry Pi Foundation publishes a book Learning to code with C written by one of its engineers. You can buy it in print or download for free.
8. C++
C's younger bother, C++ (that's C incremented by one...) is another fundamental low-level language, with more advanced language features included, such as classes. It's popular in a range of uses, including game development, and chunks of your operating system will be written in C++ too.
- Open Text Editor from the main menu.
- Enter the following code:
#include <iostream> using namespace std; int main() { cout << "Hello world\n"; } - Save the file as
hello.cppin the home directory. - Open Terminal from the main menu.
- Run the following commands:
g++ -o hellopp hello.cpp
./hellocpp

Readers familiar with C/C++ will notice I have not included the main function return values in my examples. This is intentional as to remove boilerplate, which is not strictly necessary.
9. Perl
Perl gets a lot of stick for being hard to read, but nothing much gets in the way of understanding its "hello world" program. So far, so good!
- Open Text Editor from the main menu.
- Enter the following code:
print "Hello world\n" - Save the file as
hello.plin the home directory. - Open Terminal from the main menu.
- Run the following command:
perl hello.pl

Again, I learned Perl at university, but unlike Java, I have managed to successfully avoid using it.
10. Python extras: Minecraft and the Sense HAT emulator
So that's nine different programming languages covered, but let's finish with a bit more Python. The popular computer game Minecraft is available for Raspberry Pi, and comes bundled with Raspbian. A Python library allows you to communicate with your Minecraft world, so open Minecraft and a Python editor side-by-side for some fun hacking your virtual world with code.
- Open Minecraft Pi from the main menu.
- Create and enter a Minecraft world.
- Press Tab to release your focus from the Minecraft window.
- Open Thonny Python IDE from the main menu.
- Enter the following code:
from mcpi.minecraft import Minecraft mc = Minecraft.create() mc.postToChat("Hello world") - Save the file as
hellomc.py. - Click the Run button.

Read more about hacking Minecraft with Python in my article Getting started with Minecraft Pi.
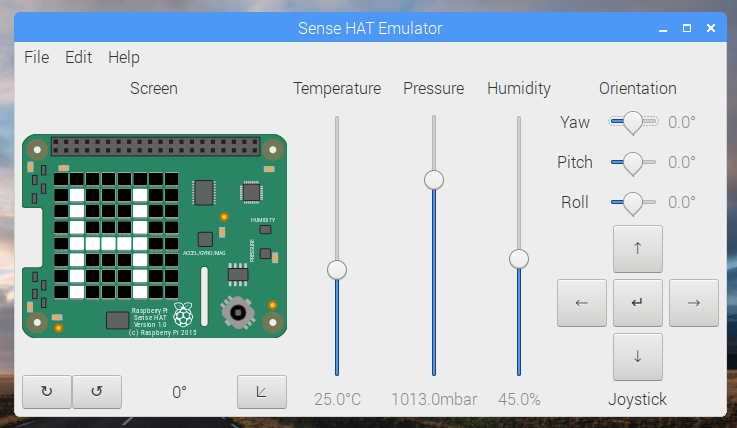
Finally, let's look at the Sense HAT Emulator. This tool provides a graphical representation of the Sense HAT, an add-on board for Raspberry Pi made especially to go to space for reasons explained in this article.
The sense_emu Python library is identical to the sense_hat library except that its commands get executed in the emulator rather than on a physical piece of hardware. Because the Sense HAT includes an 8x8 LED display, we can use its show_message function to write "hello world".
- Open another tab in Thonny and enter the following code:
from sense_emu import SenseHat sense = SenseHat() sense.show_message("Hello world") - Save the file as
sense.py. - Click the Run button.
More
That's it! I hope you learned something new, and have fun trying out new "hello world" programs on your Raspberry Pi!
You can find more on the GitHub repository —and feel free to suggest more in an issue, or send me a pull request with your contribution. If you have any other interesting "hello world" programs you want to share—related to Raspberry Pi or not—please share them in the comments below.





9 Comments