A remote desktop, according to Wikipedia, is "a software or operating system feature that allows a personal computer's desktop environment to be run remotely on one system (usually a PC, but the concept applies equally to a server), while being displayed on a separate client device."
In other words, a remote desktop is used to access an environment running on another computer. For example, the ManageIQ/Integration tests repository's pull request (PR) testing system exposes a Virtual Network Computing (VNC) connection port so I can remotely view my PRs being tested in real time. Remote desktops are also used to help customers solve computer problems: with the customer's permission, you can establish a VNC or Remote Desktop Protocol (RDP) connection to see or interactively access the computer to troubleshoot or repair the problem.
These connections are made using remote desktop connection software, and there are many options available. I use Remmina because I like its minimal, easy-to-use user interface (UI). It's written in GTK+ and is open source under the GNU GPL license.
In this article, I'll explain how to use the Remmina client to connect remotely from a Linux computer to a Windows 10 system and a Red Hat Enterprise Linux 7 system.
Install Remmina on Linux
First, you need to install Remmina on the computer you'll use to access the other computer(s) remotely. If you're using Fedora, you can run the following command to install Remmina:
sudo dnf install -y remminaIf you want to install Remmina on a different Linux platform, follow these installation instructions. You should then find Remmina with your other apps (Remmina is selected in this image).
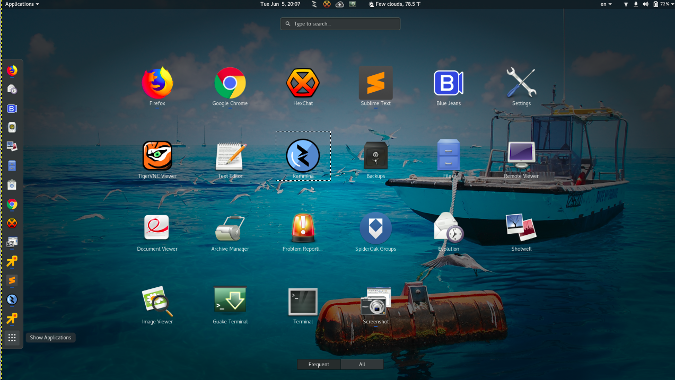
Launch Remmina by clicking on the icon. You should see a screen that resembles this:
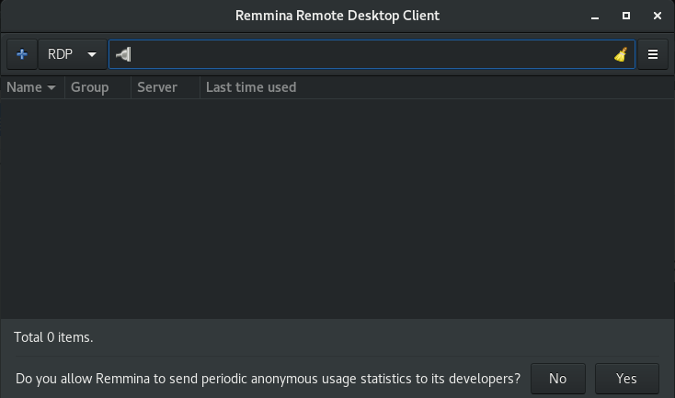
Remmina offers several types of connections, including RDP, which is used to connect to Windows-based computers, and VNC, which is used to connect to Linux machines. As you can see in the top-left corner above, Remmina's default setting is RDP.
Connecting to Windows 10
According to Microsoft's product matrix, Windows 10 Home edition does not include the ability to connect over RDP, so you must be running Pro or Enterprise editions to connect over RDP.
Before you can connect to a Windows 10 computer through RDP, you must change some permissions to allow remote desktop sharing and connections through your firewall.
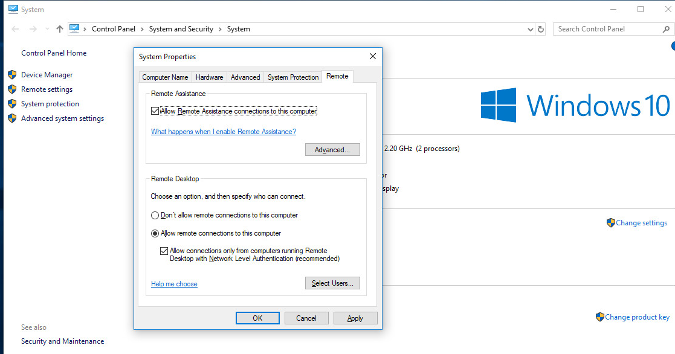
To enable remote desktop sharing, in File Explorer right-click on My Computer → Properties → Remote Settings and, in the pop-up that opens, check Allow remote connections to this computer, then select Apply.
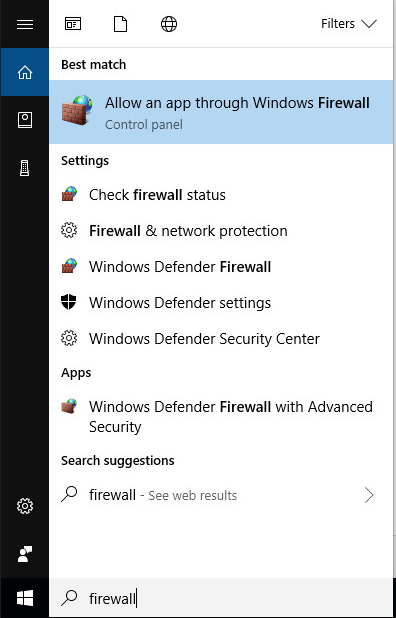
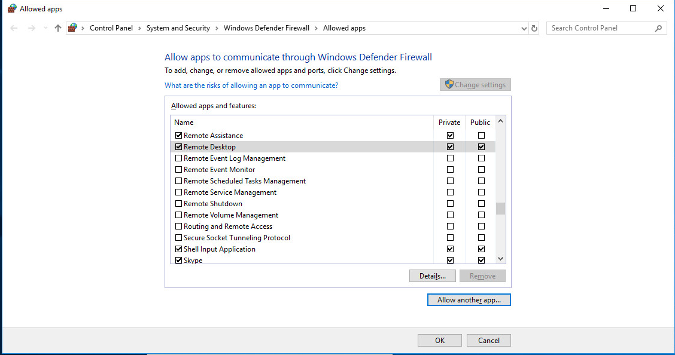
Next, enable remote desktop connections through your firewall. First, search for firewall settings in the Start menu and select Allow an app through Windows Firewall.
In the window that opens, look for Remote Desktop under Allowed apps and features. Check the box(es) in the Private and/or Public columns, depending on the type of network(s) you will use to access this desktop. Click OK.
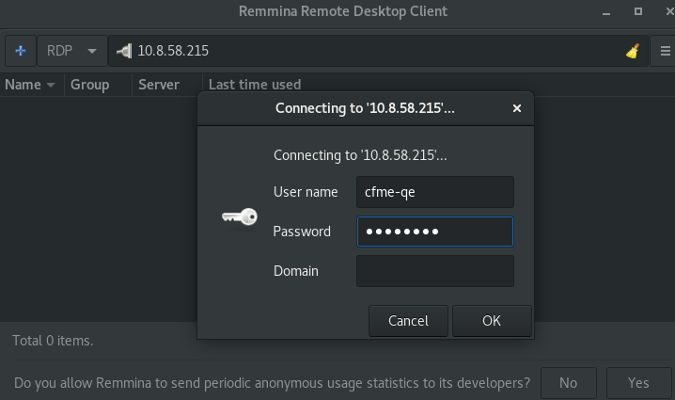
Go to the Linux computer you use to remotely access the Windows PC and launch Remmina. Enter the IP address of your Windows computer and hit the Enter key. (How do I locate my IP address in Linux and Windows 10?) When prompted, enter your username and password and click OK.
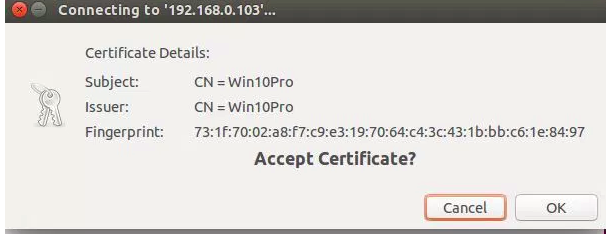
If you're asked to accept the certificate, select OK.
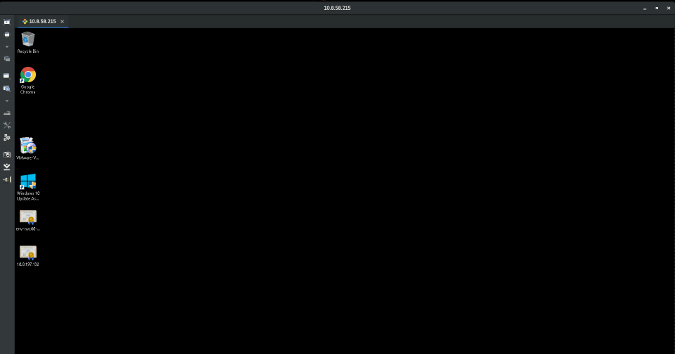
You should be able to see your Windows 10 computer's desktop.
Connecting to Red Hat Enterprise Linux
To set permissions to enable remote access on your Linux computer, open Settings from the Activities menu in the top left corner of the GNOME desktop.
Click on the Sharing category.
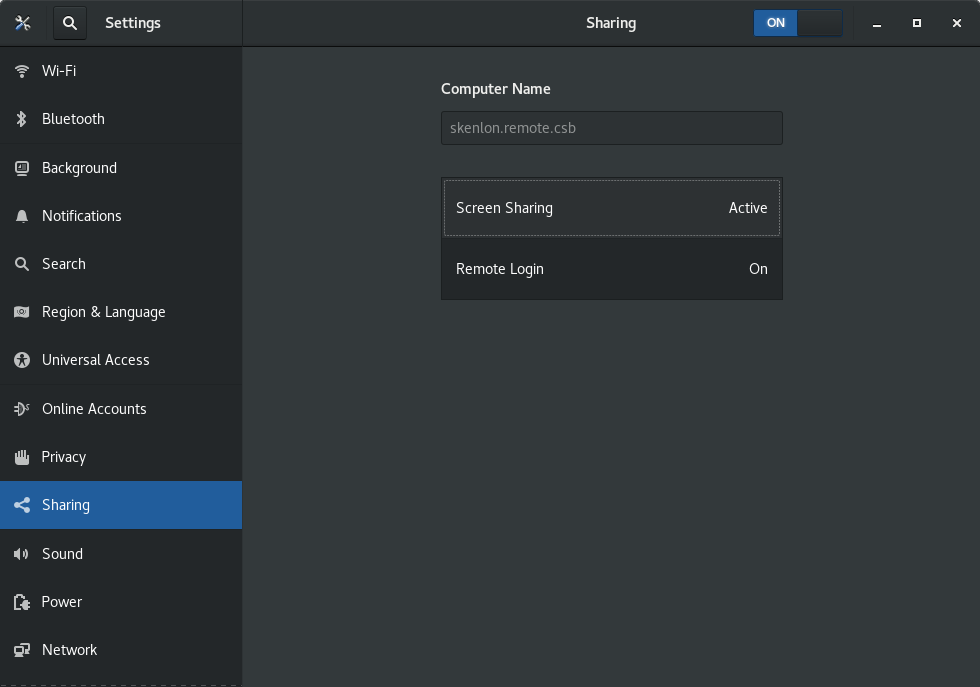
Enable Screen Sharing (and Allow connections to control screen, when prompted). You can also select between two access options: one that prompts the computer's primary user to accept or deny the connection request, and another that allows connection authentication with a password. At the bottom of the window, select the network interface where connections are allowed, then close the window.
Next, open Firewall Settings from Applications Menu → Sundry → Firewall.
Next, head to Remmina on your remote computer, enter the IP address of the Linux desktop you want to connect with, select VNC as the protocol, and hit the Enter key.
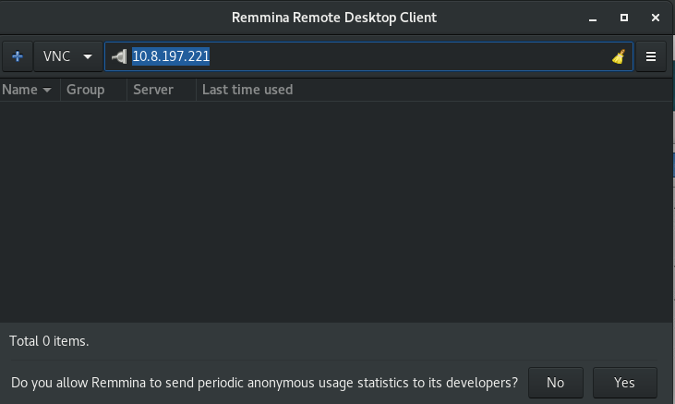
If you previously chose the authentication option New connections must ask for access, the RHEL system's user will see a prompt like this:

Select Accept for the remote connection to succeed.
If you chose the option to authenticate the connection with a password, Remmina will prompt you for the password.
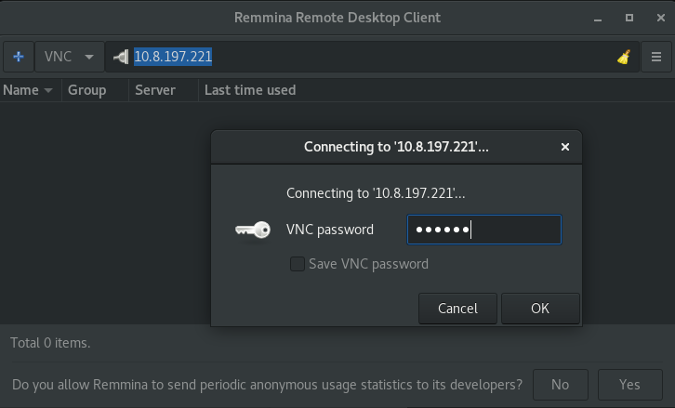
Enter the password and hit OK, and you should be connected to the remote computer.
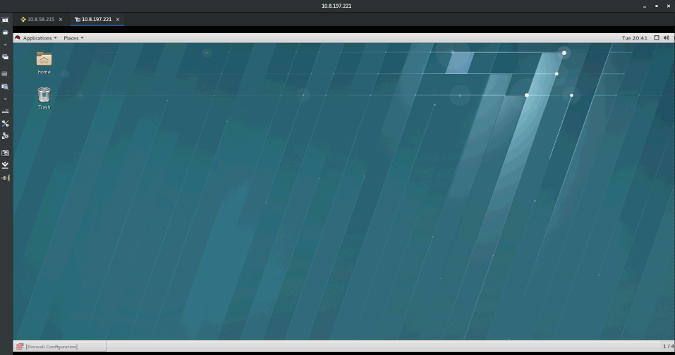
Using Remmina
Remmina offers a tabbed UI, as shown in above picture, much like a web browser. In the top-left corner, as shown in the screenshot above, you can see two tabs: one for the previously established Windows 10 connection and a new one for the RHEL connection.
On the left-hand side of the window, there is a toolbar with options such as Resize Window, Full-Screen Mode, Preferences, Screenshot, Disconnect, and more. Explore them and see which ones work best for you.
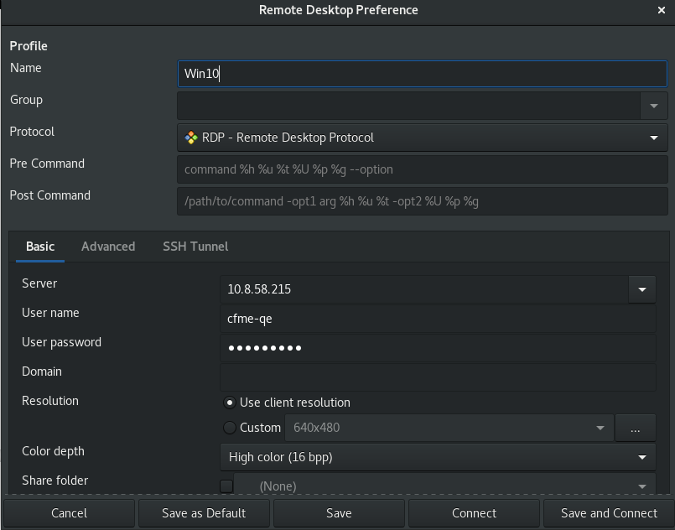
You can also create saved connections in Remmina by clicking on the + (plus) sign in the top-left corner. Fill in the form with details specific to your connection and click Save. Here is an example Windows 10 RDP connection:
The next time you open Remmina, the connection will be available.
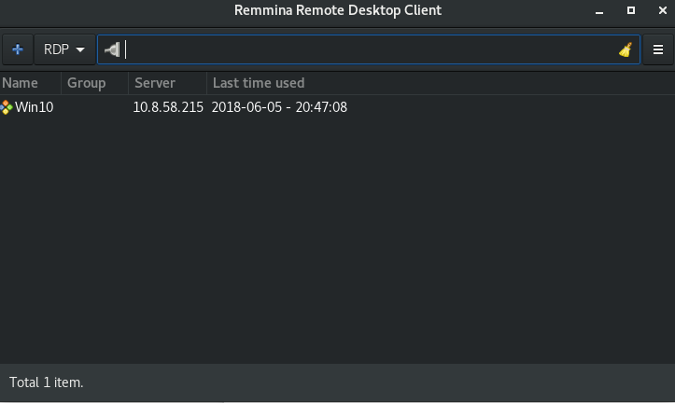
Just click on it, and your connection will be established without re-entering the details.
Additional info
When you use remote desktop software, all the operations you perform take place on the remote desktop and use its resources—Remmina (or similar software) is just a way to interact with that desktop. You can also access a computer remotely through SSH, but it usually limits you to a text-only terminal to that computer.
You should also note that enabling remote connections with your computer could cause serious damage if an attacker uses this method to gain access to your computer. Therefore, it is wise to disallow remote desktop connections and block related services in your firewall when you are not actively using Remote Desktop.
This article originally published in June 2018 and has been updated by the editor.


4 Comments