In my previous article, I explained how to set up a DIY Blynk Board using an ESP8266 based microcontroller. Blynk is an easy way to start creating Internet of Things projects. It's not tied to any specific board, so you can use the platform to control Arduino, Raspberry Pi, and other hardware of your choice over the internet.
The DIY Blynk Board comes with more than 10 preconfigured projects. My earlier article showed how to set up the DIY Blynk Board and test the first project: using the button widget to receive a digital input and produce a digital output. Specifically, pressing a button on the Blynk app toggled a physical LED attached to the board.
In this article, I'll experiment with another project: using a button connected to the Blynk Board to toggle a virtual "LED" in the app.
Note: This is an adapted version of a SparkFun tutorial for the Blynk Board. All images are from this tutorial and licensed CC BY-SA 4.0.
Gather the gear
- An ESP8266-based DIY Blynk Board
(Note: Use this tutorial to set up your Blynk Board.) - A pushbutton
- Two Dupont wires
- A breadboard
- The Blynk app
(Note: Before going any further, download the app to your iOS or Android mobile device.)
Set up the Blynk app's LED
First, we'll add an LED widget to the Blynk app using these instructions from SparkFun's project page:
- If your button widget project from the first article is still running, touch the square button in the upper-right corner to stop it.
- Touch anywhere in the blank project space to open the widget box.
- Select the LED widget near the top of the "Displays" section.
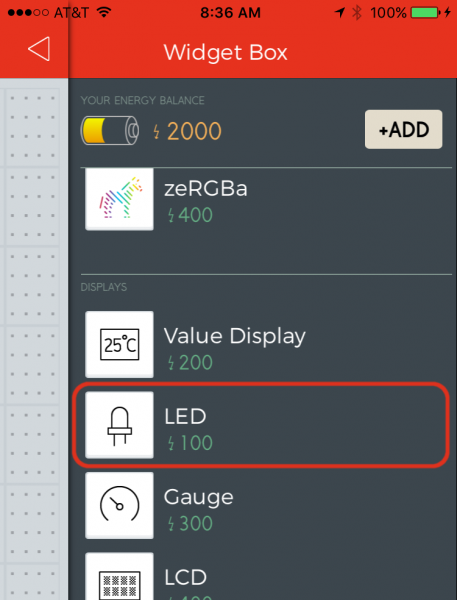
- Drag and position the LED widget anywhere in your project space.
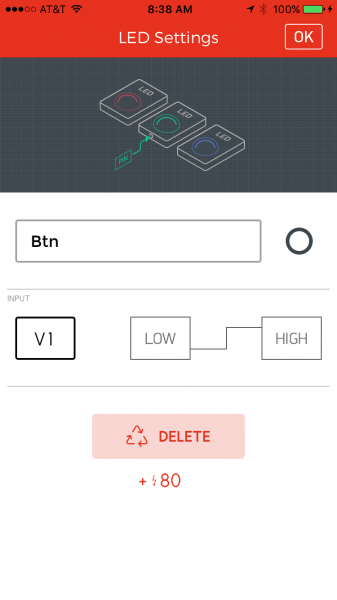
- Touch the LED widget to open the Settings dialog and adjust these values:
- Name: "Btn" (not "Button," for reasons…)
- Pin: V1. Any pin beginning with a "V" will be found under the "Virtual" list.
- Color: Touch the red circle to change the color of your LED. You can even set it up as a mythical black LED.
Wire the DIY Blynk Board
Wire the pushbutton as shown in the diagram below:
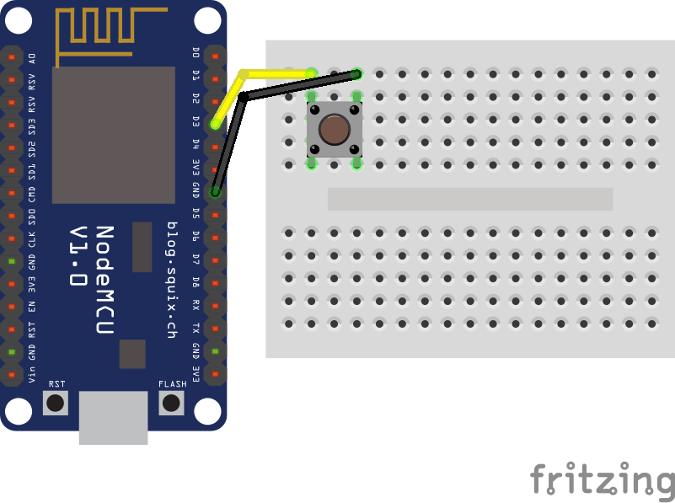
Connect one wire from the D3 (GPIO 0) pin to one leg of the pushbutton and another wire from the GND (ground) pin to the corresponding leg of the pushbutton.
Run your Blynk project
- Power on the Blynk Board.
- In the Blynk app, touch the Play button in the upper-right corner to start the project.
- With your project running, push down on the pushbutton.
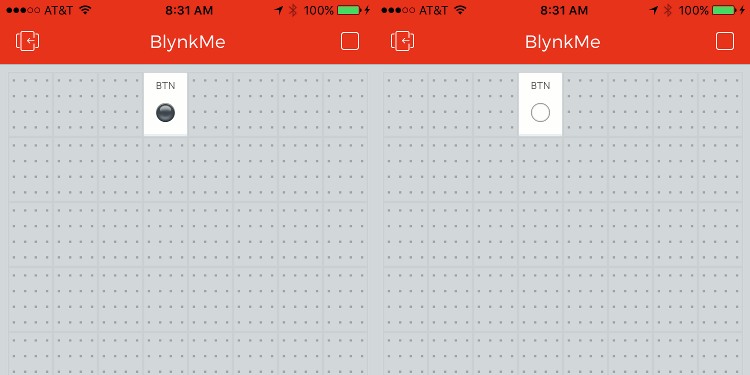
While you're holding down the button, you should see the Blynk project's LED illuminate. Depending on lag time, the LED may take a couple of seconds to respond after the button is pressed. Releasing the button will turn the LED off.
That's it! You have learned how to use a pushbutton connected to the DIY Blynk Board to toggle a virtual LED in the app.




Comments are closed.