Recently, my husband was telling me about an upcoming job interview where he would have to run through some basic commands on a computer. He was anxious about the interview, but the best way for him to learn and remember things has always been to equate the thing he doesn't know to something very familiar to him. Because our conversation happened right after I was roaming the grocery store trying to decide what to cook that evening, it inspired me to write about kubectl and Helm commands by equating them to an ordinary trip to the grocer.
Helm is a tool to manage applications within Kubernetes. You can easily deploy charts with your application information, allowing them to be up and preconfigured in minutes within your Kubernetes environment. When you're learning something new, it's always helpful to look at chart examples to see how they are used, so if you have time, take a look at these stable charts.
Kubectl is a command line that interfaces with Kubernetes environments, allowing you to configure and manage your cluster. It does require some configuration to work within environments, so take a look through the documentation to see what you need to do.
I'll use namespaces in the examples, which you can learn about in my article Kubernetes namespaces for beginners.
Now that we have that settled, let's start shopping for basic kubectl and Helm commands!
Helm list
What is the first thing you do before you go to the store? Well, if you're organized, you make a list. LIkewise, this is the first basic Helm command I will explain.
In a Helm-deployed application, list provides details about an application's current release. In this example, I have one deployed application—the Jenkins CI/CD application. Running the basic list command always brings up the default namespace. Since I don't have anything deployed in the default namespace, nothing shows up:
$ helm list
NAME    NAMESPACE    REVISION    UPDATED    STATUS    CHART    APP VERSION
However, if I run the command with an extra flag, my application and information appear:
$ helm list --all-namespaces
NAME  	 NAMESPACE  REVISION  UPDATED                   STATUS      CHART           APP  VERSION
jenkins  jenkins 	1         2020-01-18 16:18:07 EST   deployed    jenkins-1.9.4   lts
Finally, I can direct the list command to check only the namespace I want information from:
$ helm list --namespace jenkins
NAME  	 NAMESPACE  REVISION  UPDATED                   STATUS 	  CHART          APP VERSION
jenkins    jenkins 	1  	       2020-01-18 16:18:07 EST  deployed  jenkins-1.9.4  lts
Now that I have a list and know what is on it, I can go and get my items with get commands! I'll start with the Kubernetes cluster; what can I get from it?
Kubectl get
The kubectl get command gives information about many things in Kubernetes, including pods, nodes, and namespaces. Again, without a namespace flag, you'll always land in the default. First, I'll get the namespaces in the cluster to see what's running:
$ kubectl get namespaces
NAME          	 STATUS   AGE
default       	 Active   53m
jenkins       	 Active   44m
kube-node-lease  Active   53m
kube-public   	 Active   53m
kube-system   	 Active   53m
Now that I have the namespaces running in my environment, I'll get the nodes and see how many are running:
$ kubectl get nodes
NAME   	   STATUS   ROLES	AGE   VERSION
minikube   Ready    master  55m   v1.16.2
I have one node up and running, mainly because my Minikube is running on one small server. To get the pods running on my one node:
$ kubectl get pods
No resources found in default namespace.
Oops, it's empty. I'll get what's in my Jenkins namespace with:
$ kubectl get pods --namespace jenkins
NAME                   	  READY  STATUS	  RESTARTS  AGE
jenkins-7fc688c874-mh7gv  1/1 	 Running  0         40m
Good news! There's one pod, it hasn't restarted, and it has been running for 40 minutes. Well, since I know the pod is up, I want to see what I can get from Helm.
Helm get
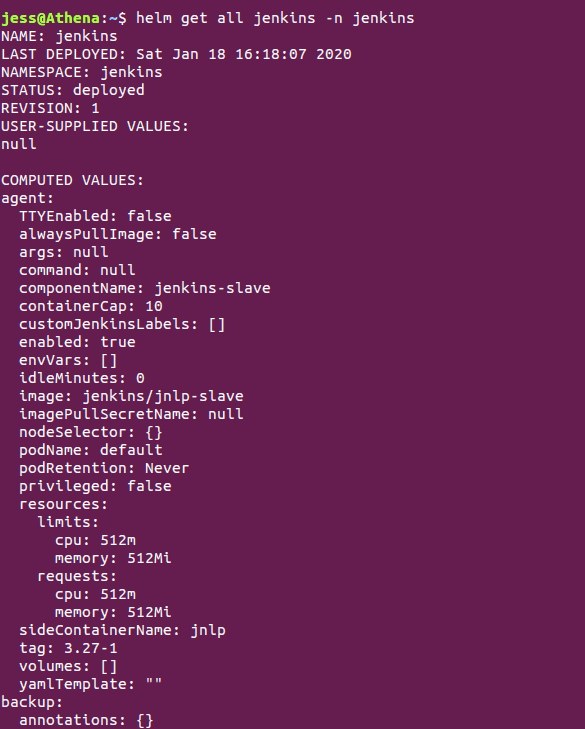
Helm get is a little more complicated because this get command requires more than an application name, and you can request multiple things from applications. I'll begin by getting the values used to make the application, and then I'll show a snip of the get all action, which provides all the data related to the application.
$ helm get values jenkins -n jenkins
USER-SUPPLIED VALUES:
null
Since I did a very minimal stable-only install, the configuration didn't change. If I run the all command, I get everything out of the chart:
$ helm get all jenkins -n jenkins

This produces a ton of data, so I always recommend keeping a copy of a Helm chart so you can look over the templates in the chart. I also create my own values to see what I have in place.
Now that I have all my goodies in my shopping cart, I'll check the labels that describe what's in them. These examples pertain only to kubectl, and they describe what I've deployed through Helm.
Kubectl describe
As I did with the get command, which can describe just about anything in Kubernetes, I'll limit my examples to namespaces, pods, and nodes. Since I know I'm working with one of each, this will be easy.
$ kubectl describe ns jenkins
Name:     	jenkins
Labels:   	<none>
Annotations:  <none>
Status:   	Active
No resource quota.
No resource limits.
I can see my namespace's name and that it is active and has no resource nor quote limits.
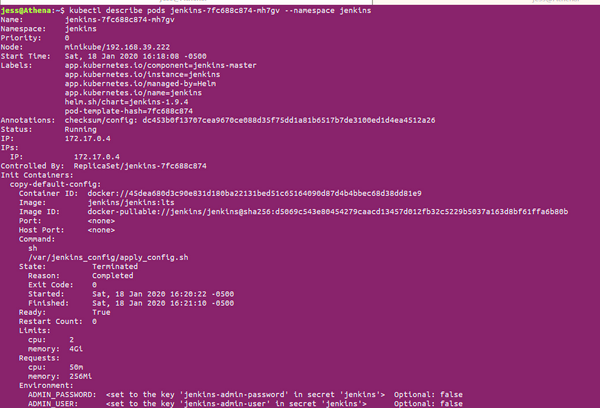
The describe pods command produces a large amount of information, so I'll provide a small snip of the output. If you run the command without the pod name, it will return information for all of the pods in the namespace, which can be overwhelming. So, be sure you always include the pod name with this command. For example:
$ kubectl describe pods jenkins-7fc688c874-mh7gv --namespace jenkins

This provides (among many other things) the status of the container, how the container is managed, the label, and the image used in the pod. The data not in this abbreviated output includes resource requests and limits along with any conditions, init containers, and storage volume information applied in a Helm values file. This data is useful if your application is crashing due to inadequate resources, a configured init container that runs a prescript for configuration, or generated hidden passwords that shouldn't be in a plain text YAML file.
Finally, I'll use describe node, which (of course) describes the node. Since this example has just one, named Minikube, that is what I'll use; if you have multiple nodes in your environment, you must include the node name of interest.
As with pods, the node command produces an abundance of data, so I'll include just a snip of the output.
$ kubectl describe node minikube

Note that describe node is one of the more important basic commands. As this image shows, the command returns statistics that indicate when the node is running out of resources, and this data is excellent for alerting you when you need to scale up (if you do not have autoscaling in your environment). Other things not in this snippet of output include the percentages of requests made for all resources and limits, as well as the age and allocation of resources (e.g., for my application).
Checking out
With these commands, I've finished my shopping and gotten everything I was looking for. Hopefully, these basic commands can help you, too, in your day-to-day with Kubernetes.
I urge you to work with the command line often and learn the shorthand flags available in the Help sections, which you can access by running these commands:
$ helm --helpand
$ kubectl -hPeanut butter and jelly
Some things just go together like peanut butter and jelly. Helm and kubectl are a little like that.
I often use these tools in my environment. Because they have many similarities in a ton of places, after using one, I usually need to follow up with the other. For example, I can do a Helm deployment and watch it fail using kubectl. Try them together, and see what they can do for you.


Comments are closed.