I grew up with console gaming and over the years I have had a number of systems, including Atari, SNES, Sega Genesis, and my all-time-favorite—the Commodore Amiga. I recently found a backup of old games I have been carrying around with me for years and got nostalgic for the glory days of retro gaming. I grabbed some old hardware and started tinkering with it so I could relive my childhood. I was surprised how well these games run on my Raspberry Pi and it's become something of a new hobby.
In this article, I'll break down how to get started. I'll also show how you can really go to town on your retro gaming rig to relive the glory days of gaming.
Supply list
- Raspberry Pi 3
- MicroSD card
- Downloaded image of RetroPie
- Flash drive
- Case
- Gamepad
- Keyboard and mouse (optional, but handy)
- Monitor or TV that uses HDMI
- Speakers (Optional: If you use a TV that supports audio via HDMI you won't need them.)
Raspberry Pi
The latest version of the Raspberry Pi has built in Wi-Fi and Bluetooth, which is handy for managing your games as well as being able to use a Bluetooth gamepad or keyboard and mouse without the need for USB dongles or cables.

Raspberry Pi 3
MicroSD card
The Raspberry Pi doesn't have a hard drive, so you need to be able to install an operating system. This is done using a microSD card. I am using a 16GB card, but the install will be fine using 8GB. We will store our ROMs on the flash drive.
Having a larger card is handy, but if you're doing it on a budget, you can go with a 16GB card and have plenty of space. There's a lot of choices for cards, there's plenty of good articles with good comparisons of the different cards. As well as a card, having an adapter so you can plug it into your computer is handy; this is how we "flash" the operating system on to the card.
RetroPie
The RetroPie distribution is the tool of choice for your Raspberry Pi gaming system. RetroPie is based off of Raspbian and wraps all the emulators into a nice tidy bundle. I have been able to run it out of the box with very little tweaking. It's also stable and actively maintained, with updates and fixes released regularly. When I first installed RetroPie and plugged in my flash drive, I was able to start playing games almost straight away, which I will admit did delay the rest of the build as I got caught up in a game of Battle Pinball. You aren't limited to using a Raspberry Pi; the software will run on other hardware, such as the Odroid-C1/C2, or you can use an old PC or laptop.
RetroPie Splash
Flash drive
The ROMs will take up the most space and, rather than have them on the microSD card, you can store them on a USB flash drive, and RetroPie can copy all the configuration files and directories onto the card so all you have to do is add your games to the folders. I used a card that doesn't stick out too far from the USB port so it's reasonably flush with the Pi. I used a Samsung 128GB flash drive, which turned out to be slightly more expensive than the Raspberry Pi but it has enough capacity to hold all my games, so I think it was worth it. As of today, I have only used 11GB of space, so the size is dependent on how many games you have.
Cases
A case is a better option than having an open circuit board with wires sticking out everywhere, which is the current state of my desk. I am using an inexpensive case by Smraza, which isn't very retro looking, but it came with a fan and all the cables I need to get started. I think for my next build I would go with something more inline with retro gaming, along the lines of an NES Case, which has a more old-school console look and feel, but still comes with cooling and all the cables. There are also plenty of 3D models available if you'd like to build your own.
Gamepad
I have an old F310 Gamepad from Logitech, which is a wired controller using USB and just works really well out of the box with RetroPie. I love the feel of it and it's great value for money. My next upgrade is an 8Bitdo Bluetooth controller to capture the retro experience, but with the convenience of Bluetooth. These controllers work well with RetroPie.
Keyboard and mouse
Having a keyboard and mouse connected while you're working with RetroPie is a good idea. You don't need one, but I found myself popping into a terminal to make tweaks, and a keyboard made it much easier. The other reason is that I wanted to install an Amiga emulator and Frotz so I could play Infocom text adventures. Having a keyboard is essential at that point. I opted for a mouse and keyboard from AmazonBasics.
Monitor/TV and audio
The Pi will use HDMI for output to a monitor or TV. If you are using a TV that supports audio over HDMI, you don't have to worry about speakers as the TV will output audio and video through HDMI. I am using a monitor on my setup, so to get audio working I opted for a couple of speakers from Adafruit, which work really well.
Getting started
First we need to download the RetroPie image and flash it to the microSD card. Once you have the image downloaded, you can follow the instructions on the RetroPie page for your operating system.
Because I run Linux, I used the instructions on the Raspbian download page. If you prefer a graphical tool, use Etcher, which makes the install easy and runs on Windows, macOS, and Linux.
Using Etcher
- Download Etcher and install it.
- Connect an SD card reader with the SD card inside.
- Open Etcher and select from your hard drive the Raspberry Pi .img or .zip file you wish to write to the SD card.
- Select the SD card to which you want to write your image.
- Review your selections and click Flash! to begin writing data to the SD card.
Assemble your Raspberry Pi
Follow the instructions that came with your case on how to install your Pi into it. Connect your TV (or monitor) into the HDMI port, speakers into the speaker jack (if you're using speakers), and the gamepad into the USB. Plug in your newly flashed microSD card into the slot under the Pi. Once you plug in the power to the USB port, the Pi will boot off the microSD card. Some cases add a switch to the cable for convenience. Note that I haven't plugged the flash drive in yet, that will come later. For reference, here's the general layout of the Pi 3.
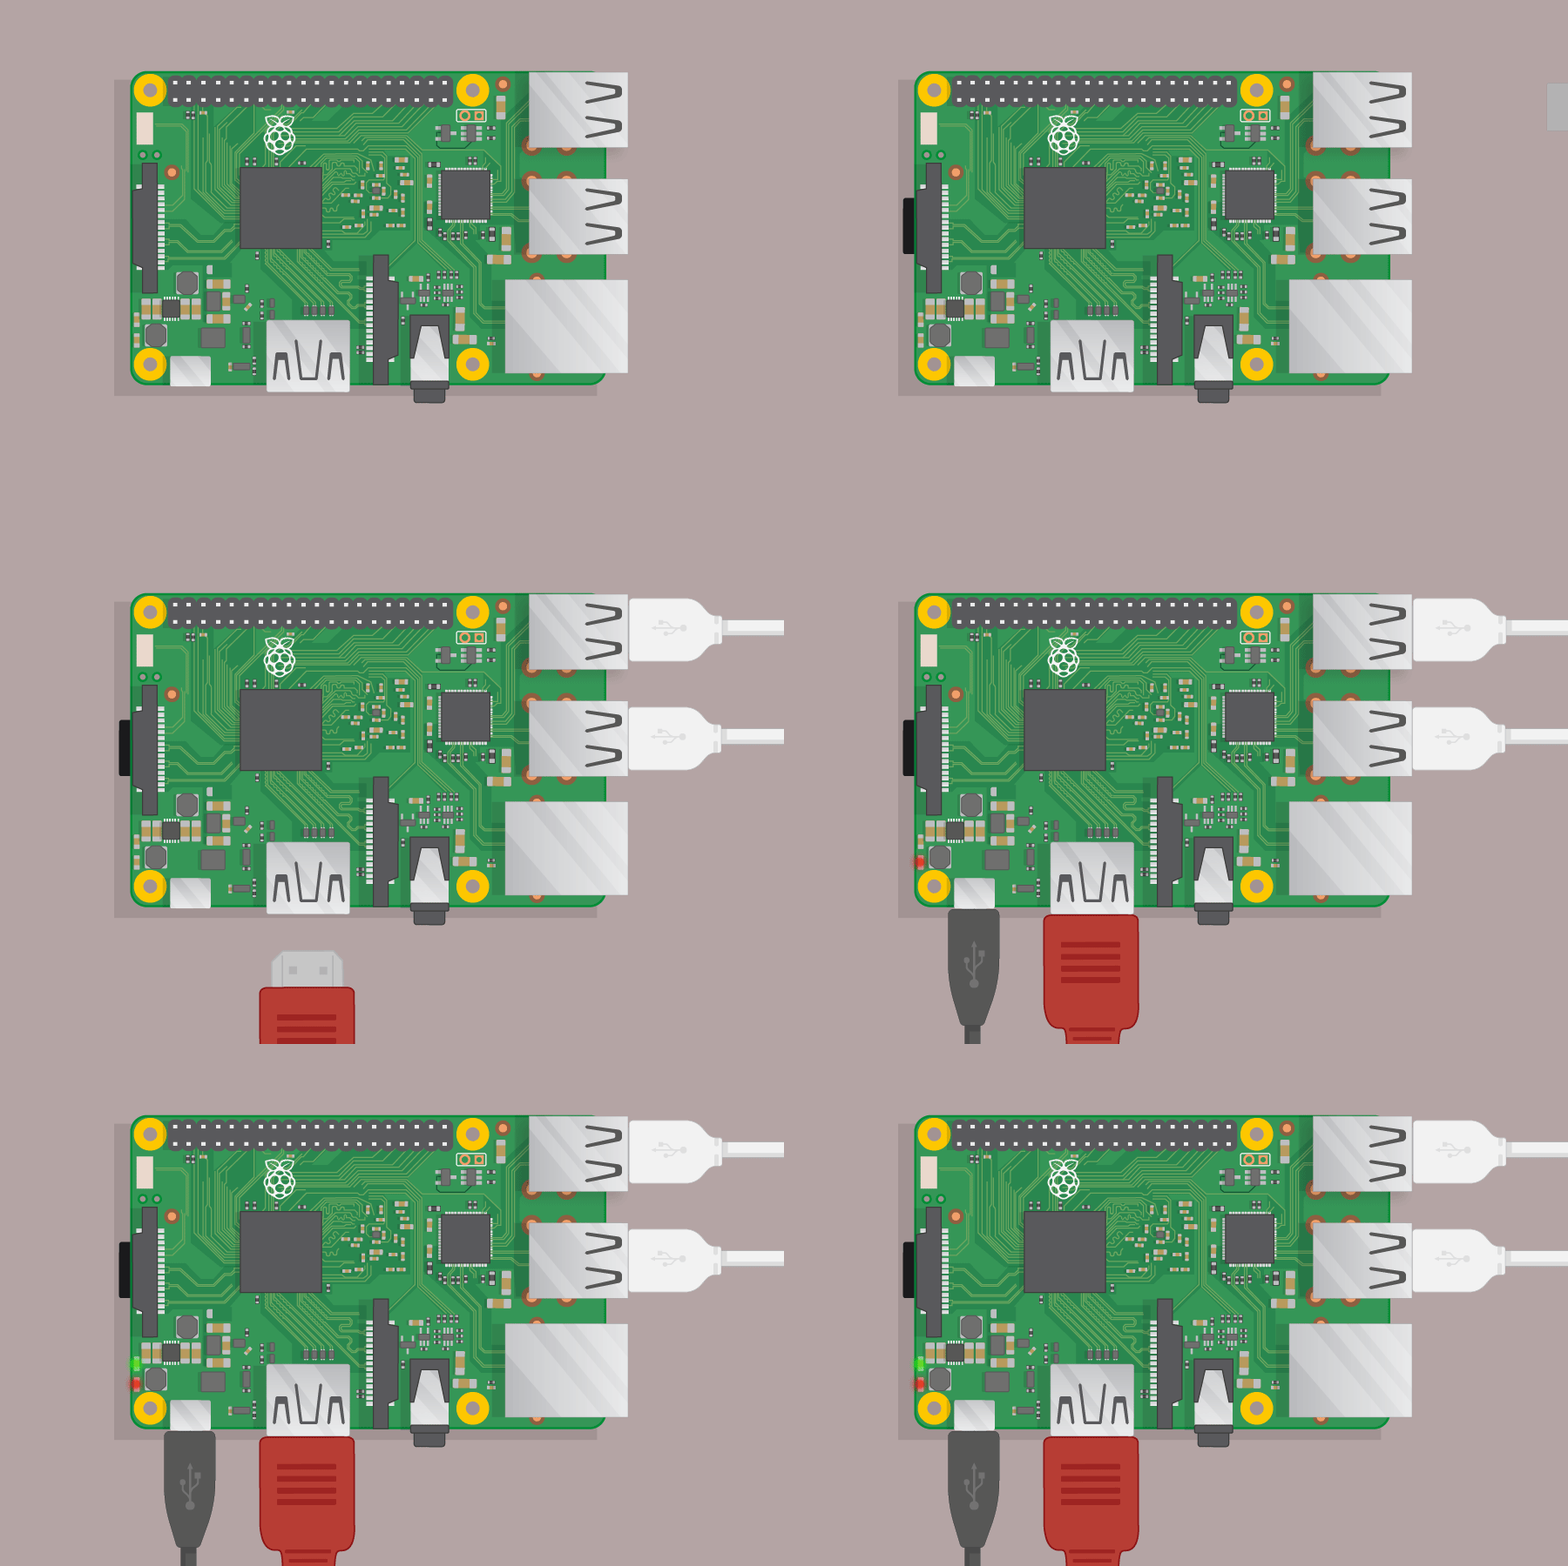
The Raspberry Pi layout. Image by Raspberry Pi Foundation. CC BY-SA 4.0
ETA Prime has a great channel on YouTube with informative videos on RetroGaming. Here's his video on how to get to this point.
When you plug in the power to the USB port, your RetroPie will boot and will first ask to configure the gamepad installed. Follow the instructions on screen to configure the buttons on your gamepad. You can navigate most options using a gamepad once it's configured.
Congratulations! You're up and running. Now let's look at how to play these classic game titles.
Using the flash drive
RetroPie creates directories for your ROMs and they are stored on the microSD card. We want to use the flash drive instead. Luckily RetroPie does all the heavy lifting.
- Add a directory to the flash drive called retropie-mount.
- Restart emulation station.
RetroPie will copy the directories from the SD card and into the flash drive, then it configures the SD card to mount the folders under your home drive. This means that all the games you store on the flash drive will be mounted onto your home drive when you boot the emulator. It's fun to see the total space available on your microSD card showing as 8GB, when the folder with your ROM contains 11GB because it's using the flash drive.
Loading games
Under the ROMs directory on your flash drive, you'll see a folder for each emulator you have running. Drop your games into that folder and they automatically will show up on emulation station. If they don't show up, you can press the Start button on your controller while in the main screen and restart emulation station. They will automatically show up on restart.
If you are using Amiga games, they often came on multiple disks. So a game would be rtype[0].adf, rtype[1].adf. You can zip them together as rtype.zip so they only show up once. Amibian, the emulator that manages Amiga games, will extract the games and can piece them together to run the game.
How do I clean up this mess of cables?
You should be up and running, but if you desk now looks like a mad scientist's lab, you need to consider how to wrap everything up in a neat and tidy bundle. Here are a few projects on YouTube that look fun and show the versatility of what you can do with a RetroPie setup:
- Retro Tube: A vintage TV-style case, complete with monitor.
- Mini Arcade Cabinet: A DIY project to build a portable bar top arcade cabinet.
- RetroBox: An arcade controls and combined Raspberry Pi cabinet.
Troubleshooting
- I made a mistake configuring my gamepad and now I'm stuck in the config screen: I ran into this working with my gamepad. Hold down any key and it will skip the selection, and when you are at the bottom of the screen you can use the gamepad to navigate back to the selection that caused a problem and retry it.
- How do I quit a game and go back to emulation station?: I loved this problem. I was playing a game and realized I didn't know how to get back to the main window. To do this, use the key on your gamepad that you defined as the hotkey and the Start button at the same time. If your gamepad doesn't have a button you can use for a hotkey, skip the selection by holding down any key and you will be prompted to assign a combination of the Select button and Start button to use for quitting games. My Logitech has a Logitech button, which I assigned as the hotkey, so to quit a game, I use the Logitech button and Start. On my 8bitdo controller, I use Select and Start to quit back to EmulationStation. If you are using the Amiga emulation, Amibian defines F11 to quit, which is configurable. On ScummVM you can use CTRL + Q to exit a game..
- Why are some games pixelated?: These games were often designed to run on a CRT monitor, which had scanlines and lower resolutions than a modern monitor. To soften the pixels, you can use an option under the RetroPie configuration screen to "soften" games for a specific emulator, or you can look into a shader, which is an overlay that can simulate the look of a CRT, complete with scanlines and a host of other options. Have a play with them to find a combination you like.
- How do I get the box art and game info in?: When you have a game selected, press the Select button on your gamepad, you will get an option to edit the metadata for that game. Scroll to the bottom of the menu and use the Scrape button. This will query an online game database and download information about the game, along with box art. If it doesn't find the game, you can enter the information by hand.





6 Comments