There are many Kubernetes administration tools to choose from, whether you prefer a command-line utility or a graphical user interface. I recently covered k9s, a text-based interface that many day-to-day Kubernetes administrators enjoy, but you have to navigate through many Kubernetes-specific terms to use it. A lot of people who use Kubernetes less often would rather have a colorful, clean visual guide. This is where Lens, an open source integrated development environment (IDE) tool for administering Kubernetes clusters, comes in.
Install Lens
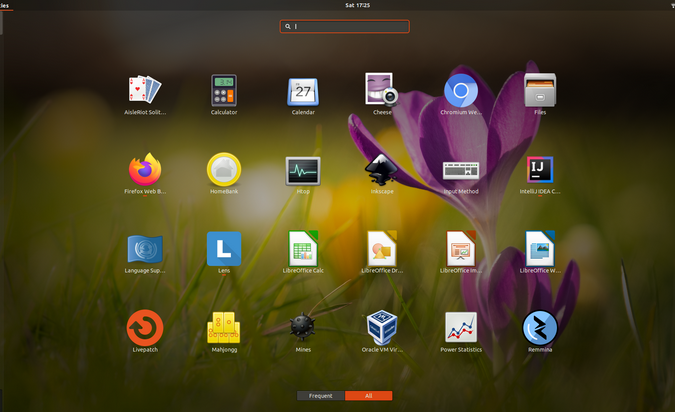
You can download Lens for Linux, macOS, or Windows from either its GitHub page or its website. Linux installs are offered through AppImage, and this tutorial walks you through the installation process. After installation, Lens appeared in my applications list (the blue box with the L in the center).
(Jess Cherry, CC BY-SA 4.0)
Add a cluster
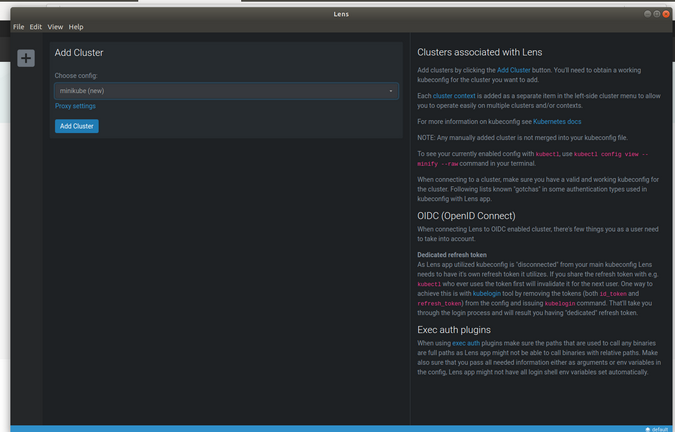
Managing Kubernetes means keeping an eye on one or more clusters. To add a cluster to Lens, click the large + sign, choose your cluster from the drop-down list, and click Add Cluster. Environments are automatically picked up from your ~/.kube/config file.
(Jess Cherry, CC BY-SA 4.0)
Explore Lens' menus
Lens gives you all the information you need about a cluster it manages. To help you get started, I'll explore the Lens menu sections with screenshots to show you what information and options they offer.
If you need a refresher on Kubernetes terminology, A beginner's guide to Kubernetes container orchestration is a good place to read about it.
Nodes menu
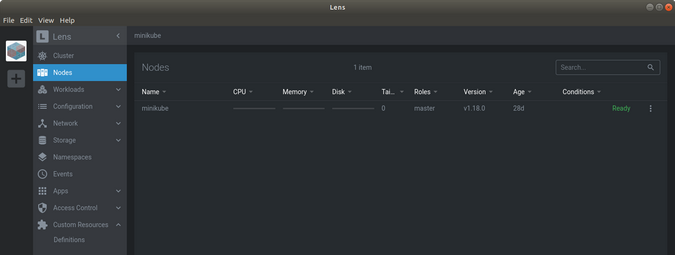
First, look at the Nodes. A node can be a virtual machine or physical (bare metal) machine depending on the cluster. Each node contains the services necessary to run Pods, managed by the control plane. We can start by checking if our nodes are up and running in a Ready state. If there were an issue, this page would provide details as to what is wrong with the node.
(Jess Cherry, CC BY-SA 4.0)
Workloads menu
The Workloads section provides a lot of information about your cluster. You can access its subsections with either the menu on the left or at the top of the pane—both work the same way.
Overview
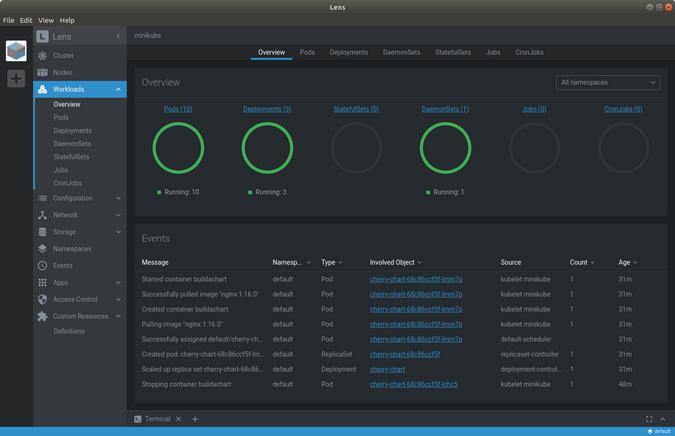
Click Overview to see the events happening in the cluster, as well as how many Pods, Deployments, StatefulSets, DaemonSets, Jobs, and CronJobs are running in it. You can select each Overview item to see details about it.
(Jess Cherry, CC BY-SA 4.0)
Pods
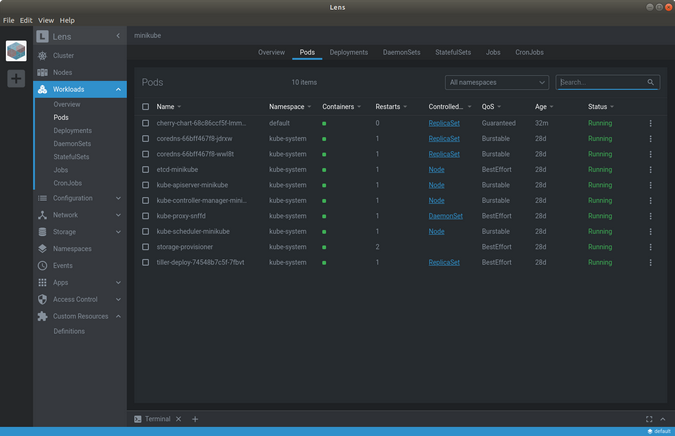
Click Pods to see a list of the pods in the cluster.
(Jess Cherry, CC BY-SA 4.0)
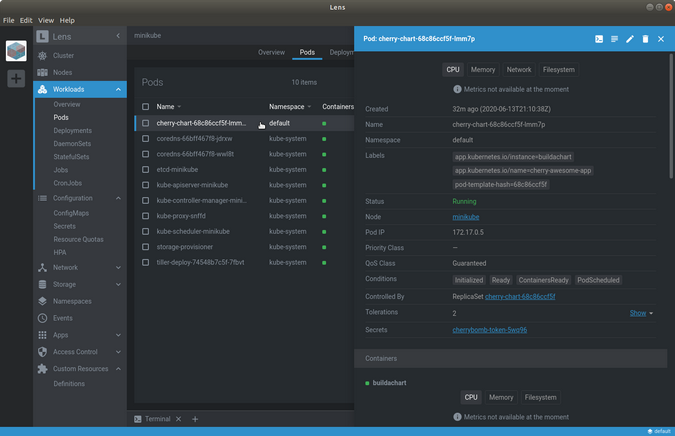
Click on a pod name in the Pods section of Workloads, and it will bring up a details pane on the right with a ton of things you can do really quickly.
(Jess Cherry, CC BY-SA 4.0)
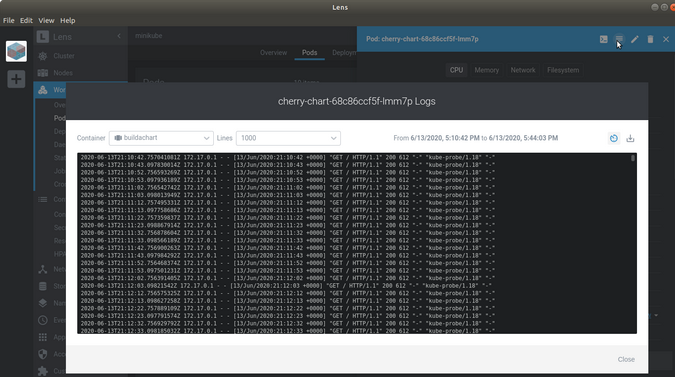
Open the pod's logs by clicking on the multi-line button (the second icon from the left) on the top-right of the pod detail window.
(Jess Cherry, CC BY-SA 4.0)
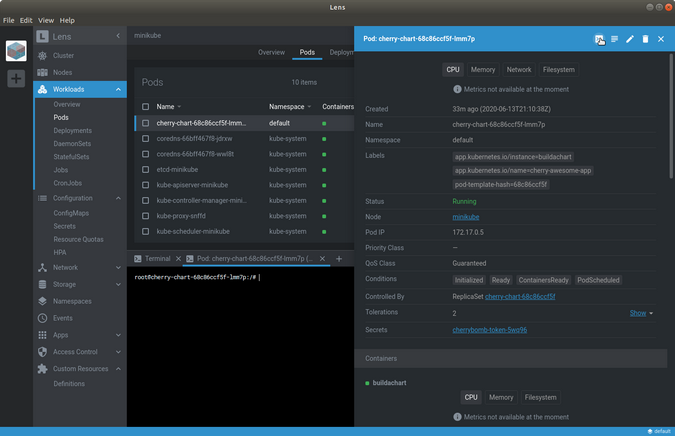
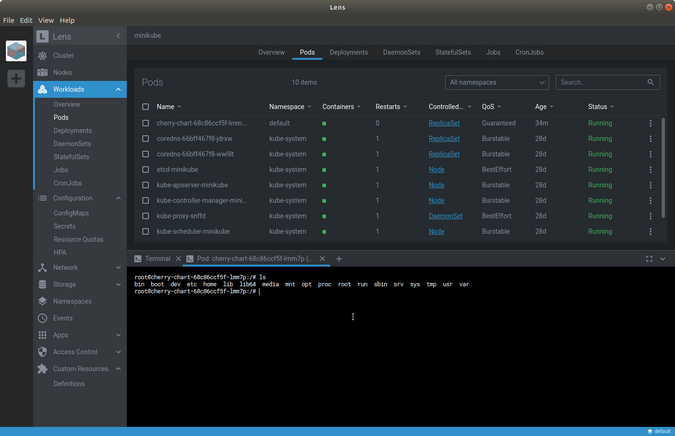
If you need to shell into a pod, Lens has a terminal built into it. Access it by clicking the terminal button (the left-most icon) above the pod detail.
(Jess Cherry, CC BY-SA 4.0)
A terminal will open.
(Jess Cherry, CC BY-SA 4.0)
Deployments
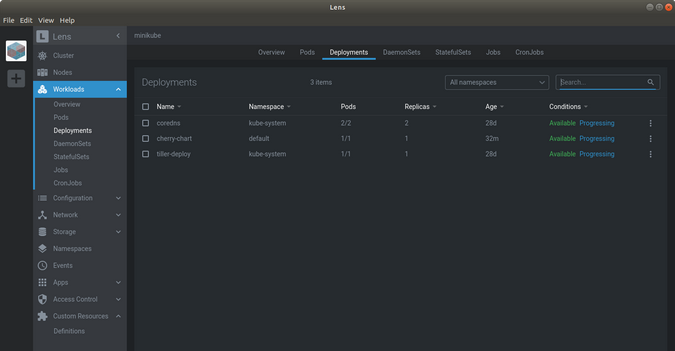
Deployments shows what Deployments are in the cluster.
(Jess Cherry, CC BY-SA 4.0)
Configuration menu
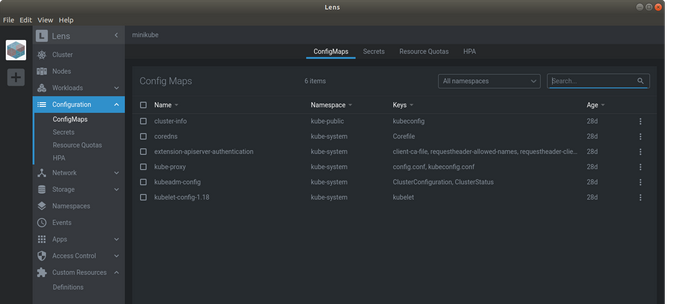
Configuration shows ConfigMaps, Secrets, Resource Quotas, and Horizontal Pod Autoscalers (HPA).
(Jess Cherry, CC BY-SA 4.0)
Network menu
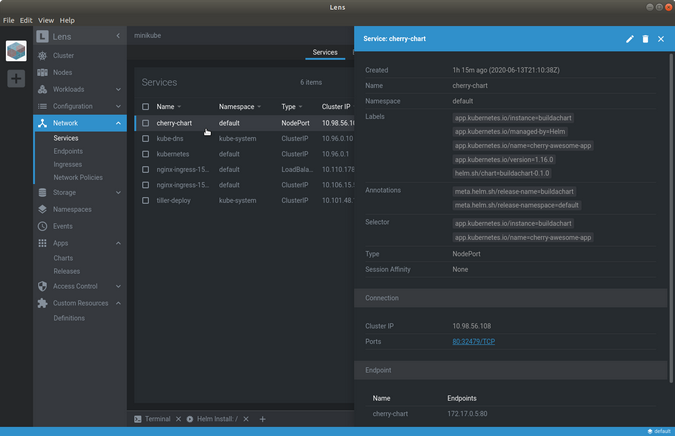
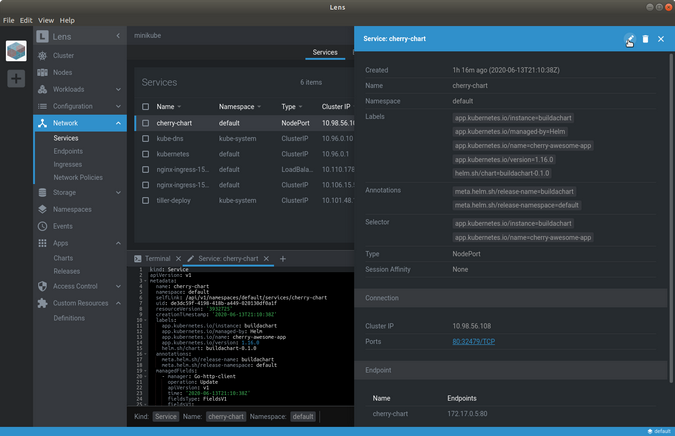
Network includes options for managing your network services, endpoints, ingresses, and network policies.
Network Services
(Jess Cherry, CC BY-SA 4.0)
If you see a pencil icon (like the one in the top-right corner above), clicking it will open a terminal window where you can edit the configurations.
(Jess Cherry, CC BY-SA 4.0)
Storage menu
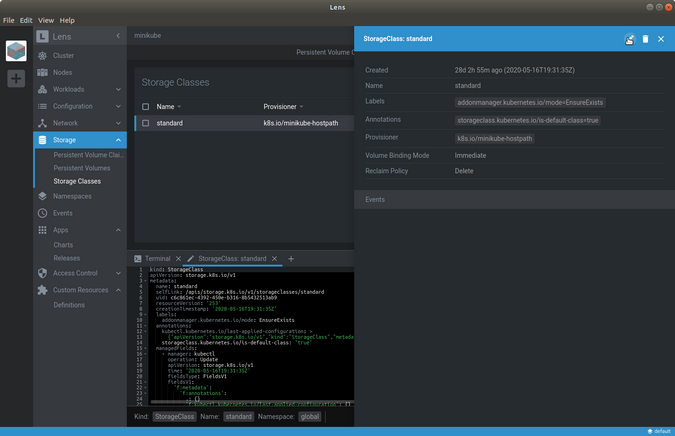
Storage options, including PersistentVolumes and StorageClasses, are also navigable.
(Jess Cherry, CC BY-SA 4.0)
Namespaces menu
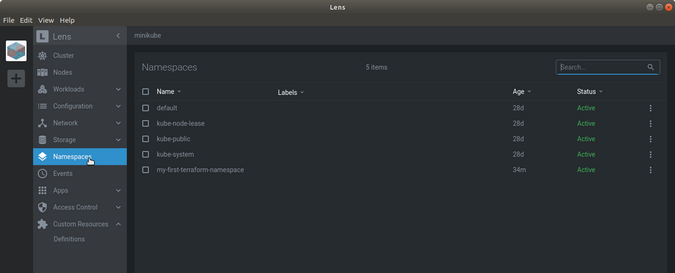
Namespaces shows a list of your namespaces.
(Jess Cherry, CC BY-SA 4.0)
Apps menu
Lens' crown jewel is its one-click (OK, more like three-click) process for installing apps with Helm charts. I would suggest using this only on your local cluster, but it's still a nice add-on in Lens.
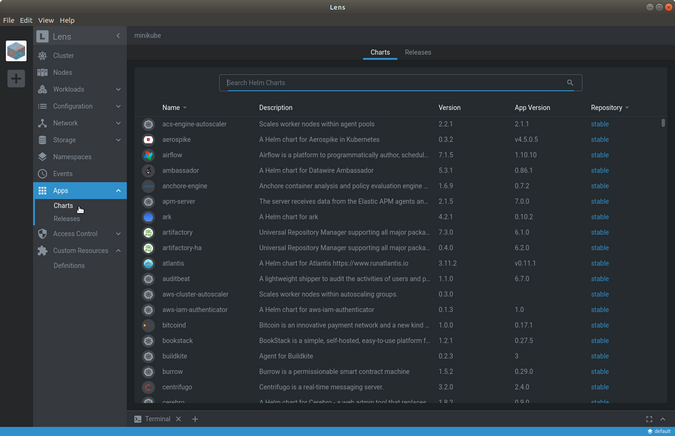
To install a chart, click Apps in the left navigation and click Charts. A list of all the charts available through Helm (and its stable repository) appears.
(Jess Cherry, CC BY-SA 4.0)
You can also find a chart using Search. Click on the chart you want, and a window will open on the right with a large Install button.
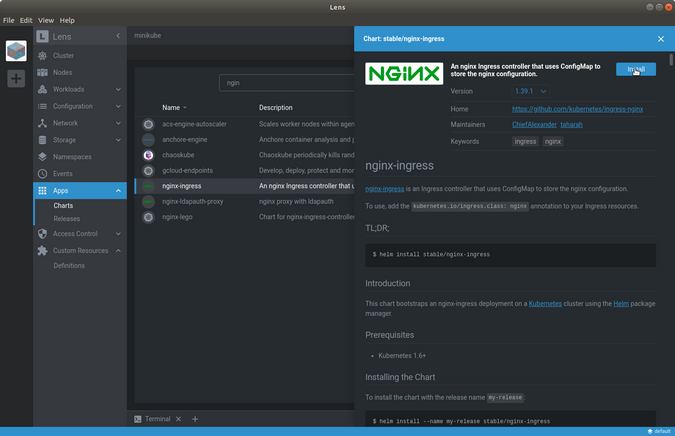
(Jess Cherry, CC BY-SA 4.0)
Click Install and a terminal will open at the bottom with another Install button in the lower-right. Click it.
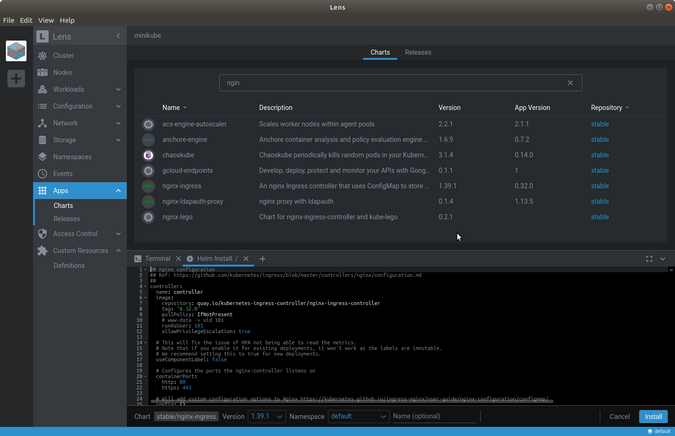
(Jess Cherry, CC BY-SA 4.0)
It installs the Helm chart and tells you when it's finished.
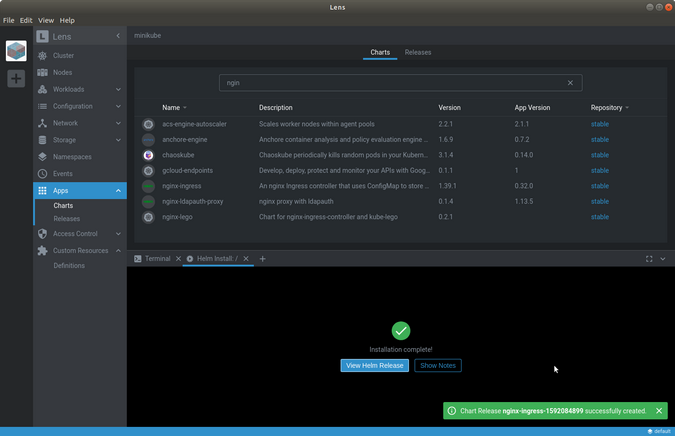
(Jess Cherry, CC BY-SA 4.0)
You can double-check that the Helm chart is installed in your cluster by looking in the Pods section under Workloads.
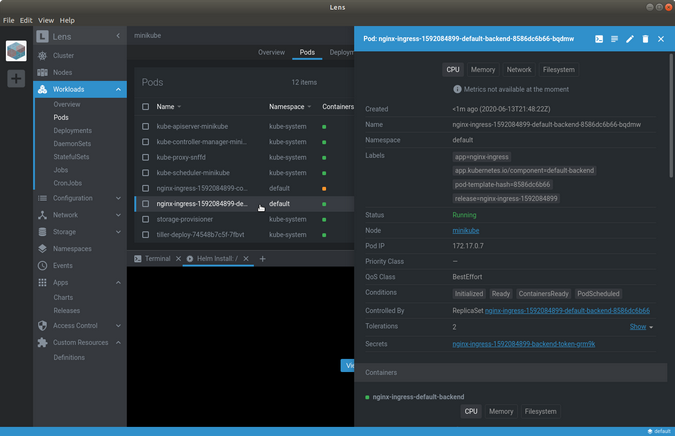
(Jess Cherry, CC BY-SA 4.0)
The Helm install takes under a minute and, because Lens has an edit function in each detail window, you can manually configure the apps you install. In my opinion, this is the only downfall of this function—I prefer to use my own values because it's hard to track manual changes. Why do I consider this a problem? If you're working with a repo with versioned helm charts and need to run a manual change without checking in the changed values, you quickly run into code drift.
Access Control menu
The Access Control section includes Service Accounts, Roles, Role Bindings, and Pod Security Policies, so you can visualize and edit the security you have in place (as you can see in the following screenshots). Service Accounts are the equivalent of Linux user accounts, but they are intended for processes running in a cluster. Running applications are attached to Roles, which have Role Bindings to the cluster to allow pods to access certain administrative permissions. Pod Security Policies are a more glandular level of security for the pods to have access to resources like certain volume types or to set seccomp profiles used by containers.
Service Accounts
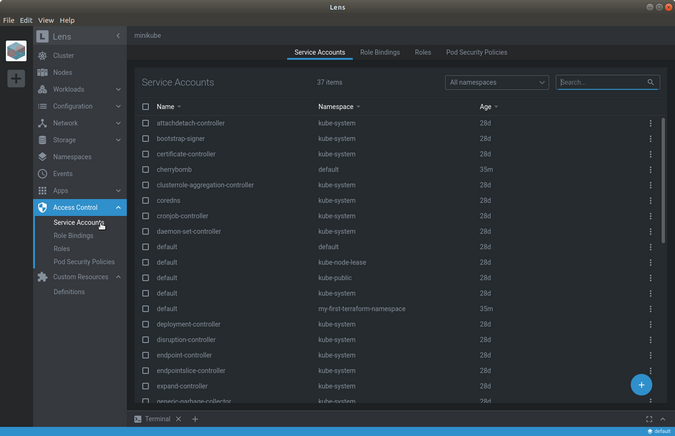
(Jess Cherry, CC BY-SA 4.0)
Role Bindings
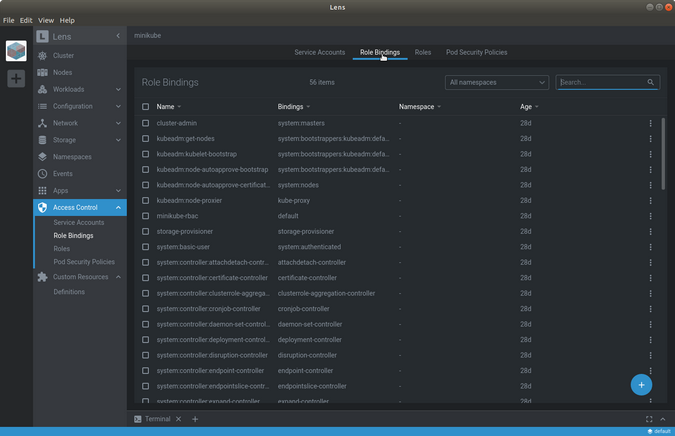
(Jess Cherry, CC BY-SA 4.0)
Roles
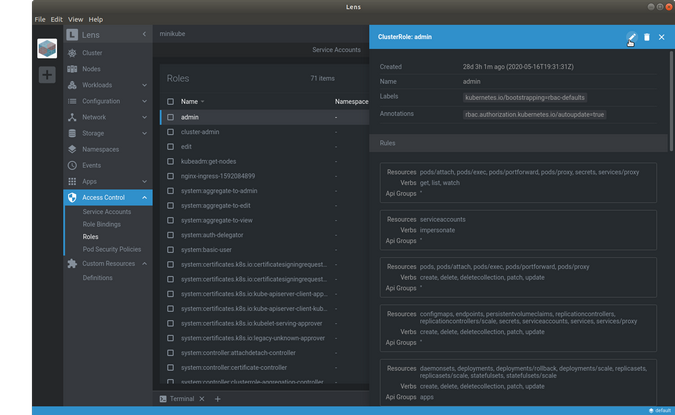
(Jess Cherry, CC BY-SA 4.0)
Final notes
Lens is a beautiful and powerful alternative to managing Kubernetes from the command line. There are some times when you'll want to use the command line, mostly due to the drawbacks of manually editing charts before launching them or for tracking environmental changes. If you have good log-keeping practices in your cluster, this may not be a problem. If you are a visual person, Lens is a great way to explore your Kubernetes cluster and handle 95% of your administrative tasks.






Comments are closed.