Some time ago, I wanted to give a blackboard-style look to a typeset equation. I started playing around with the GNU Image Manipulation Program (GIMP) and was satisfied with the result. The problem was that I had to perform several actions on the image, I wanted to use this style again, and I did not want to repeat the steps for all the images. Besides, I was sure that I would forget them in no time.
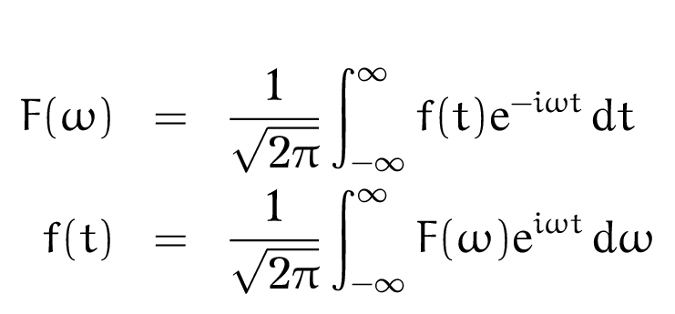
(Cristiano Fontana, CC BY-SA 4.0)
GIMP is a great open source image editor. Although I have been using it for years, I had never investigated its batch-processing abilities nor its Script-Fu menu. This was the perfect chance to explore them.
What is Script-Fu?
Script-Fu is the scripting language built into GIMP. It is an implementation of the Scheme programming language. If you have never used Scheme, give it a try, as it can be very useful. I think Script-Fu is a great way to start because it has an immediate effect on image processing, so you can feel productive very quickly. You can also write scripts in Python, but Script-Fu is the default option.
To help you get acquainted with Scheme, GIMP's documentation offers an in-depth tutorial. Scheme is a Lisp-like language, so a major characteristic is that it uses a prefix notation and a lot of parentheses. Functions and operators are applied to a list of operands by prefixing them:
(function-name operand operand ...)

(+ 2 3)
↳ Returns 5

(list 1 2 3 5)
↳ Returns a list containing 1, 2, 3, and 5
It took me a while to find the documentation for the full list of GIMP's functions, but it was actually straightforward. In the Help menu, there is a Procedure Browser with very extensive and detailed documentation about all the possible functions.
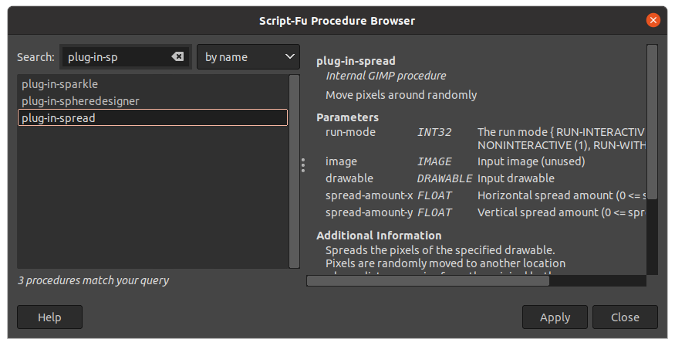
GIMP Procedure Browser (Cristiano Fontana, CC BY-SA 4.0)
Accessing GIMP's batch mode
You can run GIMP with batch mode enabled by using the -b option. The -b option's argument can be the script you want to run or a dash (-) that makes GIMP launch in an interactive mode instead of the command line. Normally when you start GIMP, it loads its graphical user interface (GUI), but you can disable that with the -i option.
Writing your first script
Create a file called chalk.scm and save it to the scripts folder found in the Preferences window under Folders → Scripts. In my case, it is at $HOME/.config/GIMP/2.10/scripts.
Inside the chalk.scm file, write your first script with:
(define (chalk filename grow-pixels spread-amount percentage)
   (let* ((image (car (gimp-file-load RUN-NONINTERACTIVE filename filename)))
          (drawable (car (gimp-image-get-active-layer image)))
          (new-filename (string-append "modified_" filename)))
     (gimp-image-select-color image CHANNEL-OP-REPLACE drawable '(0 0 0))
     (gimp-selection-grow image grow-pixels)
     (gimp-context-set-foreground '(0 0 0))
     (gimp-edit-bucket-fill drawable BUCKET-FILL-FG LAYER-MODE-NORMAL 100 255 TRUE 0 0)
     (gimp-selection-none image)
     (plug-in-spread RUN-NONINTERACTIVE image drawable spread-amount spread-amount)
     (gimp-drawable-invert drawable TRUE)
     (plug-in-randomize-hurl RUN-NONINTERACTIVE image drawable percentage 1 TRUE 0)
     (gimp-file-save RUN-NONINTERACTIVE image drawable new-filename new-filename)
     (gimp-image-delete image)))
Defining the script variables
In the script, the (define (chalk filename grow-pixels spread-amound percentage) ...) function defines a new function called chalk that accepts the parameters: filename, grow-pixels, spread-amound, and percentage. Everything else inside the define function is the body of the chalk function. You might have noticed that variables with long names are spelled with dashes between the words; this is the idiomatic style of Lisp-like languages.
The (let* ...) function is a special procedure that allows you to define some temporary variables that are valid only inside the body. In this case, the variables are image, drawable, and new-filename. It loads the image with gimp-file-load, which returns a list that includes the image, then it selects the first entry with the car function. Then, it selects the first active layer and stores its reference in the drawable variable. Finally, it defines the string containing the new filename of the resulting image.
To help you better understand the procedure, I'll break it down. First, start GIMP with the GUI enabled and the Script-Fu console, which is found in Filters → Script-Fu → Console. In this case, you cannot use let* because the variables must be persistent. Define the image variable using the define function, and give it the proper path to find the image:
(define image (car (gimp-file-load RUN-NONINTERACTIVE "Fourier.png" "Fourier.png")))It appears that nothing has happened in the GUI, but the image is loaded. You need to enable the image display with:
(gimp-display-new image)
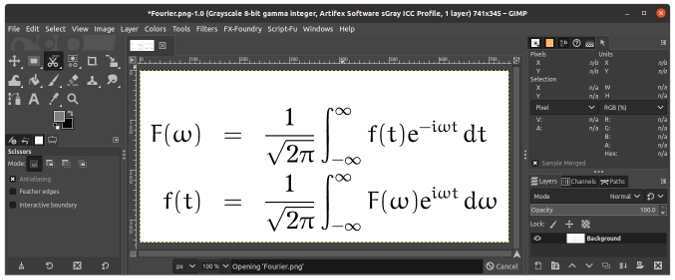
(Cristiano Fontana, CC BY-SA 4.0)
Now, get the active layer and store it in the drawable variable:
(define drawable (car (gimp-image-get-active-layer image)))Finally, define the image's new filename:
(define new-filename "modified_Fourier.png")Here is what you should see in the Script-Fu console after running these commands:
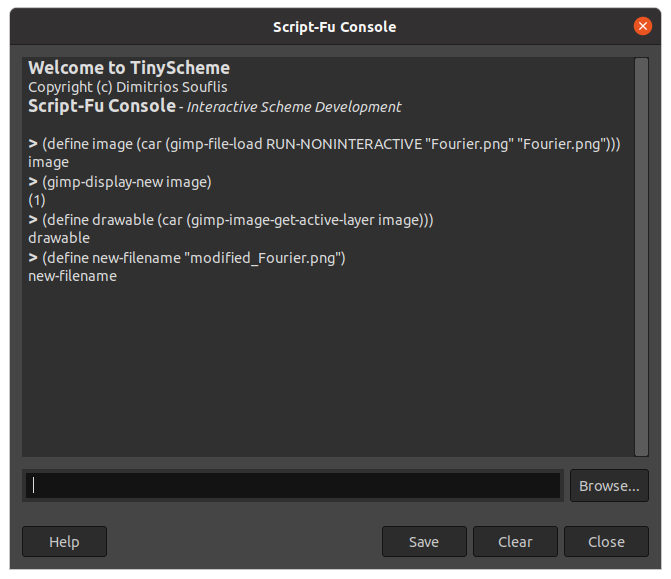
(Cristiano Fontana, CC BY-SA 4.0)
Before acting on the image, you need to define the variables that would be defined as the function arguments in the script:
(define grow-pixels 2)
(define spread-amount 4)
(define percentage 3)
Acting on the image
Now that all the relevant variables are defined, you can act on the image. The script's actions can be executed directly on the console. The first step is to select the color black on the active layer. The color is written as a list of three numbers—either as (list 0 0 0) or '(0 0 0):
(gimp-image-select-color image CHANNEL-OP-REPLACE drawable '(0 0 0))
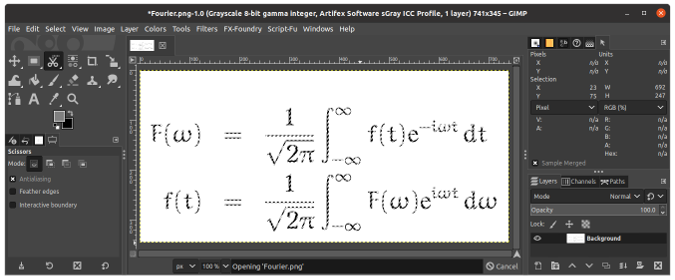
(Cristiano Fontana, CC BY-SA 4.0)
Grow the selection by two pixels:
(gimp-selection-grow image grow-pixels)
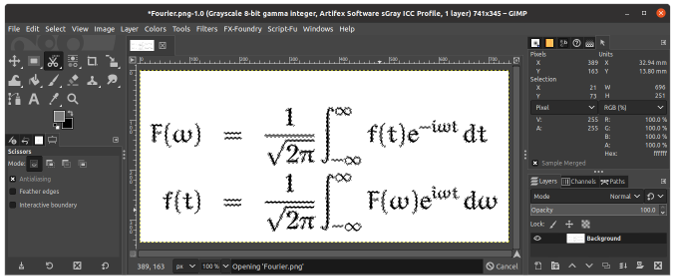
(Cristiano Fontana, CC BY-SA 4.0)
Set the foreground color to black, and fill the selection with it:
(gimp-context-set-foreground '(0 0 0))
(gimp-edit-bucket-fill drawable BUCKET-FILL-FG LAYER-MODE-NORMAL 100 255 TRUE 0 0)
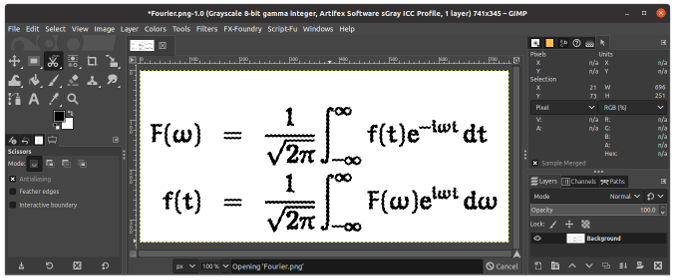
(Cristiano Fontana, CC BY-SA 4.0)
Delete the selection:
(gimp-selection-none image)
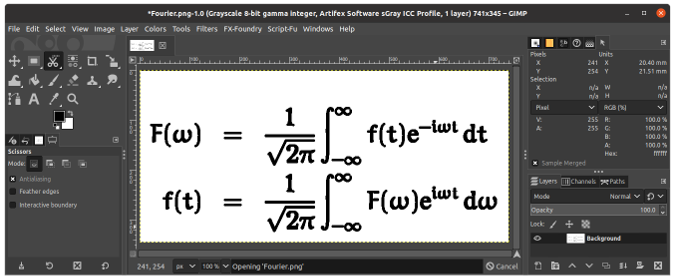
(Cristiano Fontana, CC BY-SA 4.0)
Move the pixels around randomly:
(plug-in-spread RUN-NONINTERACTIVE image drawable spread-amount spread-amount)
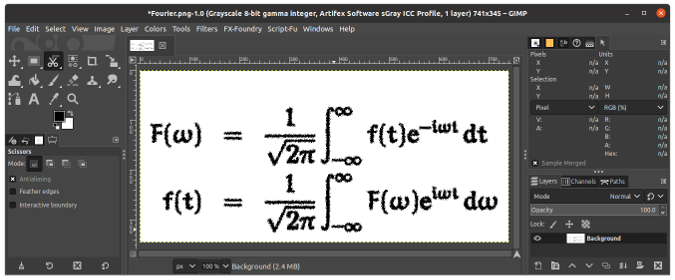
(Cristiano Fontana, CC BY-SA 4.0)
Invert the image colors:
(gimp-drawable-invert drawable TRUE)
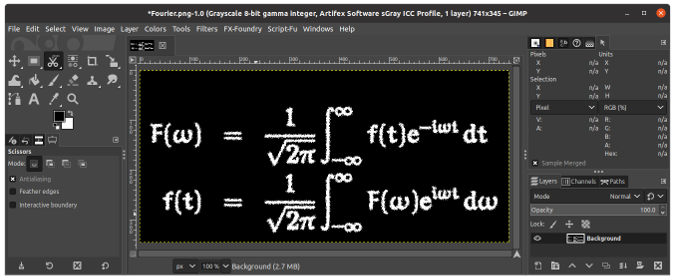
(Cristiano Fontana, CC BY-SA 4.0)
Randomize the pixels:
(plug-in-randomize-hurl RUN-NONINTERACTIVE image drawable percentage 1 TRUE 0)
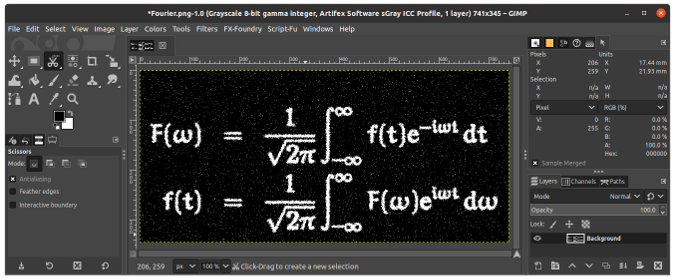
(Cristiano Fontana, CC BY-SA 4.0)
Save the image to a new file:
(gimp-file-save RUN-NONINTERACTIVE image drawable new-filename new-filename)
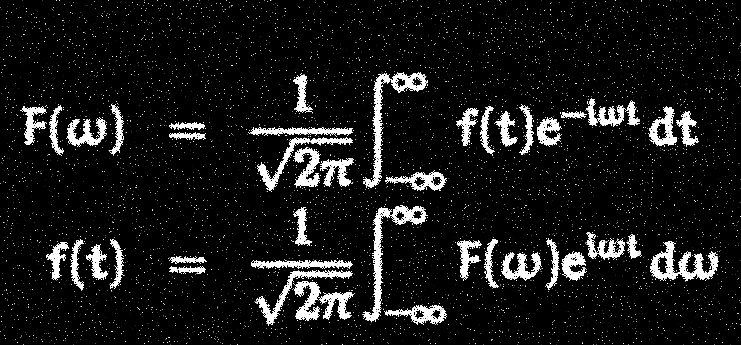
Fourier transform equations (Cristiano Fontana, CC BY-SA 4.0)
Running the script in batch mode
Now that you know what the script does, you can run it in batch mode:
gimp -i -b '(chalk "Fourier.png" 2 4 3)' -b '(gimp-quit 0)'After the chalk function runs, it calls a second function with the -b option to tell GIMP to quit: gimp-quit.
Learn more
This tutorial showed you how to get started with GIMP's built-in scripting features and introduced Script-Fu, GIMP's Scheme implementation. If you want to move forward, I suggest you look at the official documentation and its tutorial. If you are not familiar with Scheme or Lisp, the syntax could be a little intimidating at first, but I suggest you give it a try anyway. It might be a nice surprise.




Comments are closed.