One of today's most promising emerging technologies is paring containers with cluster management software such as Docker Swarm, Apache Mesos, and the popular Kubernetes. Kubernetes allows you to create a portable and scalable application deployment that can be scheduled, managed, and maintained easily. As an open source project, Kubernetes is continually being updated and improved, and it leads the way among container cluster management software.
Kubernetes uses various architectural components to describe the deployments it manages.
- Pods are a group of one or more containers that share network and storage. The containers in a pod are considered "tightly coupled," and they are managed and deployed as a single unit. If an application were deployed in a more traditional model, the contents of the pod would always be deployed together on the same machine.
- Nodes represents a worker machine in a Kubernetes cluster. The worker machine can be either physical or (more likely) virtual. A node contains all the required services to host a pod.
- A cluster always requires a master node, where the controlling services (known as the master components) are installed. These services can be distributed on a single machine or across multiple machines for redundancy. They control communications, workload, and scheduling.
- Deployments are a way to declaratively set a state for your pods or ReplicaSets (groups of pods to be deployed together). Deployments use a "desired state" format to describe how the deployment should look, and Kubernetes handles the actual deployment tasks. Deployments can be updated, rolled back, scaled, and paused at will.
The following tutorial will explain the basics of creating a cluster, deploying an app, and creating a proxy, then send you on your way to learning even more about Kubernetes.
Create a cluster
Begin by using the Kubernetes-provided tutorial to create a cluster and deploy an app. This cluster will consist of a master and one or more nodes. In the first scenario, you'll create a cluster using a utility called "Minkube," which creates and runs a cluster on a local machine. Minikube is great for testing and development. You will also use the kubectl command, which is installed as part of the Kubernetes API.
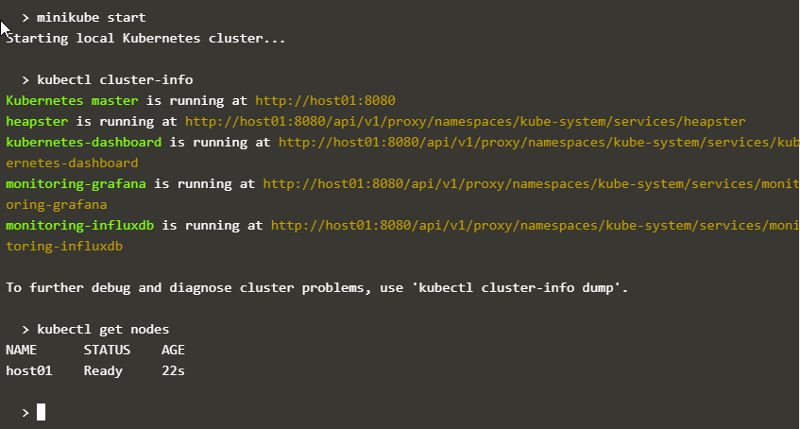
In the interactive terminal, start the Minikube software with the command:
minikube startView the cluster information with the command:
kubectl cluster-infoList the available nodes with the command:
kubectl get nodes

opensource.com
The screenshot above shows the output from these commands. Note the only available node is host01, which is operating as the master (as seen in the cluster-info output).
Deploy an app
In the next step in the interactive tutorial, you'll deploy a containerized application to your cluster with a deployment configuration. This describes how to create instances of your app, and the master will schedule those instances onto nodes in the cluster.
In the interactive terminal, create a new deployment with the kubectl run command:
kubectl run kubernetes-bootcamp \
--image=docker.io/jocatalin/kubernetes-bootcamp:v1 --port=8080
This creates a new deployment with the name kubernetes-bootcamp from a public repository at docker.io and overrides the default port to 8080.
View the deployment with the command:
kubectl get deployments

opensource.com
The deployment is currently on a single node (host01), because only that node is available.
Create a proxy
In the third part of the tutorial, you will create a proxy into your deployed app. A pod runs on an isolated private network that cannot be accessed from outside. The kubectl command uses an API to communicate with the application, and a proxy is needed to expose the application for use by other services.
Open a new terminal window and start the proxy server with the command:
kubectl proxyThis creates a connection between your cluster and the virtual terminal window. Notice it's running on port 8001 on the local host.

opensource.com
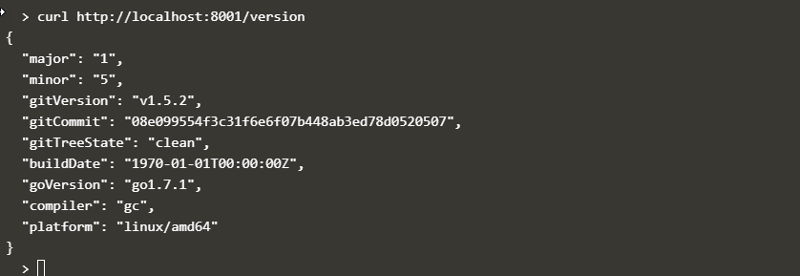
Return to the first terminal window and run a curl command to see this in action:
curl http://localhost:8001/version

opensource.com
The JSON output, shown in the screenshot above, displays the version information from the cluster itself.
Follow the online tutorial to find the internal name of the deployed pod and then query that pod directly. You can also get a detailed output of your pod by using the command:
kubectl describe podsThis output includes very important information, like the pod name, local IP address, state, and restart count.
Moving forward
Kubernetes is a full-fledged deployment, scheduling, and scaling manager and is capable of deciding all of the myriad details of how to deploy an app on your cluster. The few commands explored here are just the beginning of interacting with and understanding a Kubernetes deployment. The crucial takeaway is how fast and easy it is to do and how few details you need to provide to use Kubernetes.
Follow the online interactive tutorial to learn more about how Kubernetes works and all that you can do with it.


4 Comments