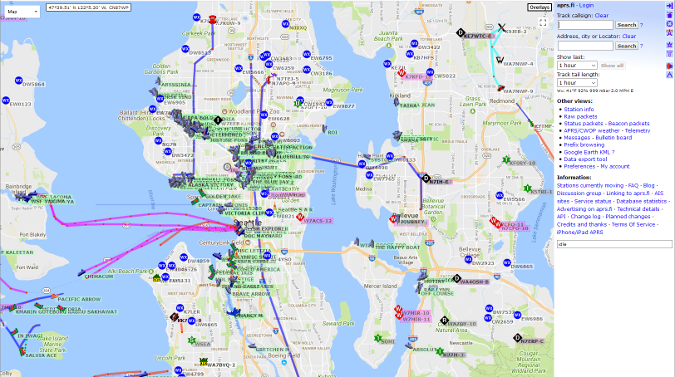
The APRS (Automatic Packet Reporting System) is a worldwide digital communications network for amateur radio, providing a single national channel where people can monitor what is happening in the surrounding area.
APRS uses packet radio (AX.25), which Tom Karpiniec described in his excellent Opensource.com article "Packet radio lives on through open source software," as the transport layer.
The basic idea of APRS is to communicate information in the context of the location of an amateur radio operator, such as other stations' position information (whether mobile or fixed), repeater systems, weather information, or events. Amateur radio operators can, in addition, send direct messages to other amateurs via the network. As packets are sent, they include location information that can be displayed on a map. This provides an immediate view of activity in an area.

opensource.com
Thanks to the internet, APRS is not limited to transmitting traffic only via radio. APRS-IS (Automatic Packet Reporting System-Internet Service) is an internet-based, worldwide network that interconnects various APRS radio networks around the world (and in space via amateur radio satellites and the International Space Station). APRS-IS is maintained and operated by volunteer amateur radio operators to provide a worldwide backbone for amateur radio APRS radio-frequency networks.
A Raspberry Pi-based APRS-IS gateway
Around the world, amateurs operate internet gateway (IGate) systems to route received packets from the packet radio-based network to the internet-based APRS-IS service and back; these gateways can be receive-only or also have transmit capabilities.
This article describes how to configure a Raspberry Pi 2 or 3 and a terminal node controller (TNC) as a receive-only IGate to relay radio traffic to the APRS-IS service, where it can be accessed by amateurs around the world.
There are no licensing requirements for receiving amateur radio traffic, only for transmitting. We can use the base Raspbian operating system, which is available directly from the Raspberry Pi Foundation website as a pre-configured image.
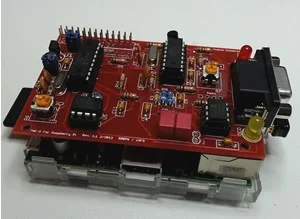
The TNC is a device that basically functions as a modem for the radio and provides the AX.25 protocol functionality. By using a dedicated piece of hardware, in this case the TNC Pi, you don't have to rely on the processing power of the Raspberry Pi to also handle the audio signals and radio control. TNC Pi is a Raspberry Pi HAT (i.e., an add-on board) that interfaces with the Pi either via serial port or I2C bus.

opensource.com
The TNC Pi can be purchased either fully assembled or as a nice DIY kit where you get to break out the soldering iron. The TNC Pi connects to the radio to enable the Rpi to send and receive packets.
Configuring the hardware
The first step is to configure the TNC and its communication with the Raspberry Pi. Since you will connect the Raspberry Pi to the TNC via serial port, make sure it is available. (Raspberry Pi is configured by default to use the internal serial port as the console port.)
Remove the following line in /boot/cmdline.txt if it exists:
console=ttyAMA0,115200 kgdboc=ttyAMA0, 115200Add the following line to /boot/config.txt:
enable_uart=1If you're using a Raspberry Pi 3, add the following lines to /boot/config.txt:
dtoverlay=pi3-miniuart-bt
core_freq=250
The following lines need to be added to /lib/systemd/system/hciattach.service to configure the universal asynchronous receiver-transmitter (UART) to communicate the with TNC Pi. (You may have to create the file in case it doesn't exist in the latest version of the distribution).
[Unit]
ConditionPathIsDirectory=/proc/device-tree/soc/gpio@7e200000/bt_pins
Before=bluetooth.service
After=dev-ttyS0.device
[Service]
Type=forking
ExecStart=/usr/bin/hciattach /dev/ttyS0 bcm43xx 921600 noflow -
[Install]
WantedBy=multi-user.target
Once you've made those changes, reboot the Raspberry Pi to ensure it will automatically pick them up during a restart.
Configuring the software
Now that the hardware side is set up, focus your attention on the APRS relay software Aprx that relays received packets to the APRS-IS system.
The packages required are part of the default repositories and can be installed by running the following command: sudo apt-get install aprx -y.
The configuration file for Aprx is located at /etc/aprx.conf. Open the file with your favorite text editor and make the following changes according to your needs. Each section of the file configures different behaviors of the software.
Call sign and location
	mycall  K5TRI-1
	myloc lat 4737.52N lon 12206.05W
The first line above defines your call sign via the mycall keyword and the second defines your location based on latitude and longitude.
Aprx / APRS-IS communication
<aprsis>
	login     $mycall
	passcode ****
	server   rotate.aprs2.net
	heartbeat-timeout   1m
	filter "m/100"
</aprsis>
The aprsis section configures Aprx to talk to the APRS-IS service. The passcode is a hash generated based on your call sign. The APRS Passcode Generator can auto-generate one. This filter defines a radius of 100 miles around your location. (It can be set smaller, of course.) This means it will only pay attention to traffic within this radius when gating to and from APRS-IS. It wouldn't make much sense to look at traffic from a station in Rome, Italy, if you're located in New York City.
Logging
<logging>
	pidfile /var/run/aprx.pid
	rflog /var/log/aprx/aprx-rf.log
	aprxlog /var/log/aprx/aprx.log
	erlangfile /var/run/aprx.state
	erlang-loglevel LOG_DAEMON
	erlanglog /var/log/erlang.log
	erlang-log1min
</logging>
The logging section defines where Aprx will write its logs and PID file. The aprx.log file is for program-specific output, while aprx-rf.log writes all the received and transmitted packages.
TNC interface
<interface>
   serial-device   /dev/ttyAMA0  19200 8n1    KISS
   alias         RELAY,WIDE,TRACE
   callsign $mycall
   tx-ok false #set to false for RX only igate
   telem-to-is true
</interface>
The interface section defines the TNC parameters like serial port, baud rate, call sign used on this interface (it's possible to have multiple interfaces with different call signs), and whether this interface is allowed to transmit packages.
Beacon
<beacon>
	beaconmode APRSIS
	cycle-size  60m
	beacon symbol "I&" $myloc comment "RX iGate on Raspberry Pi"
</beacon>
Configure the beacon to inform the APRS network that you exist. At a defined interval, the beacon sends a message to the APRS-IS service with your information. This also places your IGate on the map.
Benefits of an APRS IGate
The APRS service has evolved into a very powerful communications channel for amateur radio with numerous applications and uses. The most prevalent use is for tracking vehicle locations, such as in public service or emergency communications scenarios. Other applications might be transmission and gathering of telemetry such as weather data. No matter how it's used, operating an IGate provides a great service to the local amateur radio community.


4 Comments