Last year, I wrote about using Cockpit to manage my Linux servers. It is a web-based tool that gives you a clean, powerful interface for managing multiple servers and their associated services and applications. It also eases regular day-to-day administrative tasks.
In this article, I'll describe how to install the Cockpit web console for Linux servers on the Raspberry Pi operating system (OS), the standard OS provided by the Raspberry Pi Foundation. I'll also provide brief descriptions of its features.
Installing Cockpit on Raspberry Pi OS
Log into your Raspberry Pi system using secure shell (SSH) using an account with sudo privileges. Set up an account if you haven't already done so:
$ ssh pibox
alan@pibox's password:
Linux pibox.someplace.org 5.10.17-v7+ #1403 SMP Mon Feb 22 11:29:51 GMT 2021 armv7l

The programs included with the Debian GNU/Linux system are free software;
the exact distribution terms for each program are described in the
individual files in /usr/share/doc/*/copyright.

Debian GNU/Linux comes with ABSOLUTELY NO WARRANTY, to the extent
permitted by applicable law.
Last login: Tue May  4 09:55:57 2021 from 172.1.4.5
alan@pibox:~ $
The command to install the Cockpit web console is as simple on Raspberry Pi OS as it is on Linux servers:
$ sudo apt install cockpitCockpit only requires 60.4 kB of disk space. Together with its several package dependencies, total usage is 115MB.
The installation process will take care of setting up and starting the services. You can verify the status by using the systemctl command:
$ systemctl status cockpit.socket
● cockpit.socket - Cockpit Web Service Socket
   Loaded: loaded (/lib/systemd/system/cockpit.socket; enabled; vendor preset: enabled)
   Active: active (listening) since Tue 2021-05-04 10:24:43 EDT; 35s ago
     Docs: man:cockpit-ws(8)
   Listen: 0.0.0.0:9090 (Stream)
  Process: 6563 ExecStartPost=/usr/share/cockpit/motd/update-motd  localhost (code=exited, status=0/SUCCESS)
  Process: 6570 ExecStartPost=/bin/ln -snf active.motd /run/cockpit/motd (code=exited, status=0/SUCCESS)
    Tasks: 0 (limit: 2181)
   CGroup: /system.slice/cockpit.socket
Using Cockpit
Connecting
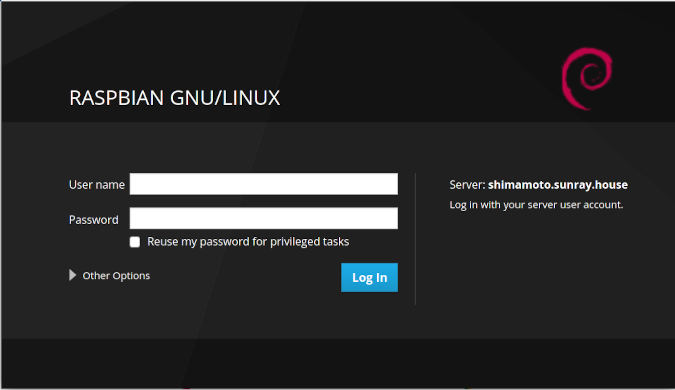
The default listening port is 9090. Open your favorite web browser and enter the address, e.g., https://pibox:9090.
(Alan Formy-Duval, CC BY-SA 4.0)
You can now log in with your regular user account. Again, it is helpful to have sudo privileges on this account—most likely the same one you use to SSH and run Apt. Be sure to check the box for "Reuse my password for privileged tasks".
Managing your Pi
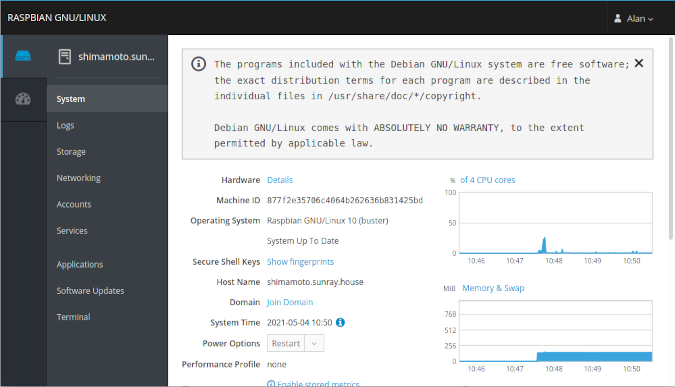
Cockpit's initial screen starts with System and will provide details and graphs of current CPU and memory usage.
(Alan Formy-Duval, CC BY-SA 4.0)
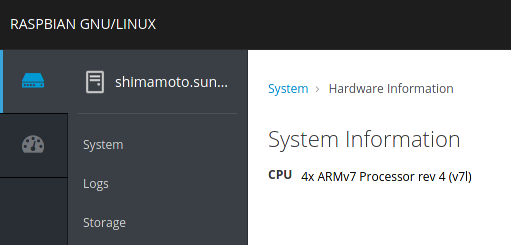
You can view hardware details from this screen.
(Alan Formy-Duval, CC BY-SA 4.0)
Explore the column on the left by clicking each item (e.g., Logs, Storage, Services, etc.). These are the standard Cockpit sections and are fairly self explanatory. Let me quickly describe each.
Logs
This section shows the logs. They can be filtered by date and severity.
Storage
The storage section shows the physical drives and RAID devices that are installed. Details such as size and serial number are shown. Graphs for read/write activity and actual space usage are displayed. Storage specific logs are presented at the bottom.
Networking
This section displays send and recieve activity, IP addresses, and network specific logs. You can also add more networking devices; such as bonds, bridges, and VLANs using the respective buttons.
Accounts
Existing accounts are shown here. Click each to manage or use the Create New Account button to add users. Accounts can be deleted here also.
Services
This section allows the administrator to view the status of all of the system services. Clicking any service takes you to a screen with the standard tasks of start, restart, and disable.
Applications
Normally, this screen provides various applications for managing functions such as the 389 Directory Server or creation of Podman containers. On my Raspberry OS though, this screen only displayed the message, "No applications installed or available". At the time of writing, perhaps this has not yet been implemented. Although, you do have to wonder whether these types of processes would be too heavy for the Raspberry PI hardware.
Software Updates
Keeping software up to date is one of the most important tasks for any system administrator. Cockpit's Software Updates section checks and applies updates.

(Alan Formy-Duval, CC BY-SA 4.0)
Terminal
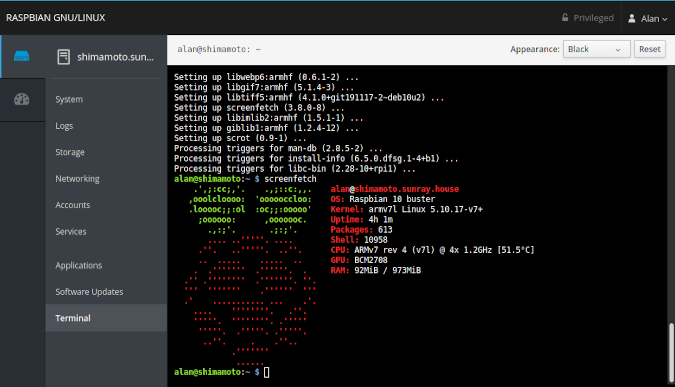
One of Cockpit's neatest features is the terminal. You can use it instead of opening a separate terminal emulator and using SSH. I used the terminal to install ScreenFetch:
$ sudo apt install screenfetchAnd I used ScreenFetch to produce this screenshot:
(Alan Formy-Duval, CC BY-SA 4.0)
Centralized control with Cockpit
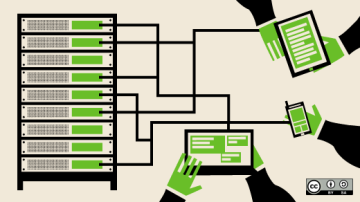
Cockpit behaves on Raspberry Pi just like it does on any other Linux system. You can add it to a dashboard for centralized control. It allows organizations to integrate Raspberry Pi-based services and systems into their overall Linux infrastructure anywhere Cockpit is used as a management dashboard solution. This is highly convenient, given that Pis are often run headless in high-density racked data centers that generally lack KVM access.



8 Comments