Motion graphics is the term used for all the snazzy, fancy logos and bars and tickers that stream across screens during the evening news, sporting events, and documentaries. There's a fine art to good motion graphics, and Kdenlive (or any video editing application, for that matter) is not exactly the best place for it. That said, a modern video editor is expected, or has the expectation, that at least simple and functional graphics should be a part of the video editing process.
The best tools for the job are either Synfig Studio or Blender. Future columns will cover motion graphics in Synfig, but for now, let's stick with the comforting familiarity of Kdenlive and produce some simple motion graphics there.
The first step, for the purposes of this exercise, is to launch Kdenlive, import a clip into your project tree, and drag it into your timeline.
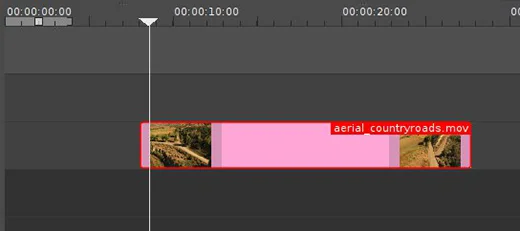
This clip will serve as the base layer; that is, it's the footage over which you want to put a lower third.
For the source of your lower third, you have any number of items to choose from; you could hammer out a background layer in GIMP or Inkscape and import it as a PNG, you could use another movie clip (animated layers, sometimes called "jumpbacks"), or whatever you like. To begin with, use a simple color clip, because it's easy to start out with plus it's the basis for fancier efforts anyway.
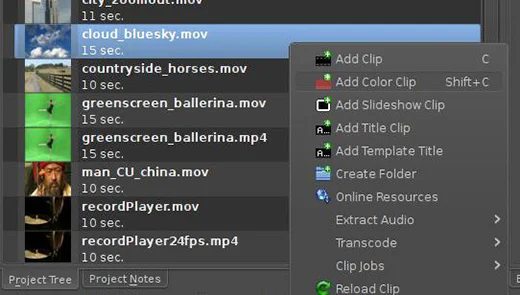
To add a Color Clip to your project tree, right click in the project tree panel and select Add Color Clip.
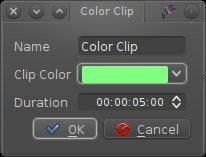
In the Color Clip window that appears, choose a colour that fits the colour scheme of your project or create a custom colour swatch. Click the OK button when satisfied.
Drag and drop the color clip on the video track above your movie clip in the timeline. Right-click on the clip in the timeline and set the transition (Kdenlive calls compositing modes "transitions") to composite.
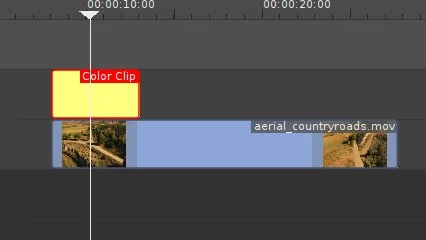
The first think you'll notice is that your color clip occupies the entire screen. If you're using a custom graphic sized to fit, this won't be an issue, but most anything else will require some cropping.
Right-click on the color clip in your timeline and choose Alpha Manipulation and MaskOMate. This applies a four-point garbage mask to the color clip. Click on the color clip to see the Effects options in the Effect Stack.
Use the sliders in the Effect Stack to crop the color region into a standard lower-third style box. The placement is up to you, but leaving some margin between the bottom of the screen and your lower-third is traditional, for fear of different devices clipping the extremities of the image (especially common on old television sets).
With that set, you are technically a third of the way done, but since you're going to the trouble of doing a lower third, you might as well go the extra mile and animate its entrance. You could just as easily have it fade in and back out, but some keyframe practise never hurt anybody.
Keyframing
There are a few plugins in Kdenlive that can keyframe movement of layers, but the best one is the Crop and Transform, and Pan and Zoom effect. Right-click the color clip to add this effect to it, and then click the color clip to see the effect options in the Effect Stack.
The Pan and Zoom interface consists of a miniature timeline at the very top of the panel, and keyframe controls and attributes beneath that. It's possible to do a lot of the keyframe work in the Project Monitor window, but using the Effect panel is more precise.
The two keyframes you need are one keyframe at which point the motion starts, and then a second keyframe at which point the motion stops and, essentially, freezes. In practise, you'll probably use four keyframes: one to start the motion, one to stop and hold the motion, a third to stop the hold and start a reverse motion, and a fourth point to end the motion. The principles are the same, so we will do two keyframes to keep things simple.
One keyframe exists already, and it is located, by default, at the very beginning of the color clip. I prefer a little bit of a delay, just for safety, so click on the diamond-shaped keyframe in the miniature timeline and drag it to the right (that is, later in time).
Click later in the miniature timeline (near the end) and click the green plus icon to add a second keyframe. A second diamond appears on the mini timeline.
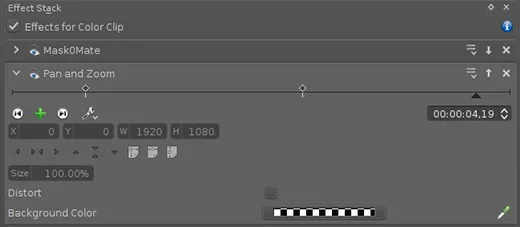
You have two keyframes now, but no motion, because all of the values are the same at each keyframe. Click the previous button in the Pan and Zoom interface to get back to the first keyframe. Let's make the color clip slide into the frame; for that to happen, the color clip must be off screen first. Try typing in some negative values into the X field; if you're working in standard HD, then your frame is 1920 pixels wide, so to get it completely off screen (frame left), your value should be -1920.
Click the next button to get to the next keyframe. For this, the desired position is exactly where you created it; an X position of 0 and a Y position of 0, so no change is required.
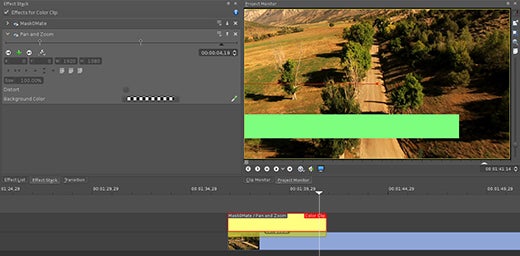
Click through your newly composited video in your main timeline. You should see that the color clip slides in from left to right.
Text
A colored bar sliding into your frame is nice, but you probably want some text to accompany it. Before moving into text mode, position your timeline playhead over a frame that has the lower third bar 100% visible; in other words, you want to be on a frame that represents your finished product, not a frame in mid-motion.
To create a Title Clip, right-click in the project tree panel and select Add Title Clip.
Click the Show Background checkbox at the botton of the Title Clip window. If you don't do this, you won't be able to tell where to place your text.
The text clip window is pretty straight-forward; click over the colored bar and start typing. Choose your font and font size from the top toolbar, and drag-and-drop to reposition the text region. When finished, click the OK button.
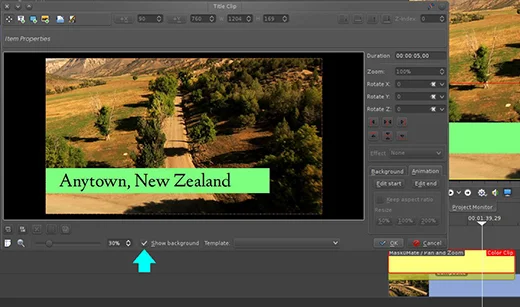
Note that you can create rectangles in the Title Clip window, and there's an argument for doing it this way. It's also straight-forward, so if you are doing simple lower-thirds and just want to create everything within the Title Clip window, you're free to do that. Realistically, you're probably going to want more flexibility than this, though, so I find that realistically I use color clips and video clips for the motion graphics, and the Title Clip for just text.
Place the text clip one video track above the color clip in your timeline, and set its transition to Affine.
To match the movement of the color clip, click on the color clip and then drag and drop the Pan and Zoom effect from the Effect Stack panel onto the title clip.
Drop Shadow
At this point, you have a functional and animated lower third. To add a little bit of separation between the lower third and the video, you can add an extra effect like a drop shadow or glow.
This is an optional extra step, but it does add a little bit of polish to the job, and since all the effects can just be copy and pasted over, the work is fast going.
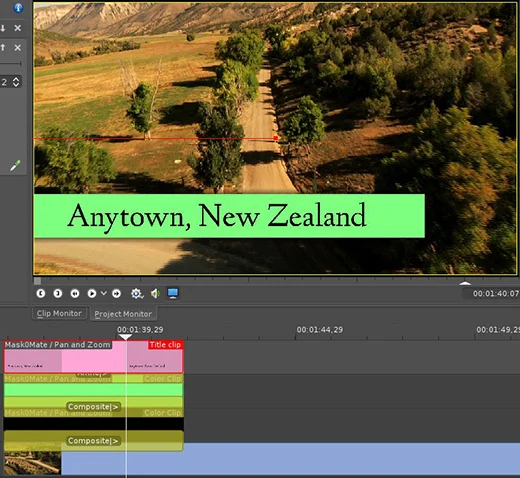
To create a new video track at the bottom of the current stack, right-click on any timeline track control (for instance, the mute button on track Video 3) and select Insert Track. Insert a new video track
Add a new color clip to your project. For a drop shadow, use black.
Move the black color clip to the empty video layer, and set its transition mode to Composite. Both color clips should be set to composite against the base video layer. To route compositing in Kdenlive, click the transition region in the timeline and adjust its target in the Effect Stack.
![]()
For more information on the finer points of compositing in Kdenlive, see my previous articles on Layered Compositing and Kdenlive Titles.
The drop shadow layer still needs its cropping and animation effects. You could drag-and-drop all the effects from your original color clip to your drop shadow clip, but the more efficient way to do the same thing is to right-click on the original color clip and select Copy, and then right-click the drop shadow layer and select Paste Effects.
For a drop shadow effect, click the black color clip in the timeline and adjust its blur value, located in the Effect Stack > MaskOMate.
Getting Creative
That's the basic principle behind quick and easy lower thirds in Kdenlive, but it's just the beginning. Even though complex motion graphics are far better designed in dedicated animation applications, some pretty good effects can be achieved within Kdenlive.
For example, you could take some stock footage of clouds against a blue sky, crop it down to a lower-third style bar, and use that as your title background.
You already know how to do most of that, but the catch is, as always, in the compositing.
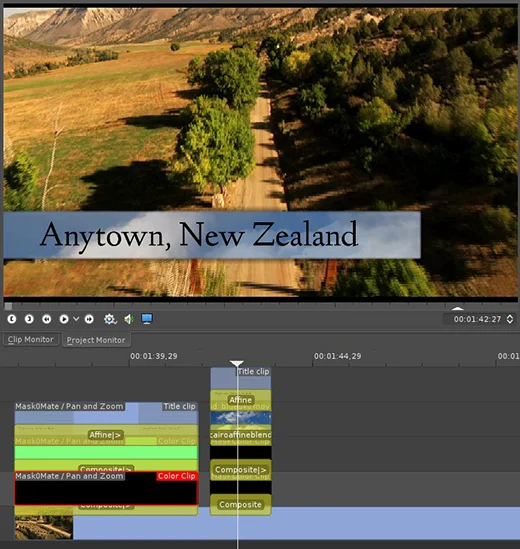
Rather than using a color clip for the initial lower third bar, bring in any video clip. Put any effect you want to put onto it (if any) in order to stylize it. In this example, I placed a Vertigo (a sort of internal overlay) filter onto the stock footage of clouds, and then cropped the clouds with MaskOMate as usual.
The problem with this is that the cloud clip wants to composite itself against your background video rather than sit on top of the video. This is easy to solve, as long as you remember what you know of compositing: you need to put a stopgap between the base video and your lower third. Specifically, place a black color clip between your drop shadow and the cloud footage. Composite this black color clip against your base video layer (Video 5 in this example), and the cloud footage against the black color clip (which it does automatically, setting itself to Auto).
It makes sense if you think about it; you're taking the black clip and adding its masked region to the base video (resulting in a black rectangle). Then you are blending the cloud footage 100% against a black space, resulting in a sum total of no change. The result is that you see 100% of the cloud footage with no composite effect against the base video layer.
That's all there is to it. Add graphics and logos as needed.
Makers
This article is part of Seth Kenlon's Multimedia Makers column, where he shares tutorials and tips on creating multimedia with Linux and its vast creative toolkit. In partnership with slackermedia.info and gnuworldorder.info.




2 Comments